Understand and manage tags in Evercate
Tags in Evercate can feel a bit abstract before you get to know them properly. But they are one of the most powerful tools in Evercate and will likely become your best friend going forward. Tags are the key to automation in Evercate.
Tags allow you to:
- Automate course access
- Automate access to course programs
- Segment users in reports
- Define a Team Leader's team
- Get a better snapshot of your users
With that said, let's get started with this guide and go through how to set up a tag structure, how to create tags, and how to assign tags to users.
Creating a tag structure
Most organizations are similar in the broader sense, and most organizations are completely unique once you look at them more closely. This is where your tag structure comes in.
Tags allow you to describe your users in a way that is meaningful to you.
For this example, we are working with a fictional organization, Propeller Inc. They have employees spread across five countries. Most of their staff work in sales, while others are technicians or work in administration and similar functions.
Based on that, let's take a closer look at how tags in Evercate work. There are three fundamental rules about tags.
- A tag must belong to a tag type – for example, you can have the tag "Sales" in the type "Role".
- A tag must be unique within a tag type – you cannot have two tags called "Sales" within the same type.
- Tag types must be unique – you cannot have two tag types called "Role".
Beyond that, you are completely free to work with tags as you need. You can create as many types as you want, and as many tags as you want, and name them whatever makes sense for your organization.
With that background, we can start creating a tag structure. For this example, we want to differentiate employees by country and role. But you can of course work with more types and tags than this for your organization.
Tag types
- Country
- Role
Tags of type Country
- Sweden
- Japan
- Australia
- Nigeria
- USA
Tags of type Role
- Sales
- Technician
- Administration
Now this is starting to look like a structure that makes sense and that we can work with in this guide.
Remember that you generally only want to create tags that support a specific action in Evercate. Such as assigning courses or segmenting users in reports. Too many tags and types tend to complicate things, so it is better to build on them over time.
Creating tags
Now that our structure is in place, we can create tags in Evercate.
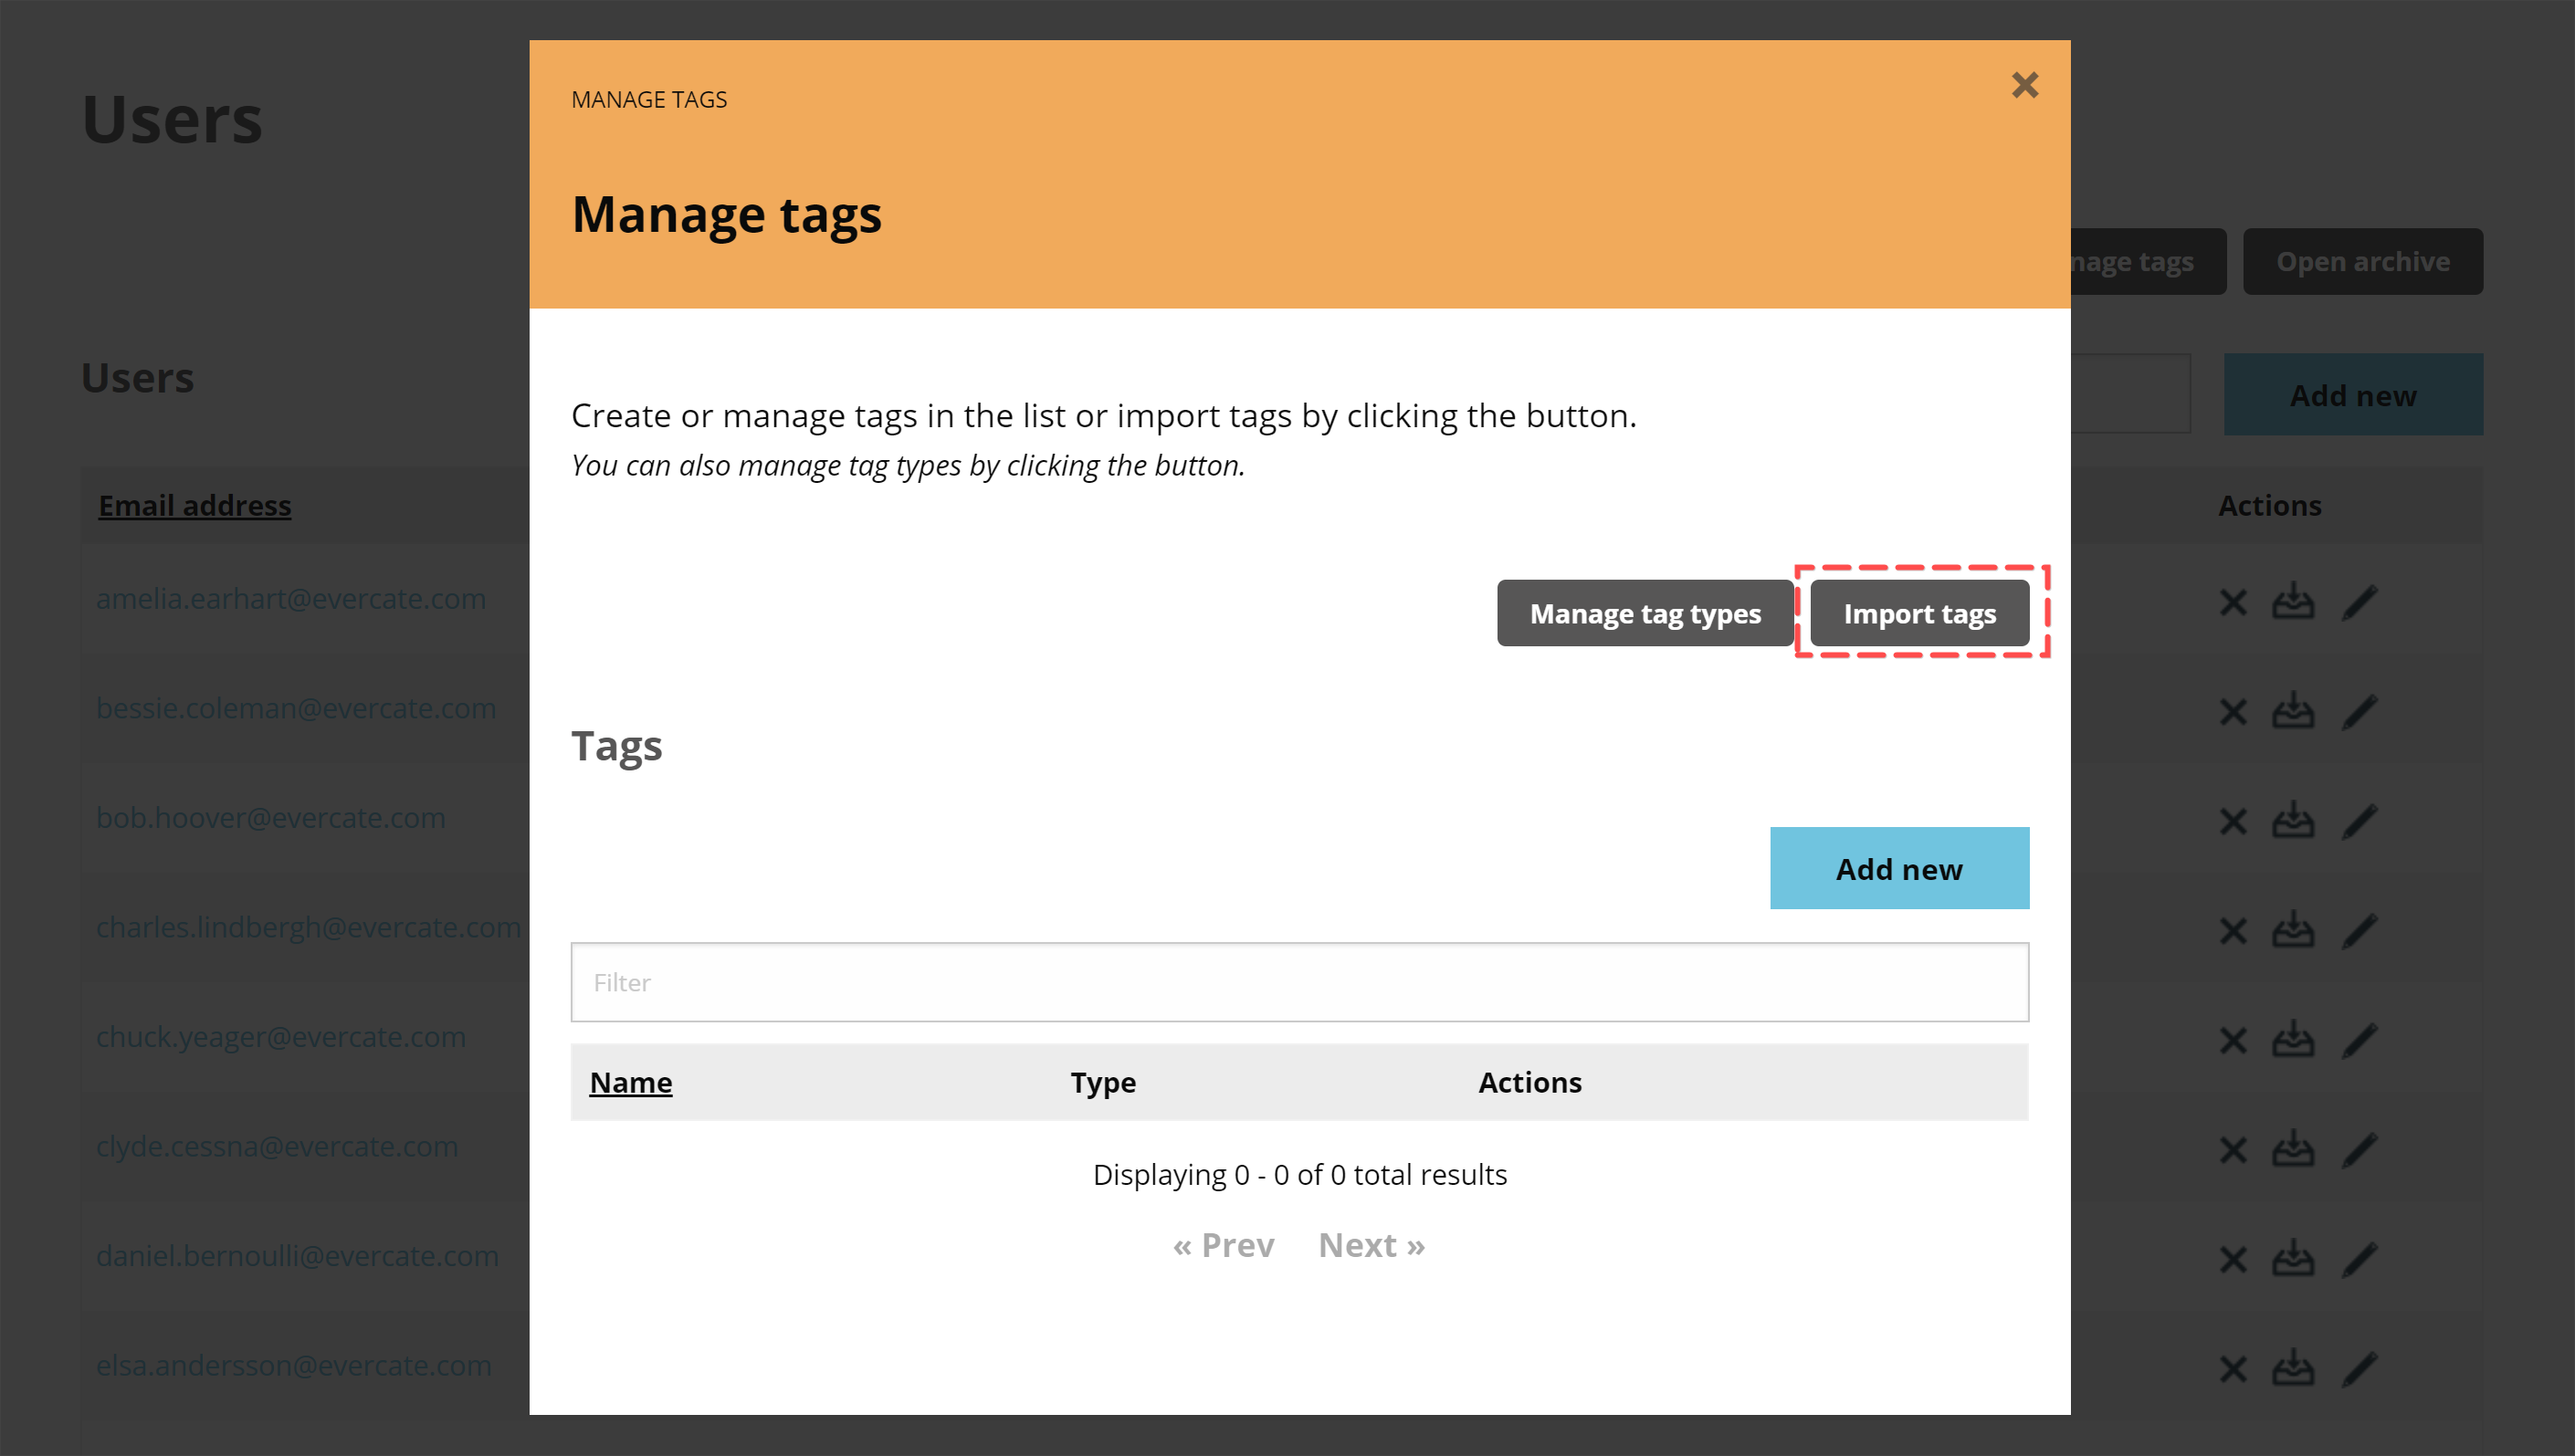
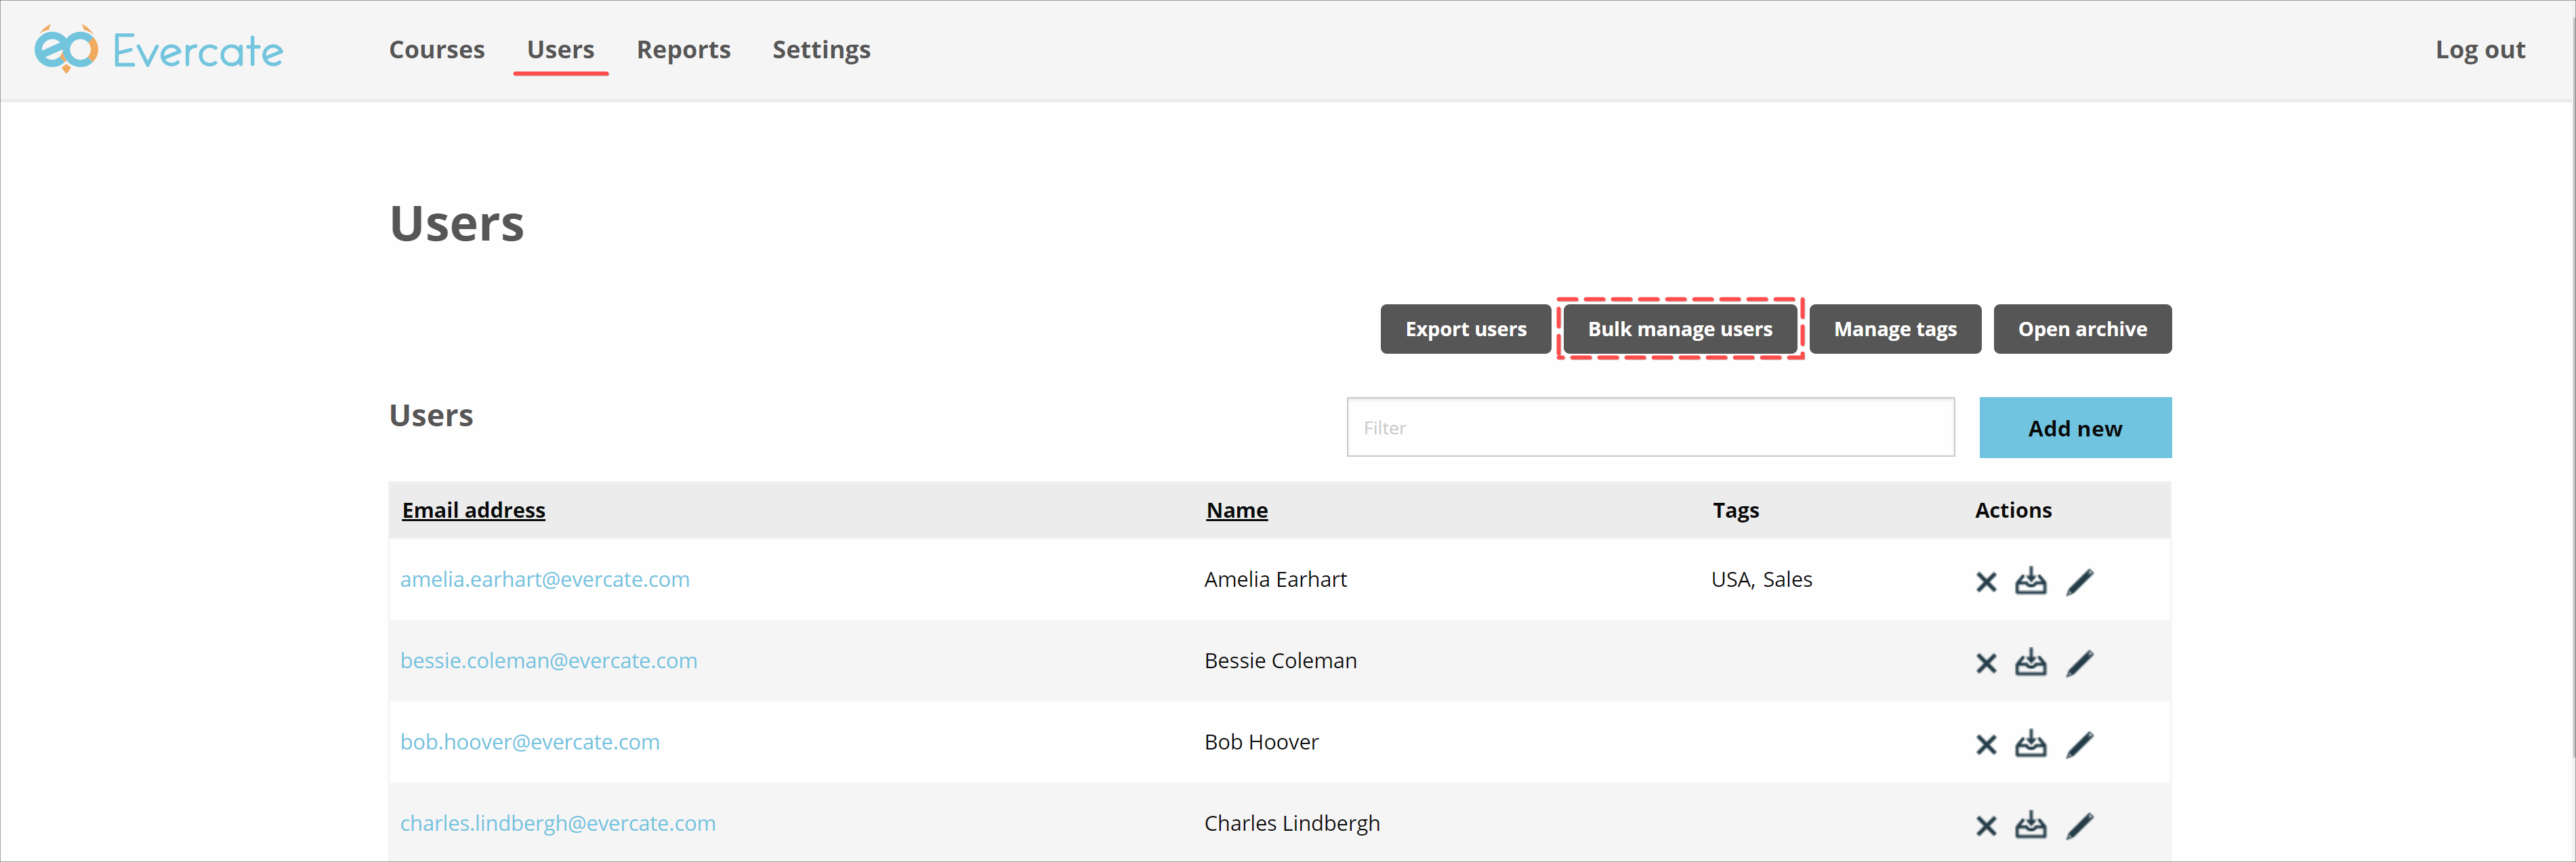
First, I click on "Users" in the main menu to go to my users page. Here I can see the users I have created, and this is also where I can manage my tags. I do this by clicking the "Manage tags" button above my user list.

Then I get a popup where I can manage my current tags (there are currently no tags, so this list is empty for me) and create new ones. There are two ways to create tags. Either we click "Add new" to add tags one by one, or we import tags, which is what I will do in this guide. If you want to add them one by one, the process is very similar. The difference is that you can only add one tag at a time instead of many. But since I want to create many tags at once, I click "Import tags".
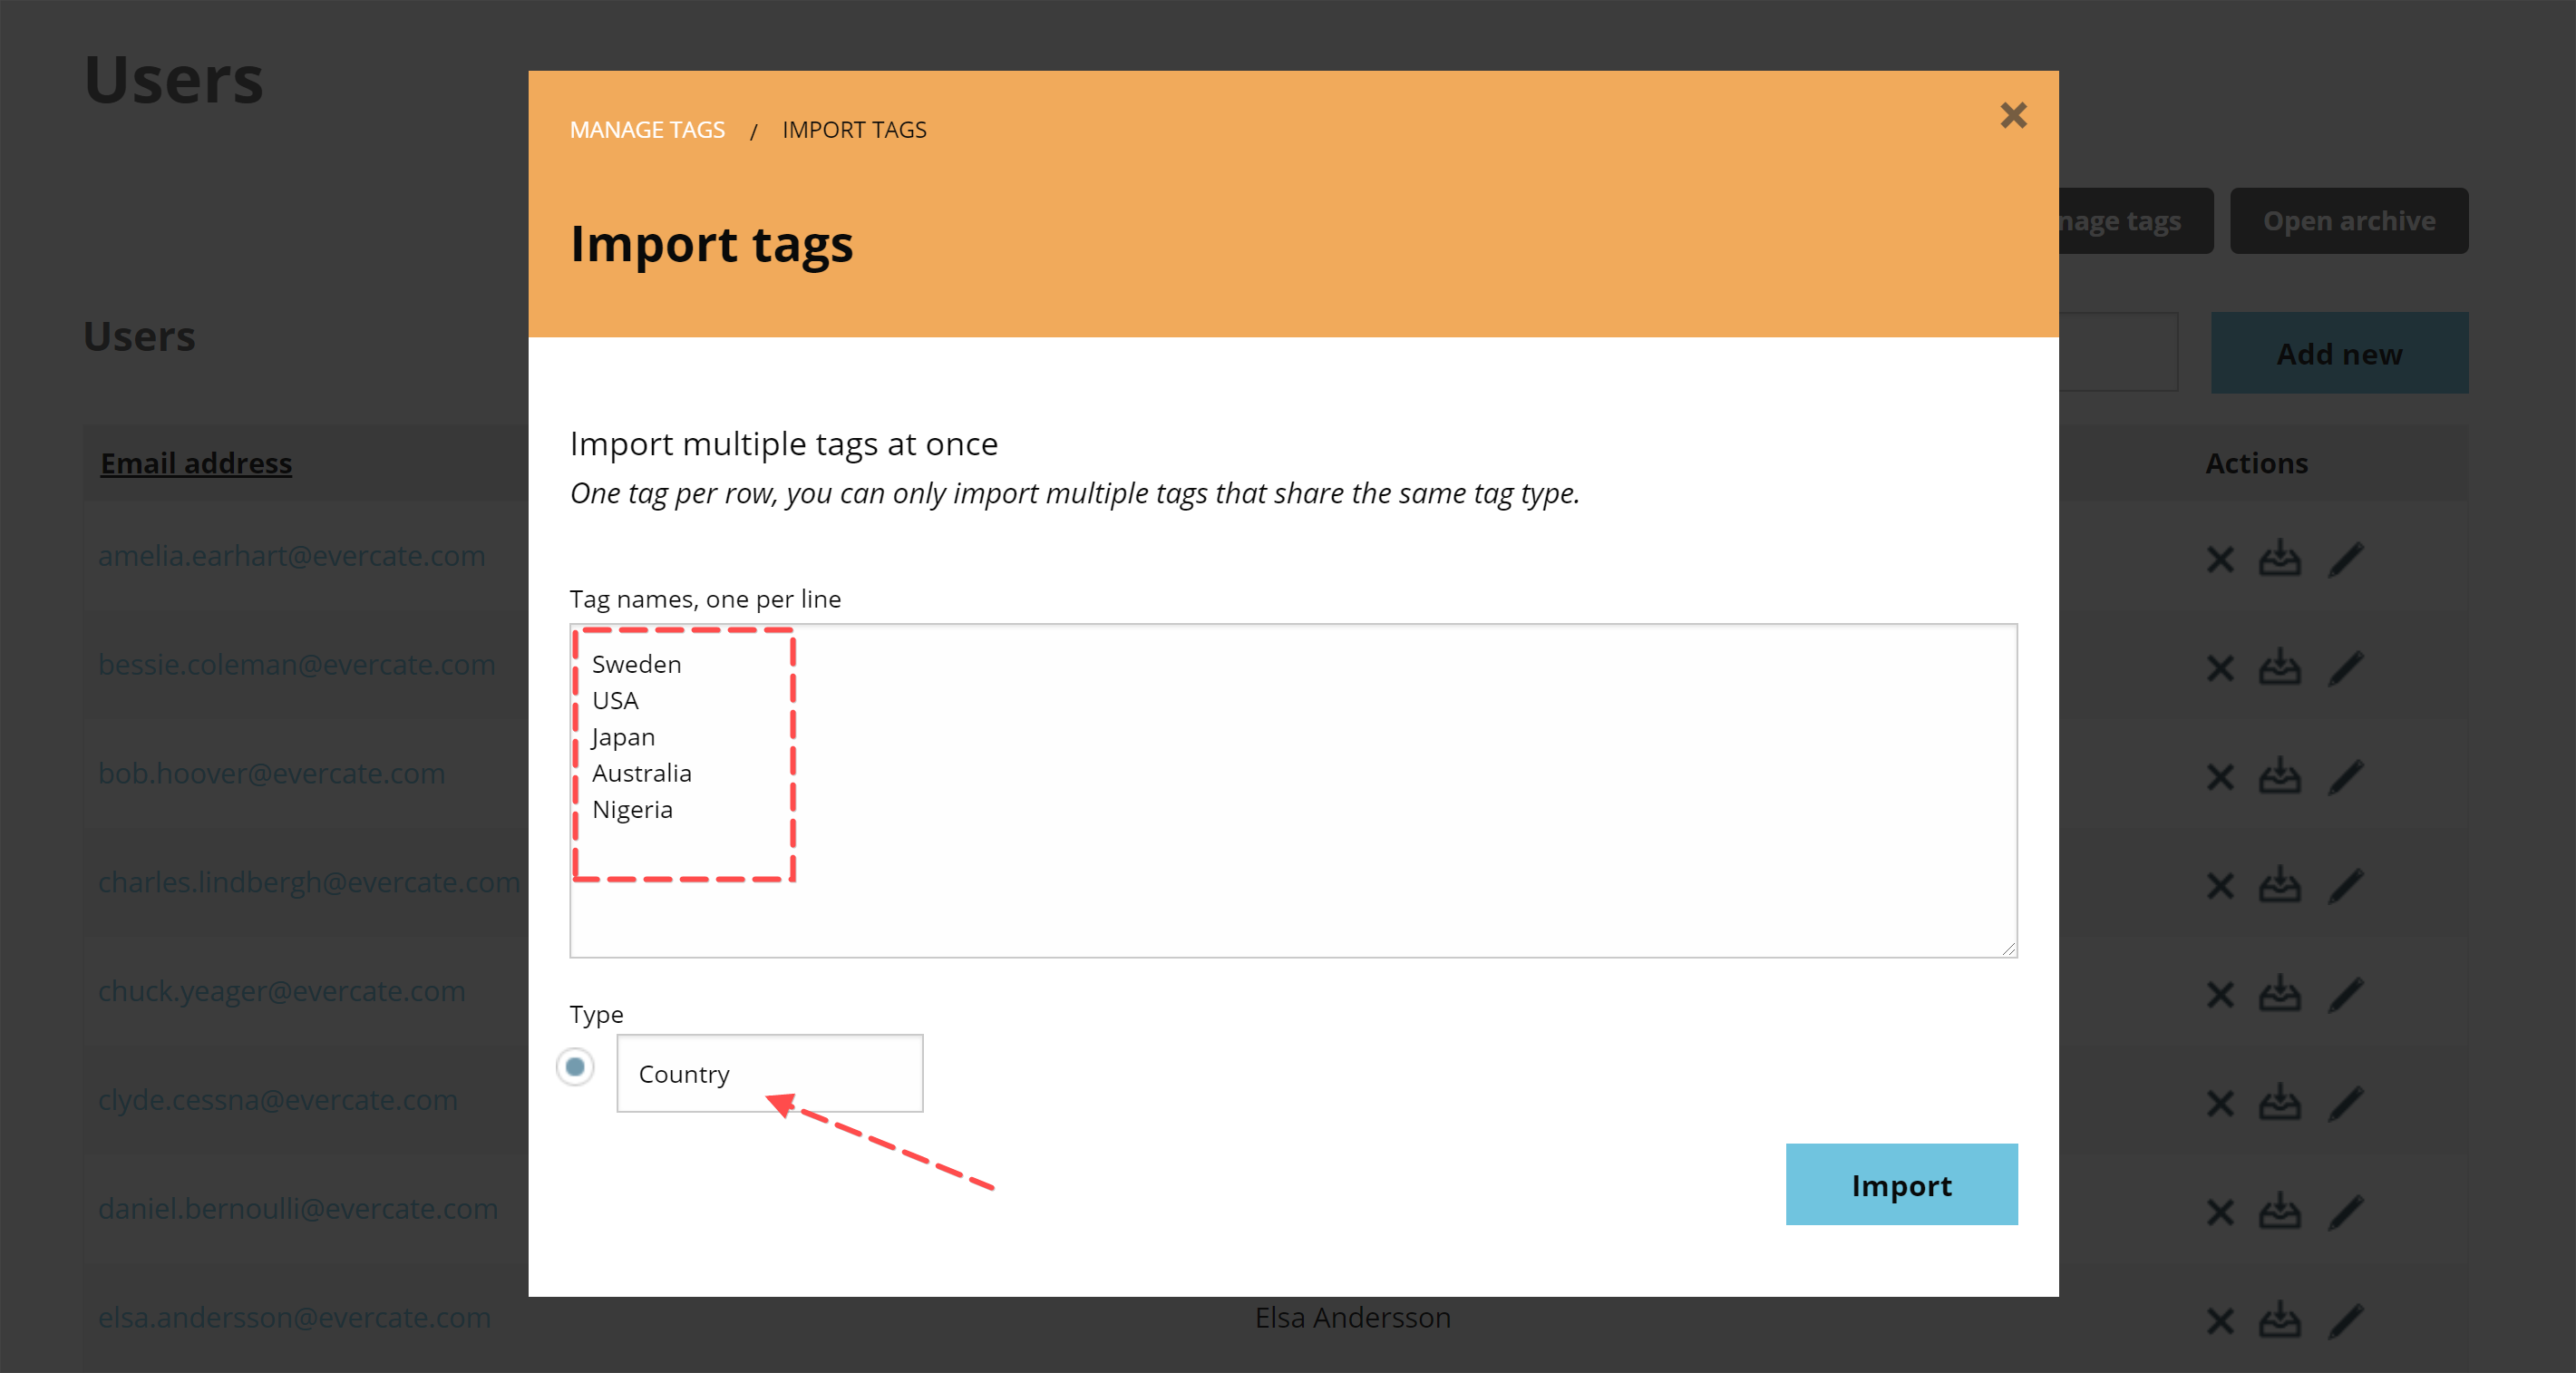
Here you simply type or paste your tags with one tag per line. When creating tags, you must assign them a tag type. You can see the "Type" field in the image below. If we had already created tag types, we could select them here. But for me, I only have the option to name my new tag type, which in this case is "Country".
Remember that we can only import tags of the same type in the same import job, so we need to repeat this step to import our tags for the tag type "Role". Once we have entered our tags and selected the tag type, we click "Import".
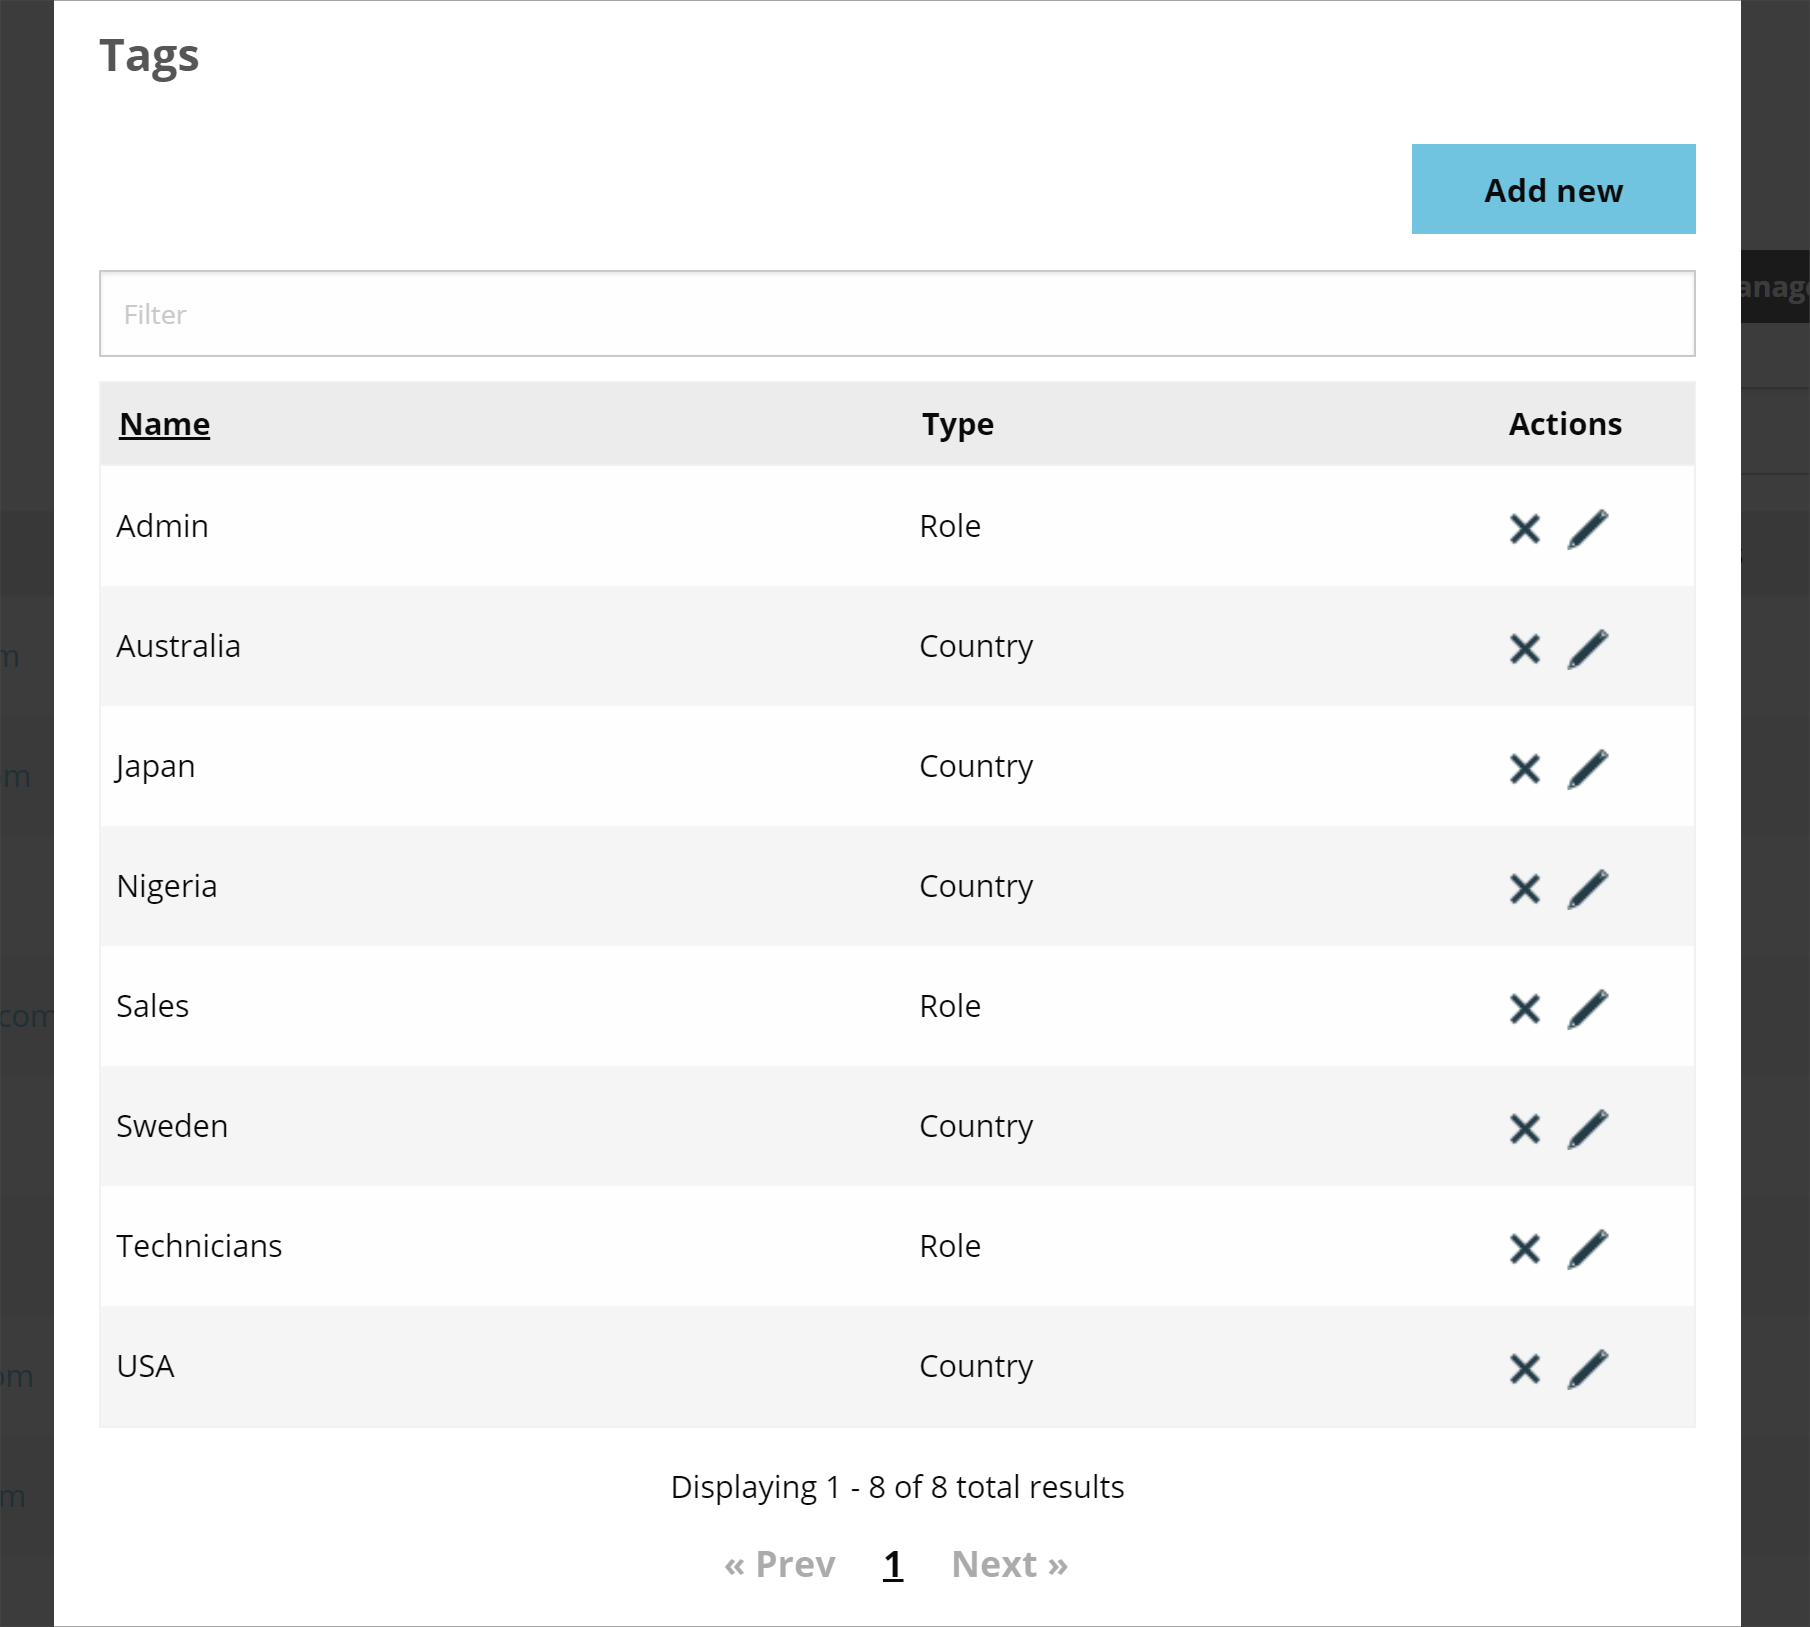
After creating my country tags, I went ahead and repeated the last step for my "Role" tags as well. This gave me a list of tags like the image below. And with that, we are ready to start assigning tags to my users.
Once we have created our tags according to the tag structure we defined earlier, we can start assigning tags to our users. Again, there are different ways to go about it depending on your needs and situation. We will cover how to assign tags to individual users, as well as how to assign tags to users in bulk.
Assigning tags to individual users
Let's start by assigning tags to an individual user. This works the same way when editing an existing user, as I will do, as when creating a new user.
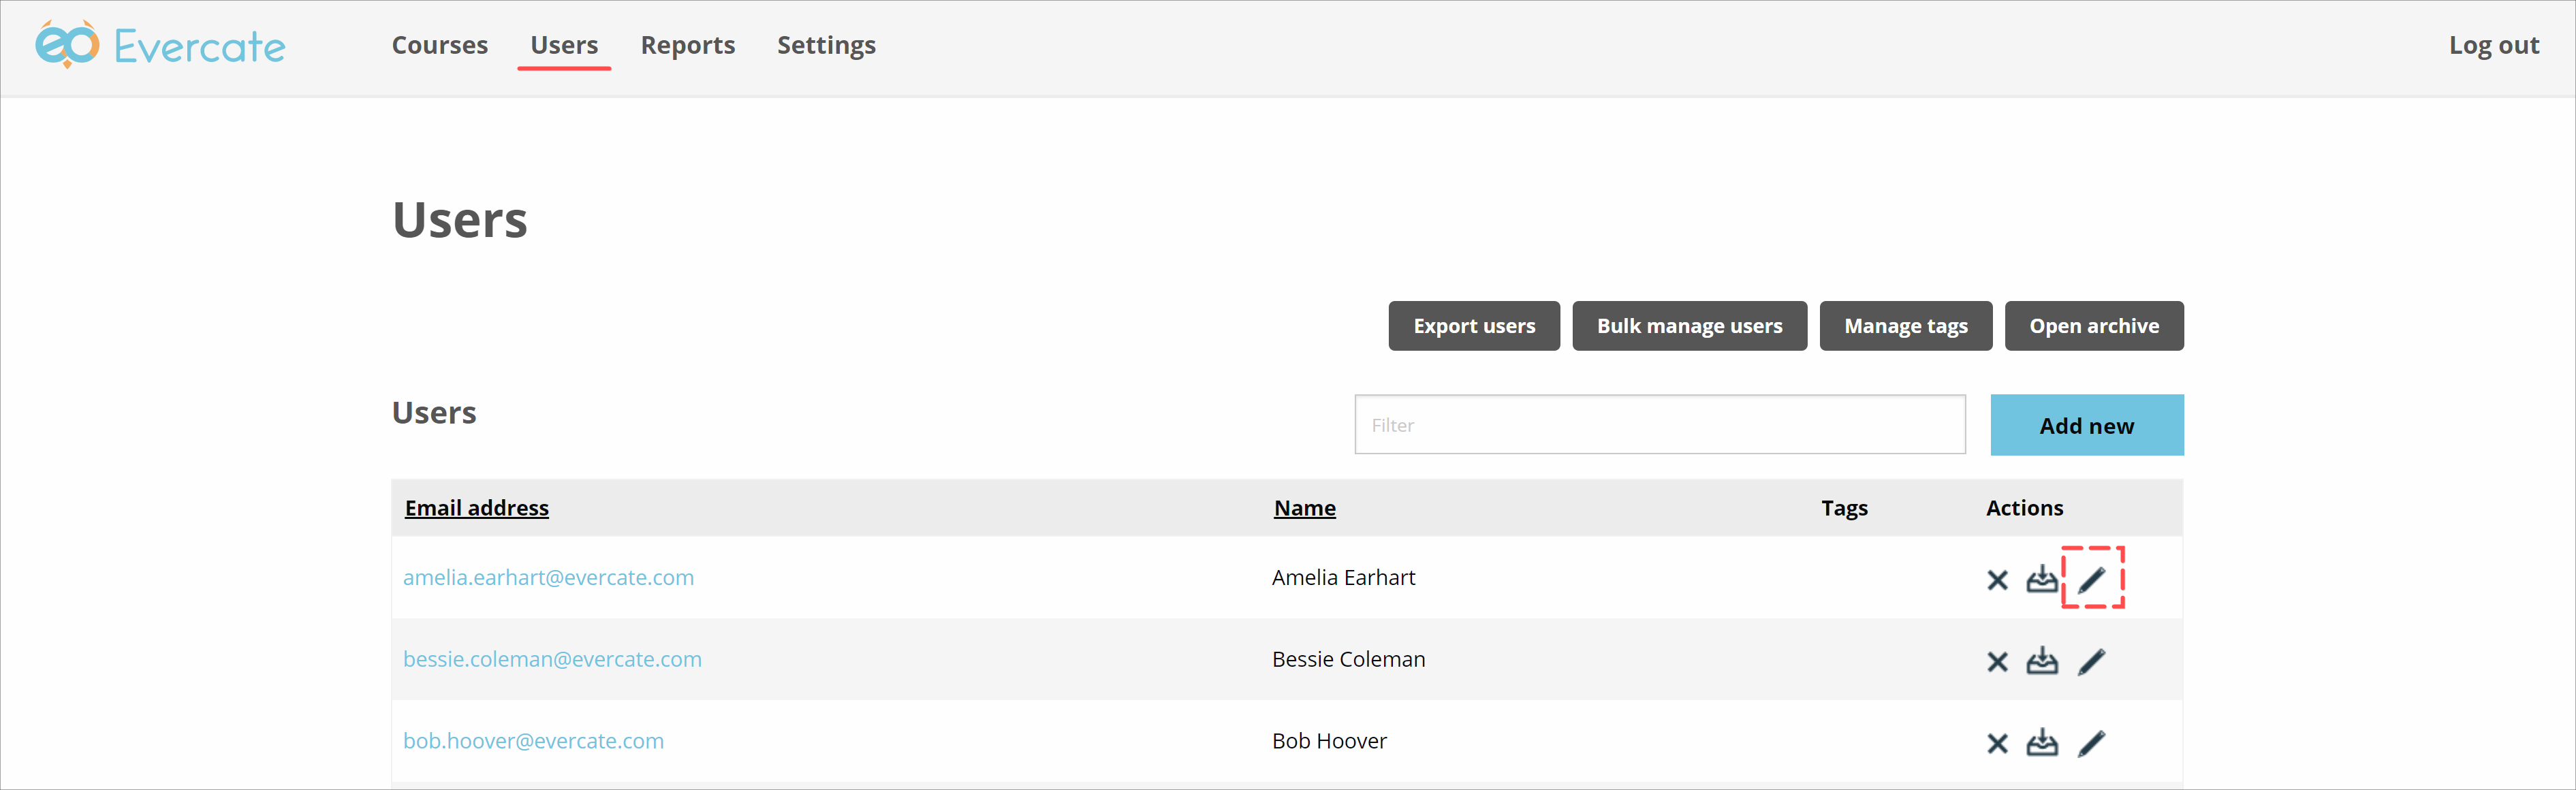
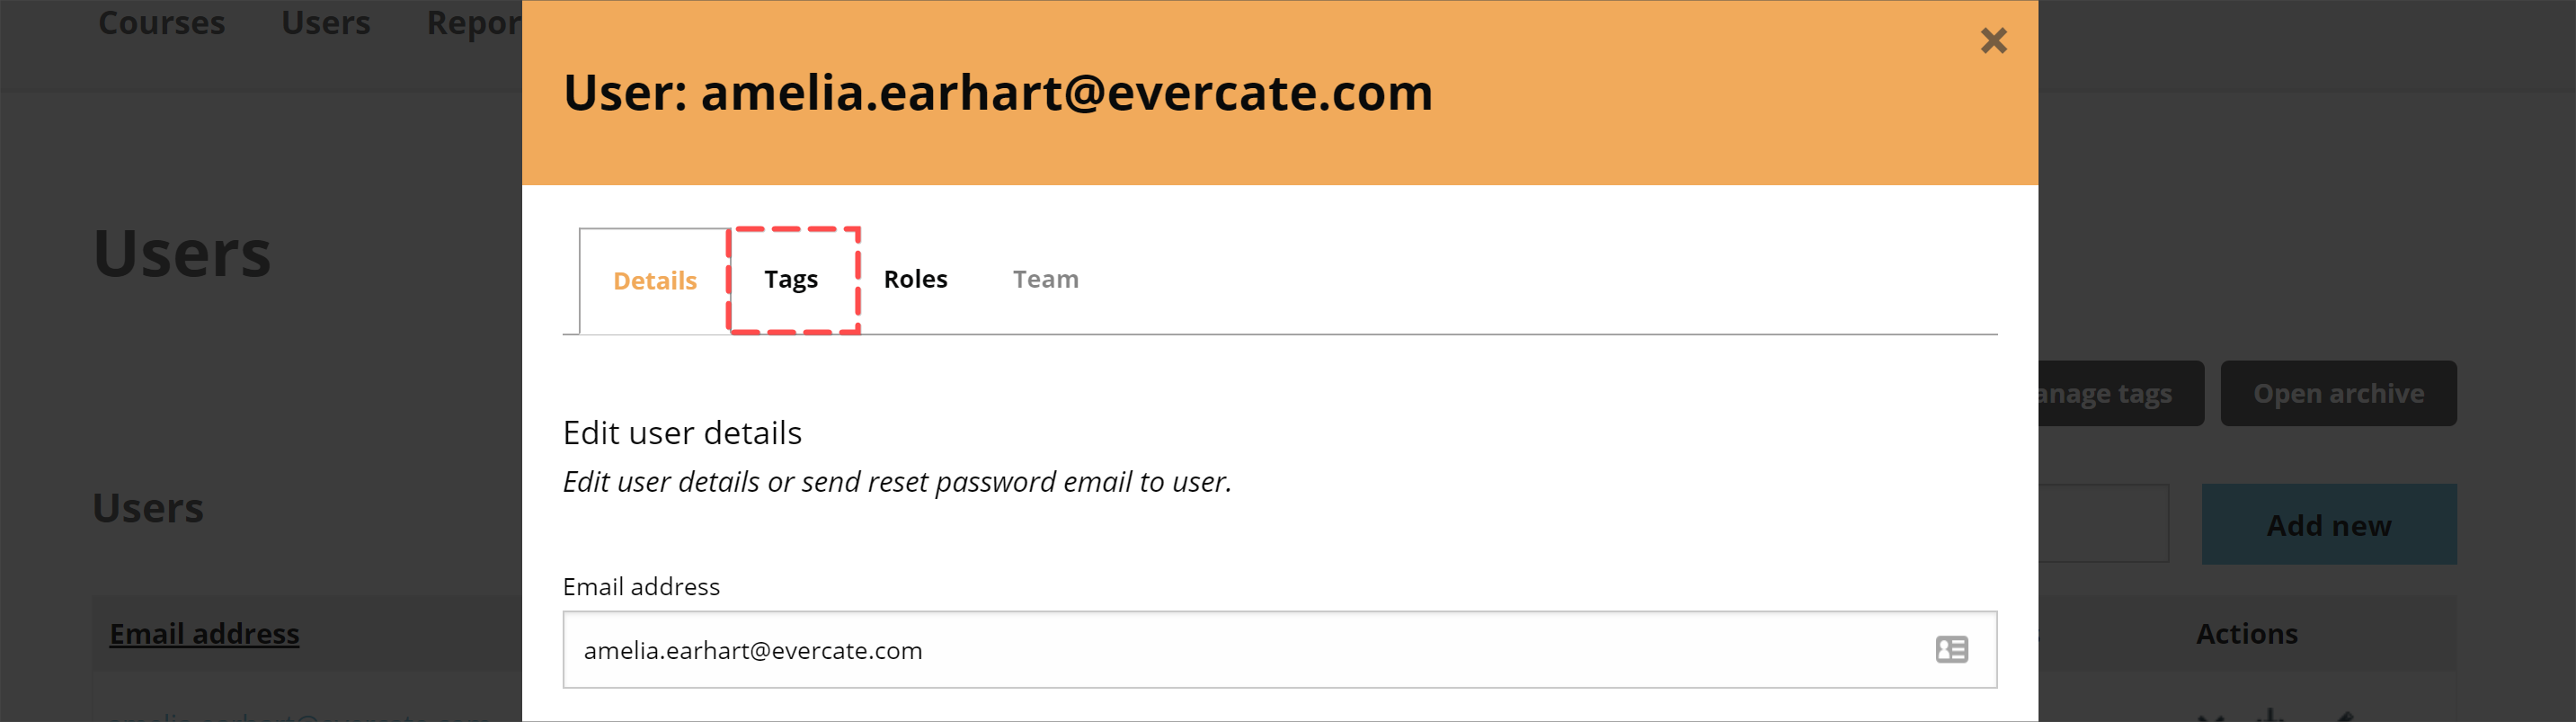
First, I make sure I am on the "Users" page again. Then I click on the pencil icon to edit Amelia Earhart in my user list.
Now we see the user information for Amelia. But we are interested in tags, so I click on the tab that says "Tags" at the top of the popup window.
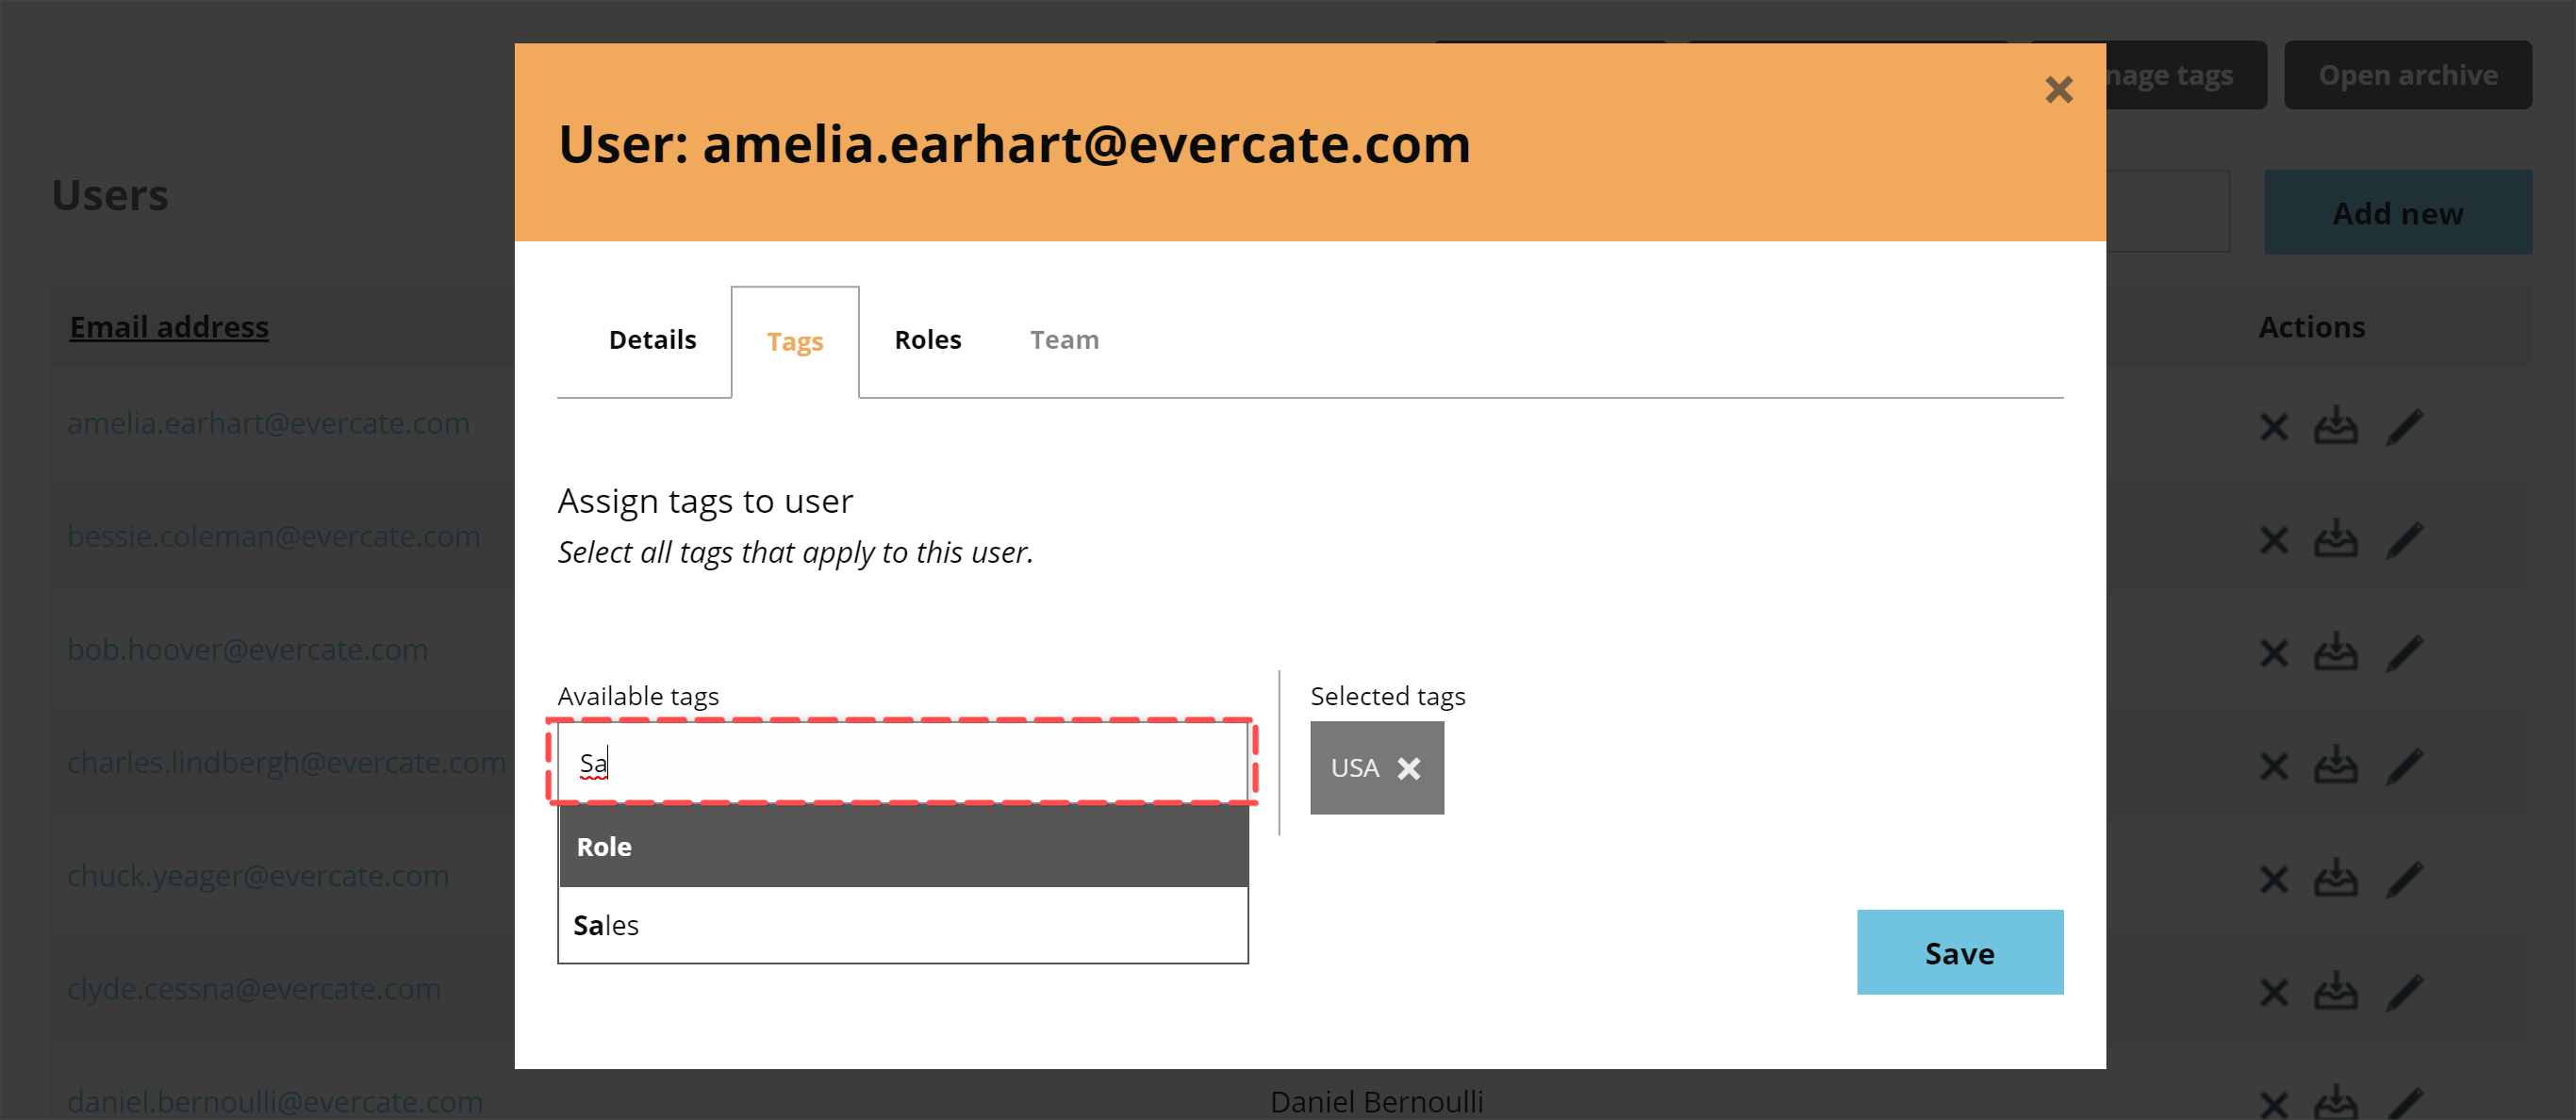
Here we can see that Amelia does not have any tags yet, but there is an input field where we can search for available tags, so I add the tag "USA" for country and am about to add the role tag "Sales" in the image below. When I am happy with the selected set of tags, I click Save.
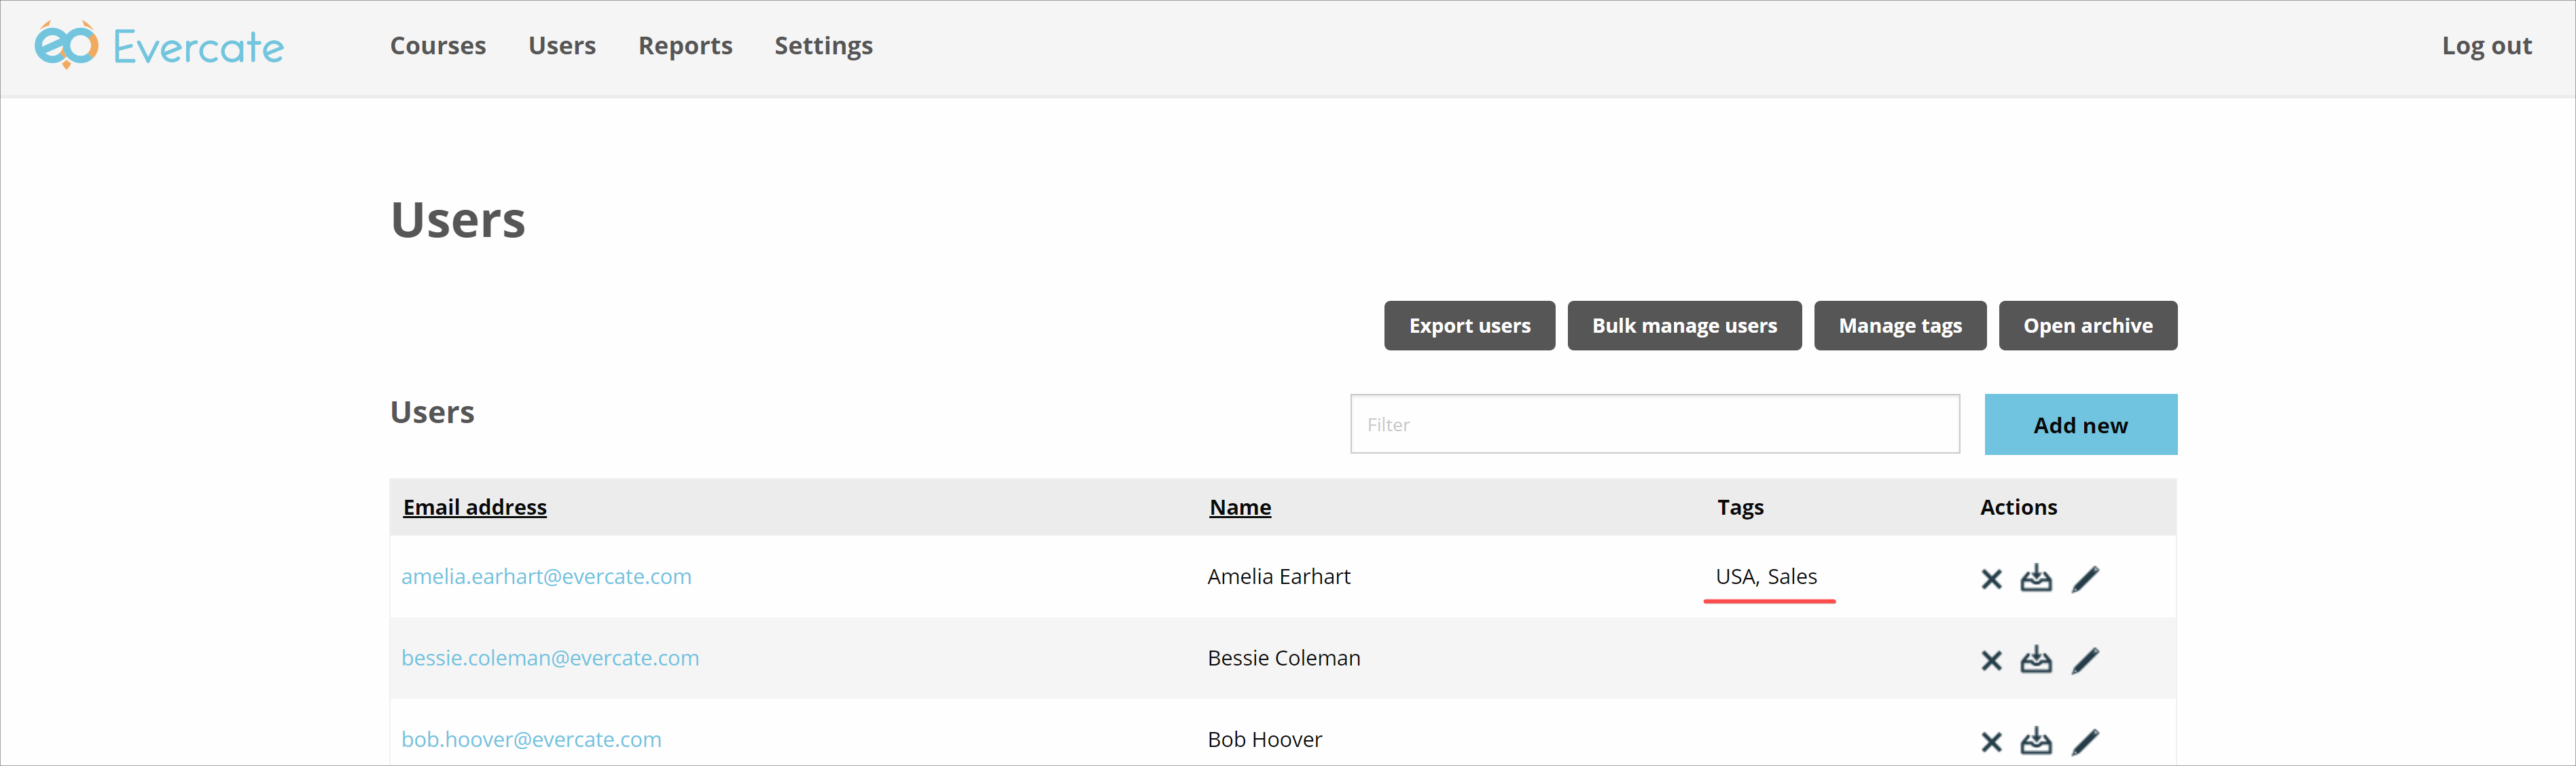
If you had already set up rules for course or program access based on tags that you add or remove in the last step, you will get another popup with a summary of how the user's access to courses and programs would change, to make sure you don't accidentally change a user's access in a way you didn't plan. But for me, I haven't set up any such rules yet, so I simply return to my user list with the difference that Amelia now has tags.
Assigning tags to users in bulk
The other way to work with tags is to assign them in bulk. You can do this either when creating users simultaneously or when updating them. Regardless of which option makes more sense for you, the process is the same.
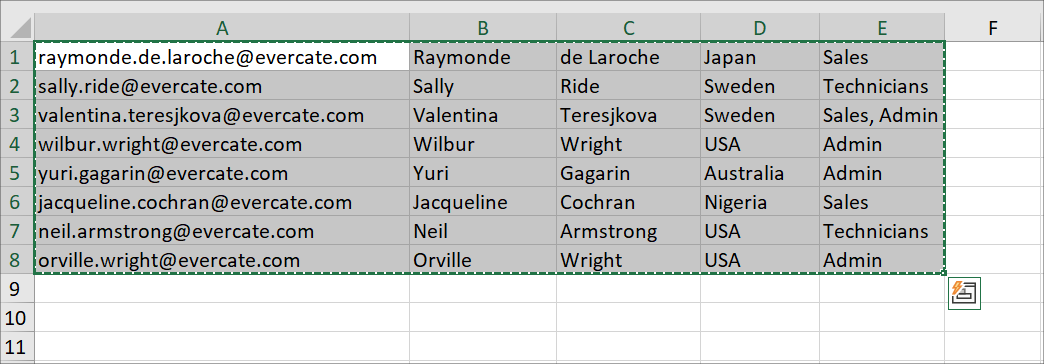
First, we need an Excel file or similar containing the users we want to work with. I am going to update some already existing users for my example. As you can see in the image, I have created a file in Excel with one row per user. For the columns, I have their email address, first name, last name, country tag, and role tag. Note that I have given Valentina two role tags, separated by a comma. I have also selected all my users and copied them to my clipboard.
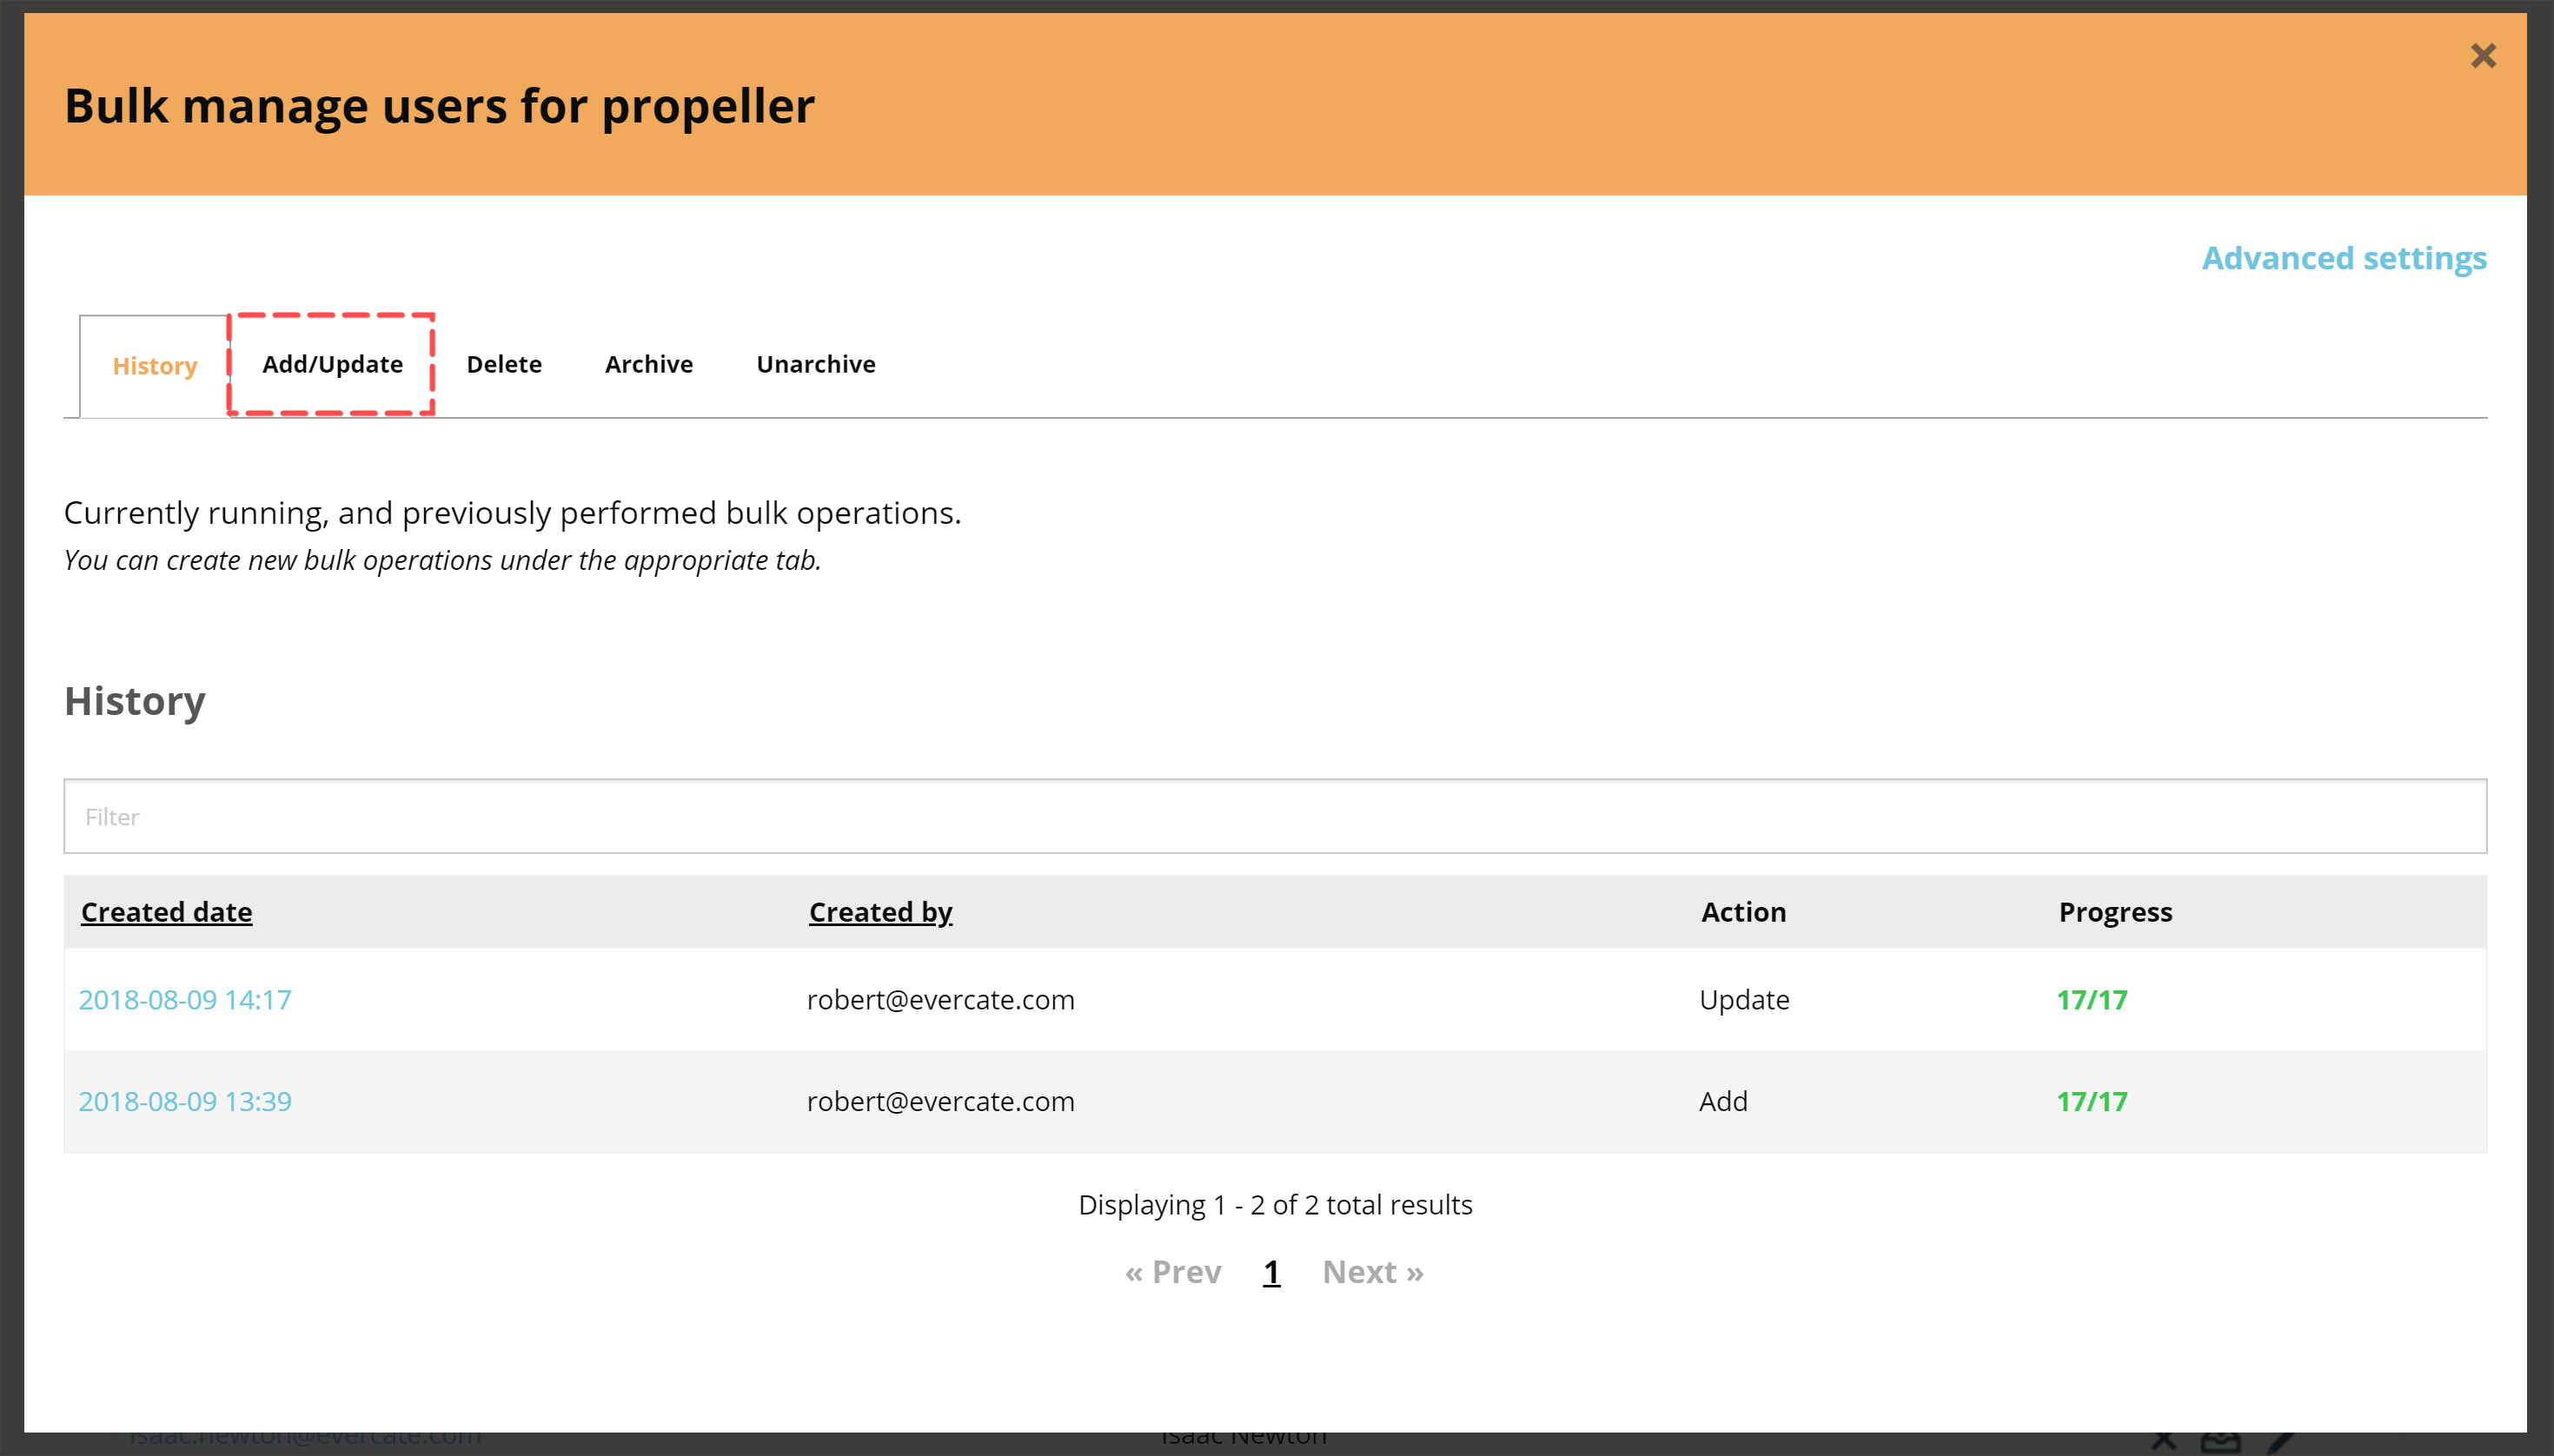
Now we go back to Evercate and make sure we are on the Users page. We have our users in the list and a button above the list for "Manage users in bulk".
When we click on that, we open a popup showing us our previous bulk jobs. But we want to click the "Add/Update" tab to update our users.
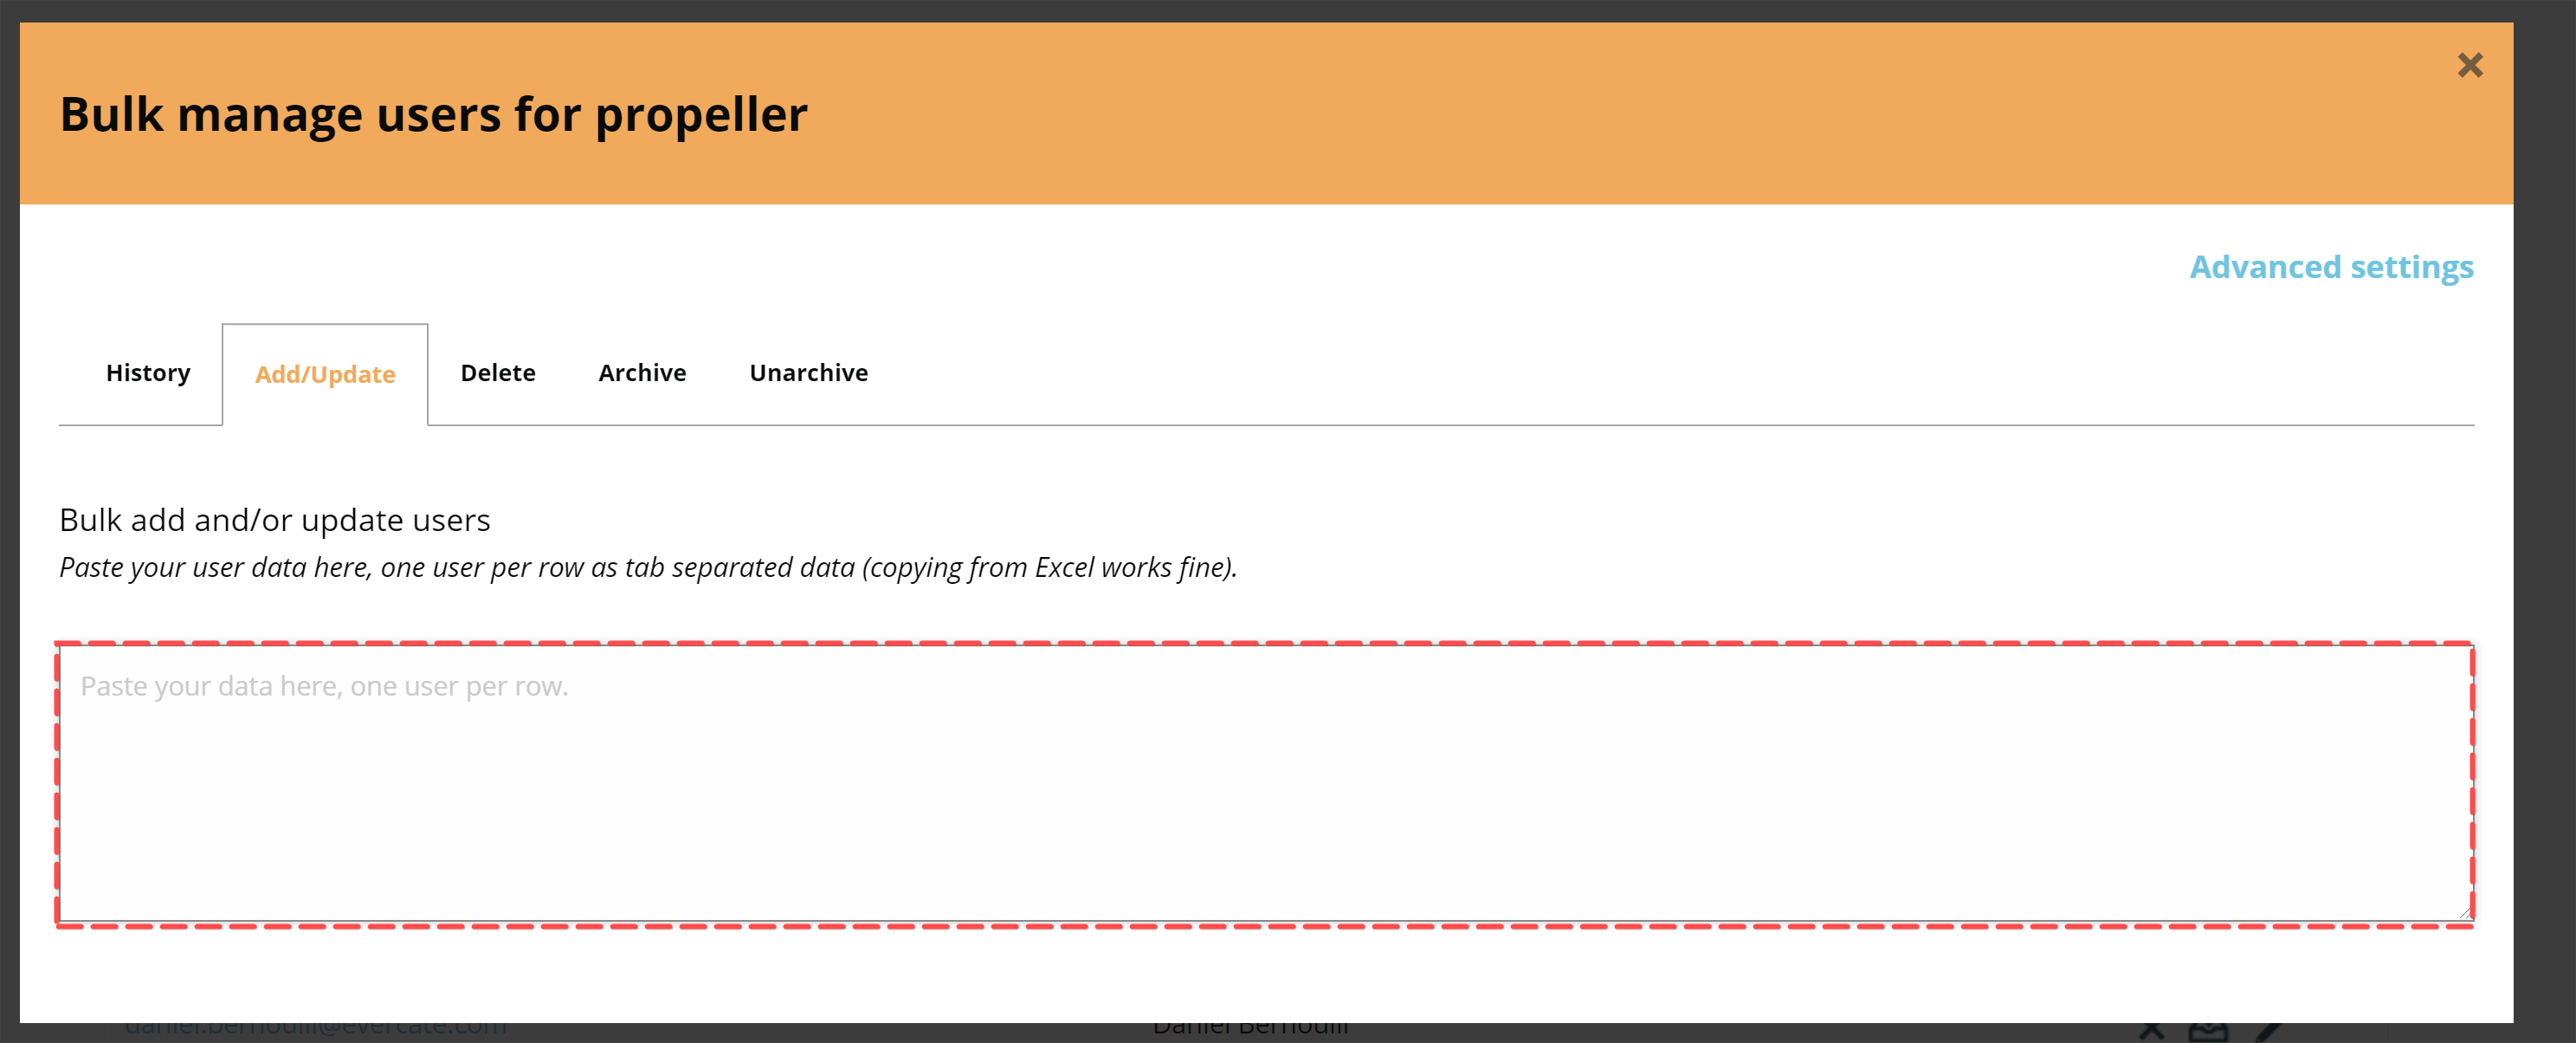
Here we see a large text area where we can paste our user data that we have copied from Excel.
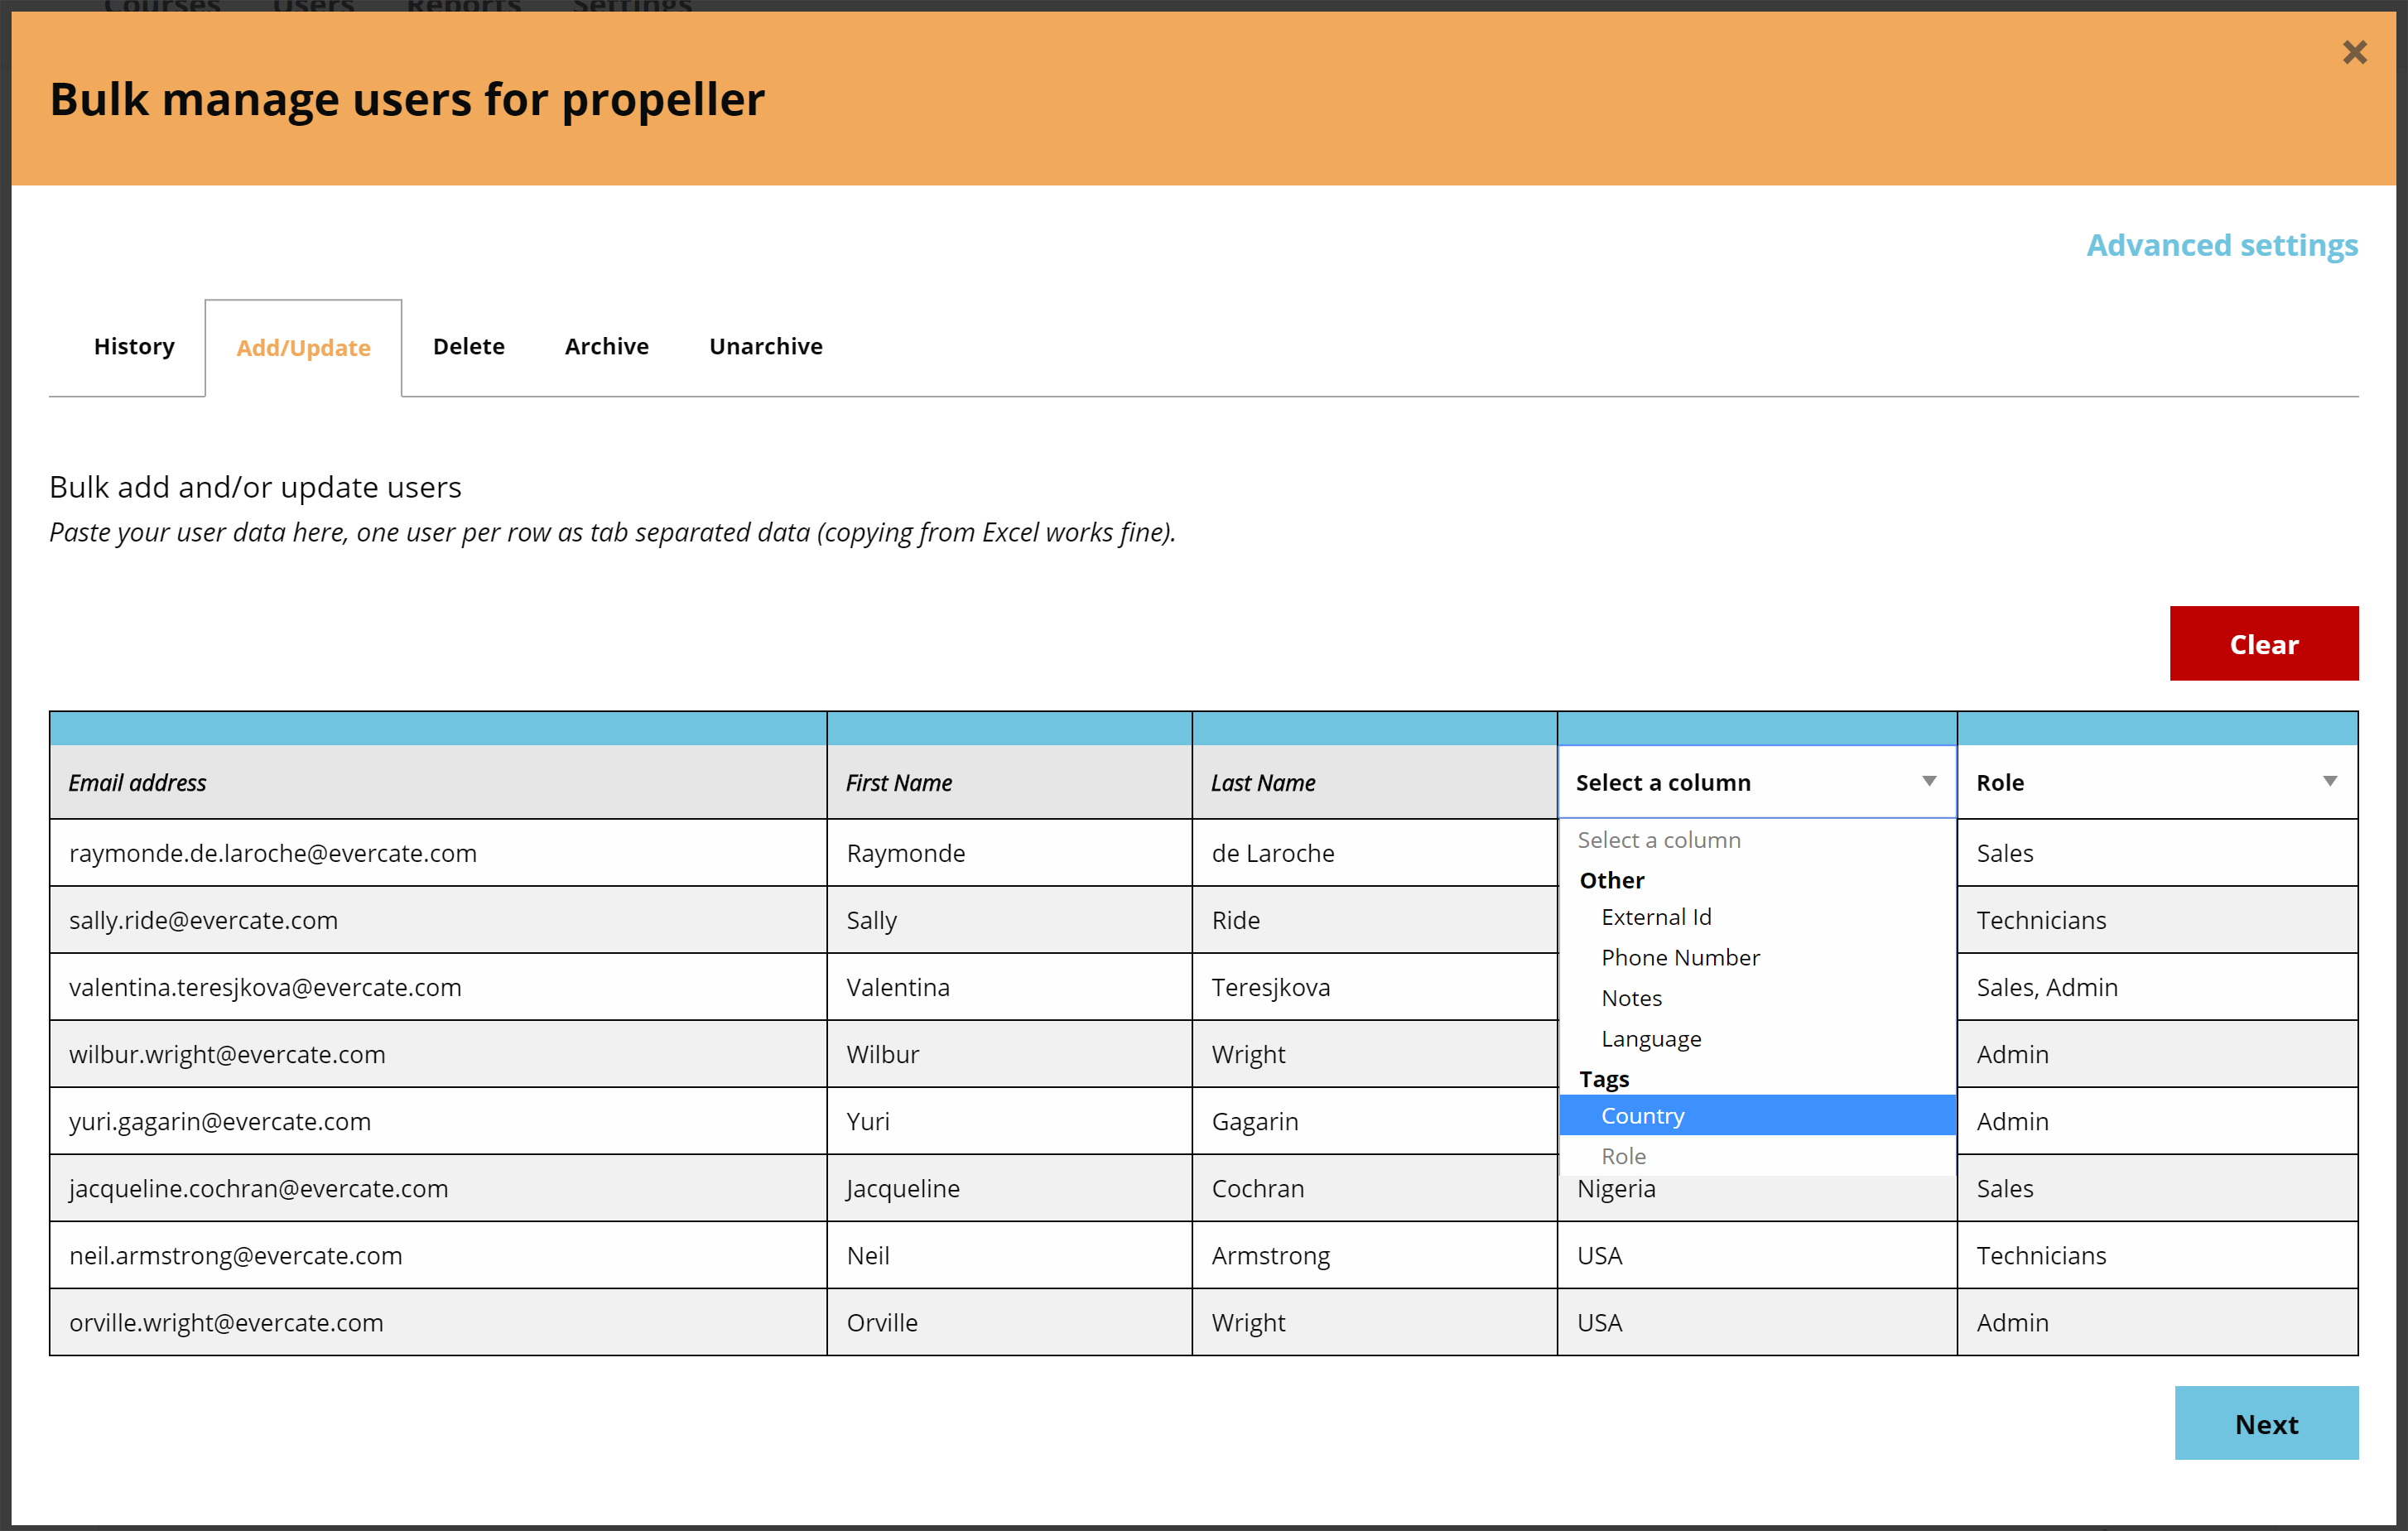
As soon as we paste our data, the system will sort it into matching rows and columns. If a column header happens to be in the wrong position, for example if it says Email where you have First Name, you can simply drag and reorder the column headers to match your data. You will also notice two blank column headers in the image below. These are for you to define the data in those columns. So we set the right column to Tags – Roles, since that is the tag type for the tags in that column, and the other "Choose a column" to Country to match my data. Then we click "Next".
The last step now is to confirm and choose our actions. Since I only have existing users in my data from Excel, I only get the option to Update users only. If there were any new users in the data, I would get additional options to choose from. The main point here is to confirm that 8 users will be updated.
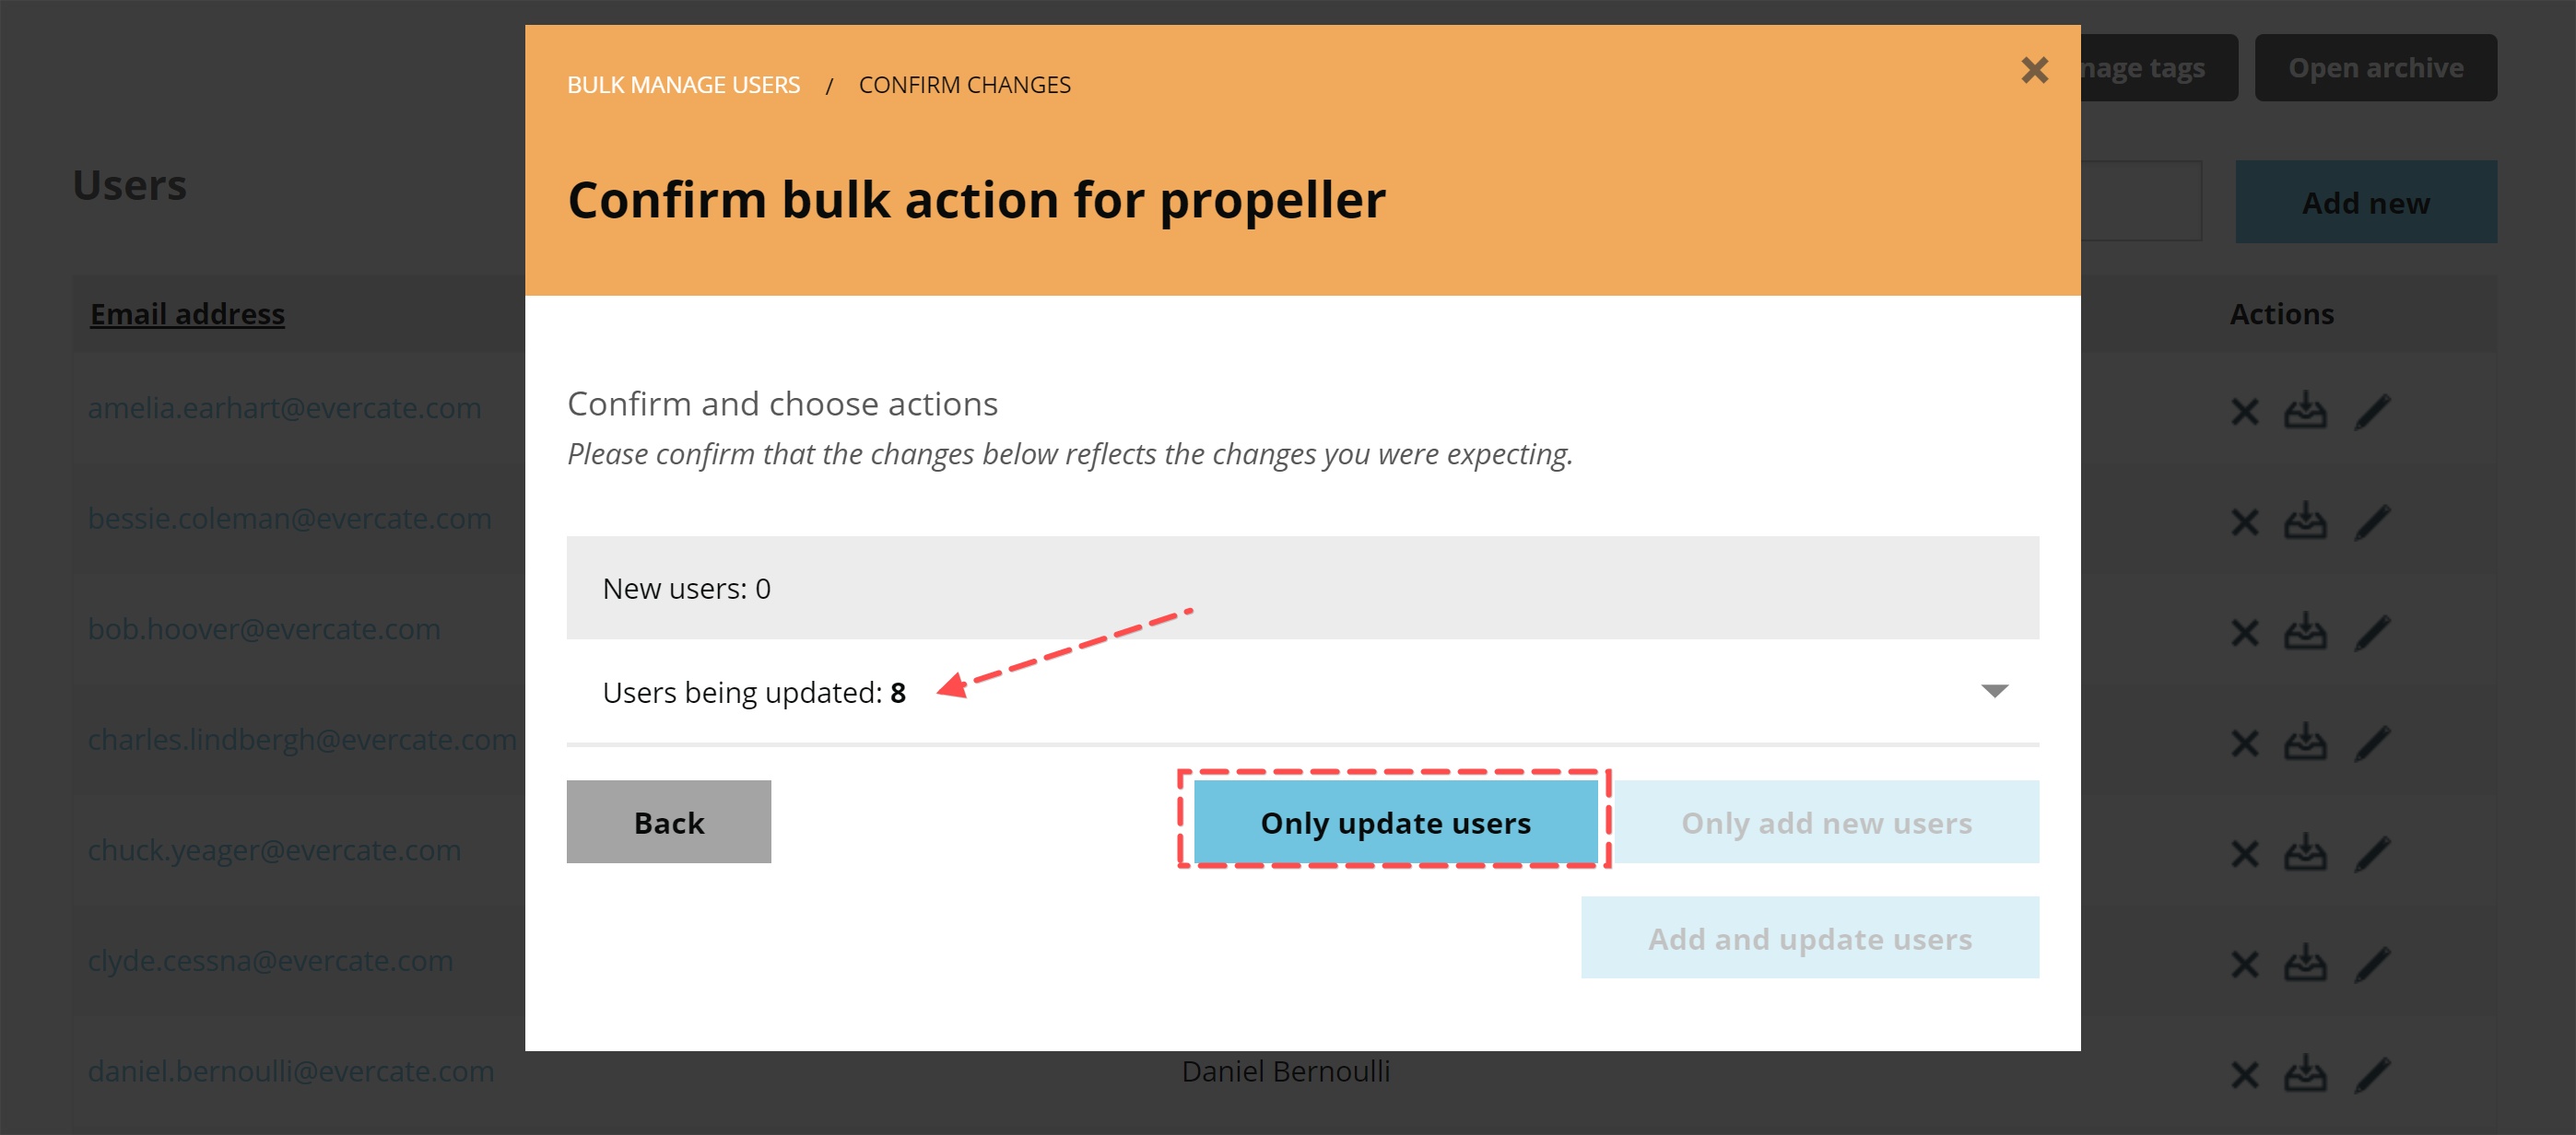
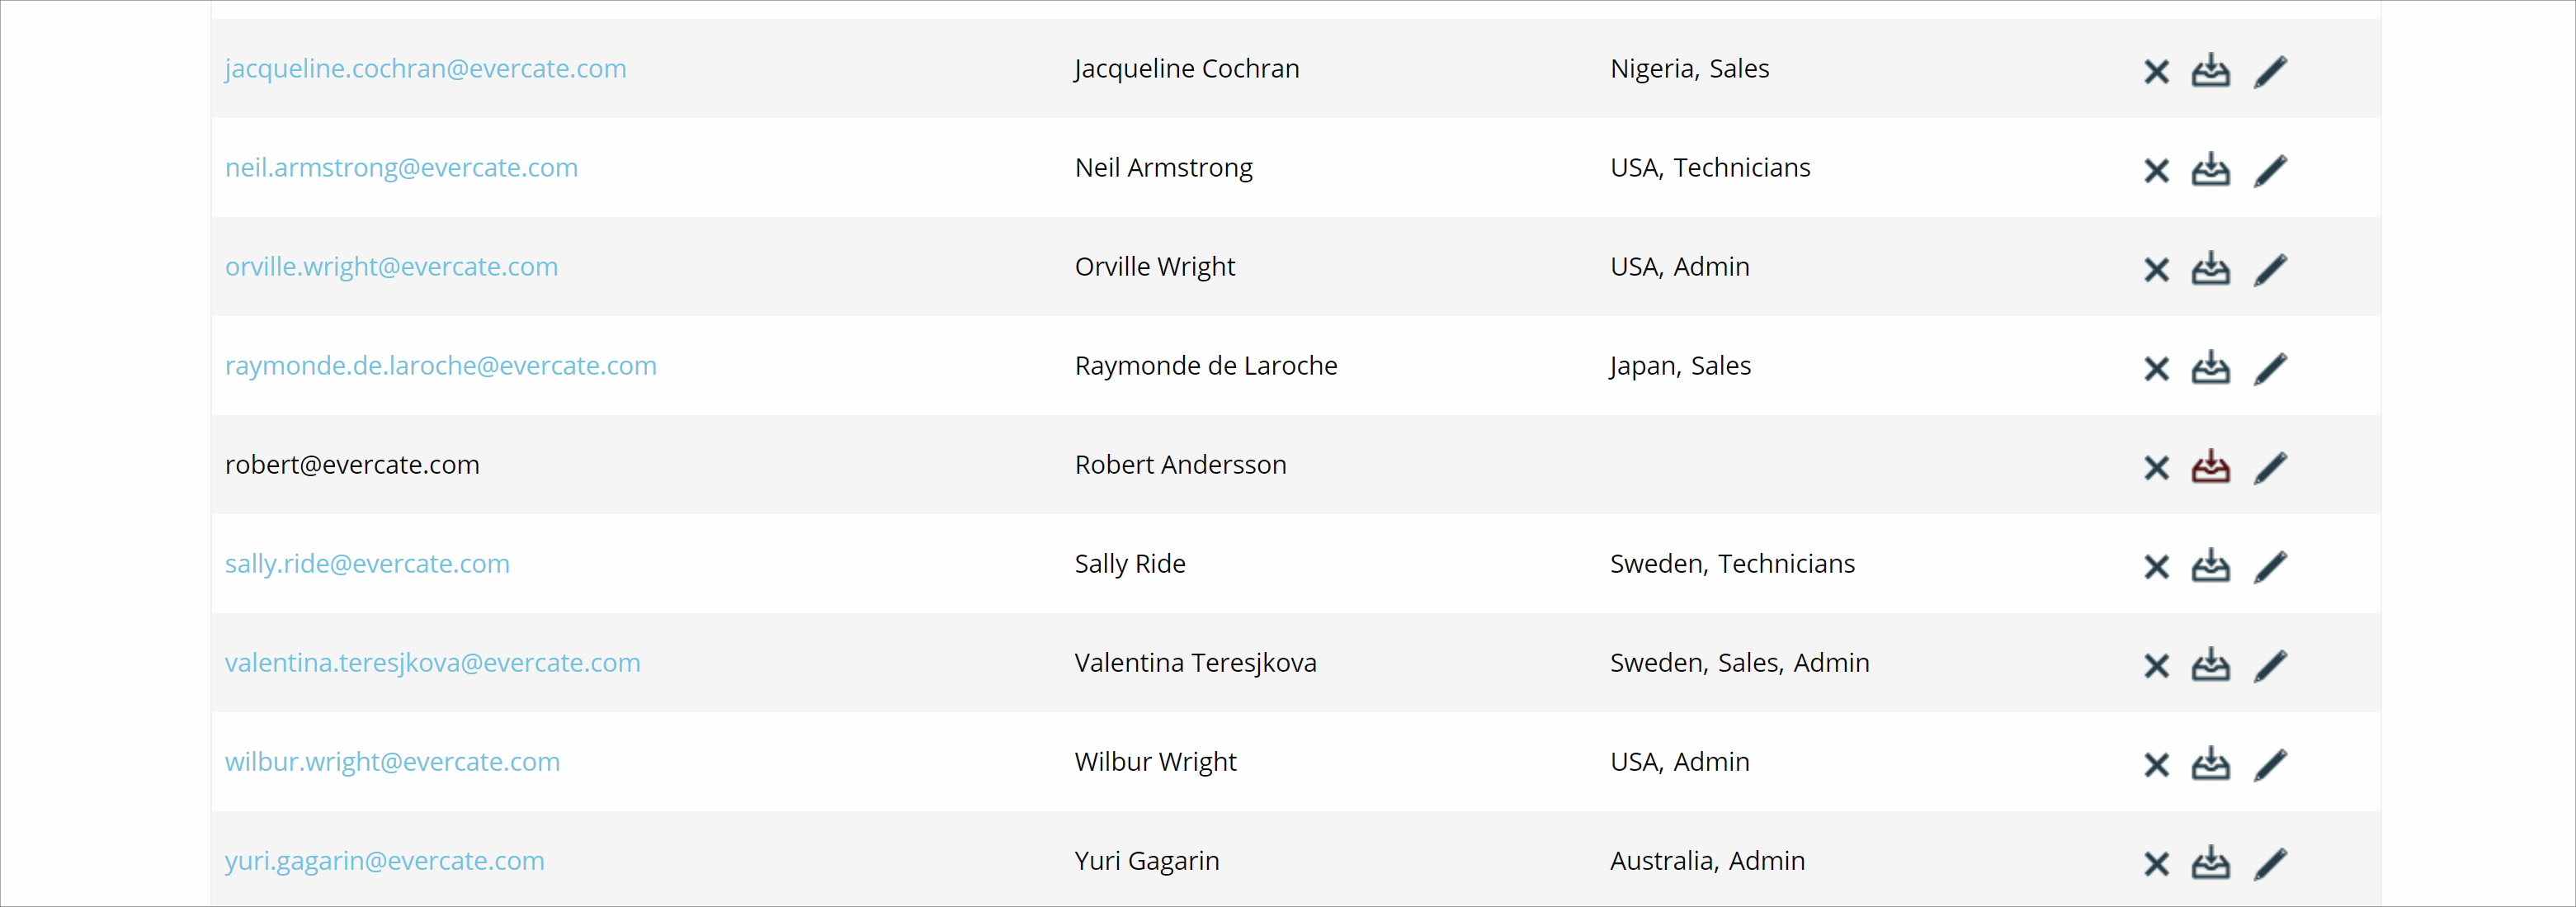
When we click "Update users only", we will be taken back to the history page and see our new bulk job running. When it is done, if we go back to our user list, we will see that we now have more users with tags.
Hopefully this guide has been helpful and given you a better understanding of how to use Evercate.
Good luck setting up your tag structure, creating your tags, and assigning them to your users.