Integrate with Microsoft Azure AD
By connecting your Microsoft Azure AD to Evercate, you can use your AD to sync users and allow Single Sign On (SSO).
Once you have created a connection, you can choose whether you want to enable provisioning, single sign on or both.
Note: If you are using a custom domain for your Evercate license (e.g., training.your-domain.com instead of your-domain.evercate.com), you must send an email to support@evercate.com so that we can approve the domain before you proceed with this guide.
Create the connection
Log in to Evercate as an administrator and click on Settings in the top menu.
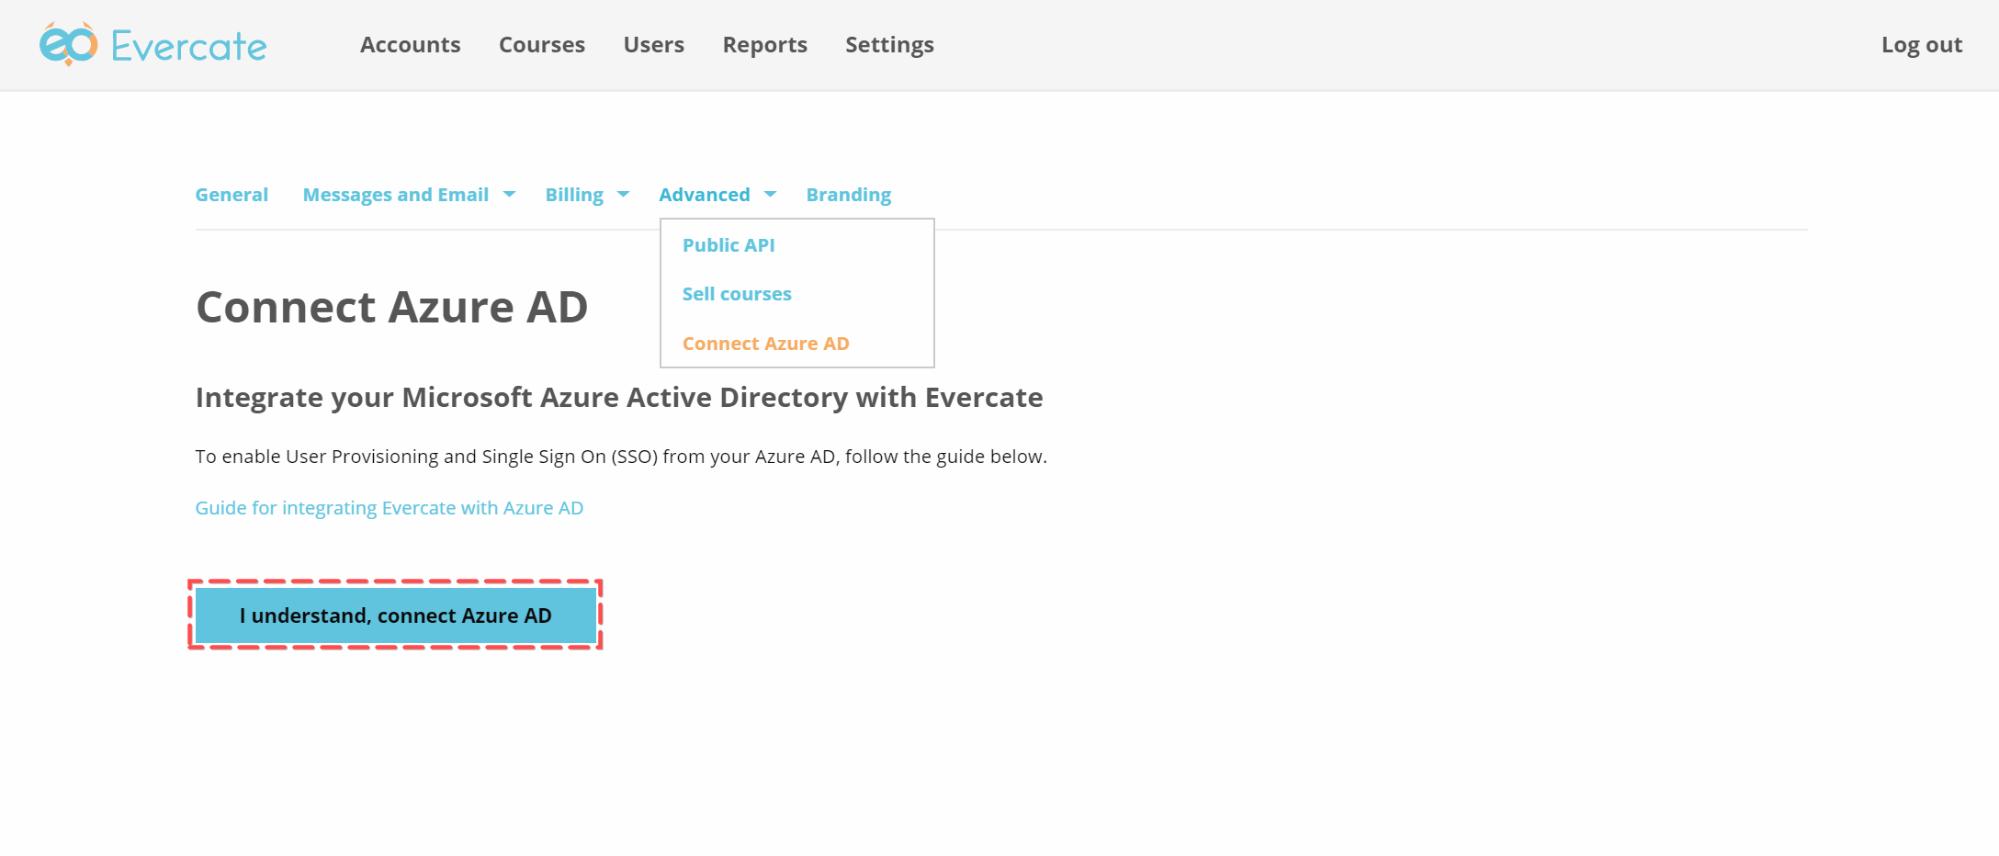
Under Settings, go to Advanced -> Connect Azure AD
Click the "I understand, connect Azure AD" button to start the process.
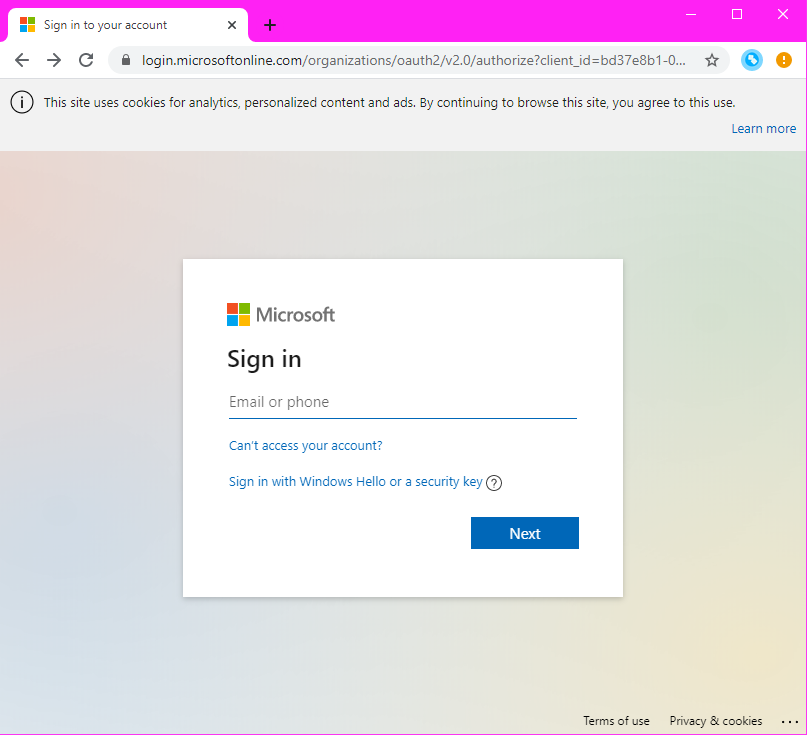
Approve the application with an AD administrator
Now you will be taken to the Microsoft Log In page where you need to log in as the administrator of your AD.
The Microsoft user you sign in with must:
- Be an administrator with access to "Enterprise Applications"
- Be an AD user and not a personal account
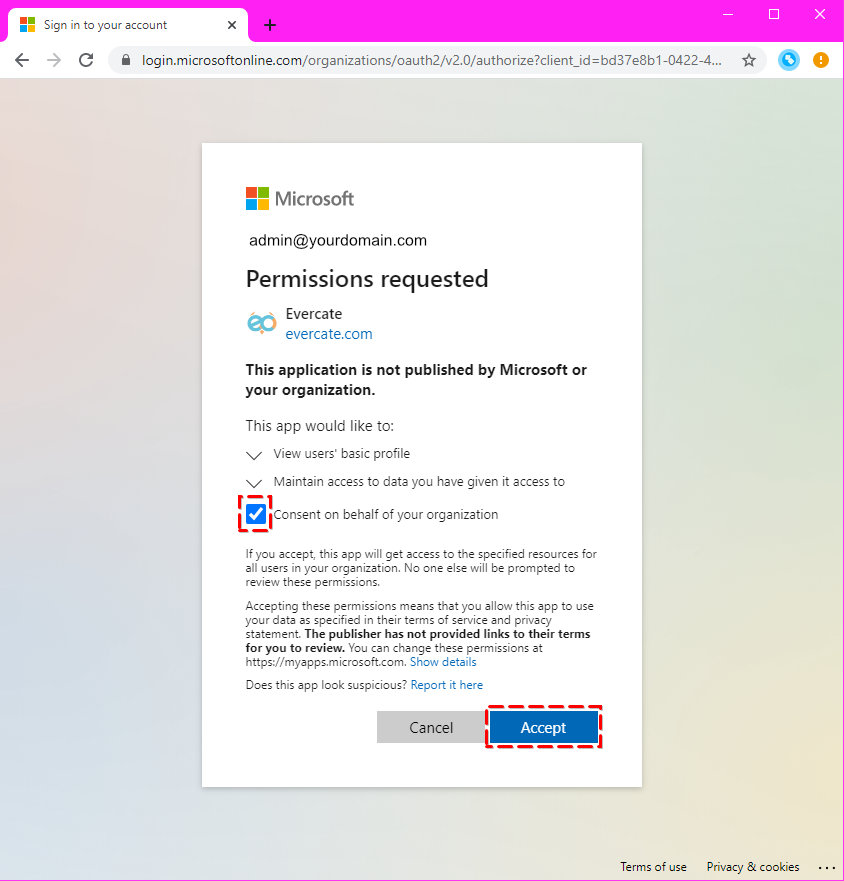
Once you have logged in with your Microsoft account, you will see a dialog box asking for Evercate permissions.
Check "Consent on behalf of your organization" before clicking on Accept.
Note: If you failed to tick the consent box, all users will receive a similar dialogue box at their first login. See below under the section "Configuring the application in Azure for SSO" on how to provide consent for your organization after the connection has been made.
Configuring AD options in Evercate
Once you have configured the connection to Azure AD, you can configure which AD features you want to enable in Evercate.
Under Settings -> Advanced -> Connect Azure AD you will see the token you need to enable provisioning (enabled from azure ad) and can tick the box to allow single sign on for your Evercate account.

Note: For single sign on to work, each user logging in via single sign on must have a corresponding user set up in Evercate. This can be done by one of the following methods:
- Enable provisioning from AD
- Add users manually one by one
- Import users
- Create users through our API
Configuring the application in Azure for SSO
Enter consent in Azure Portal
Note. You only need to do this if you have not given your consent for the whole organization when you configured the Azure AD connection
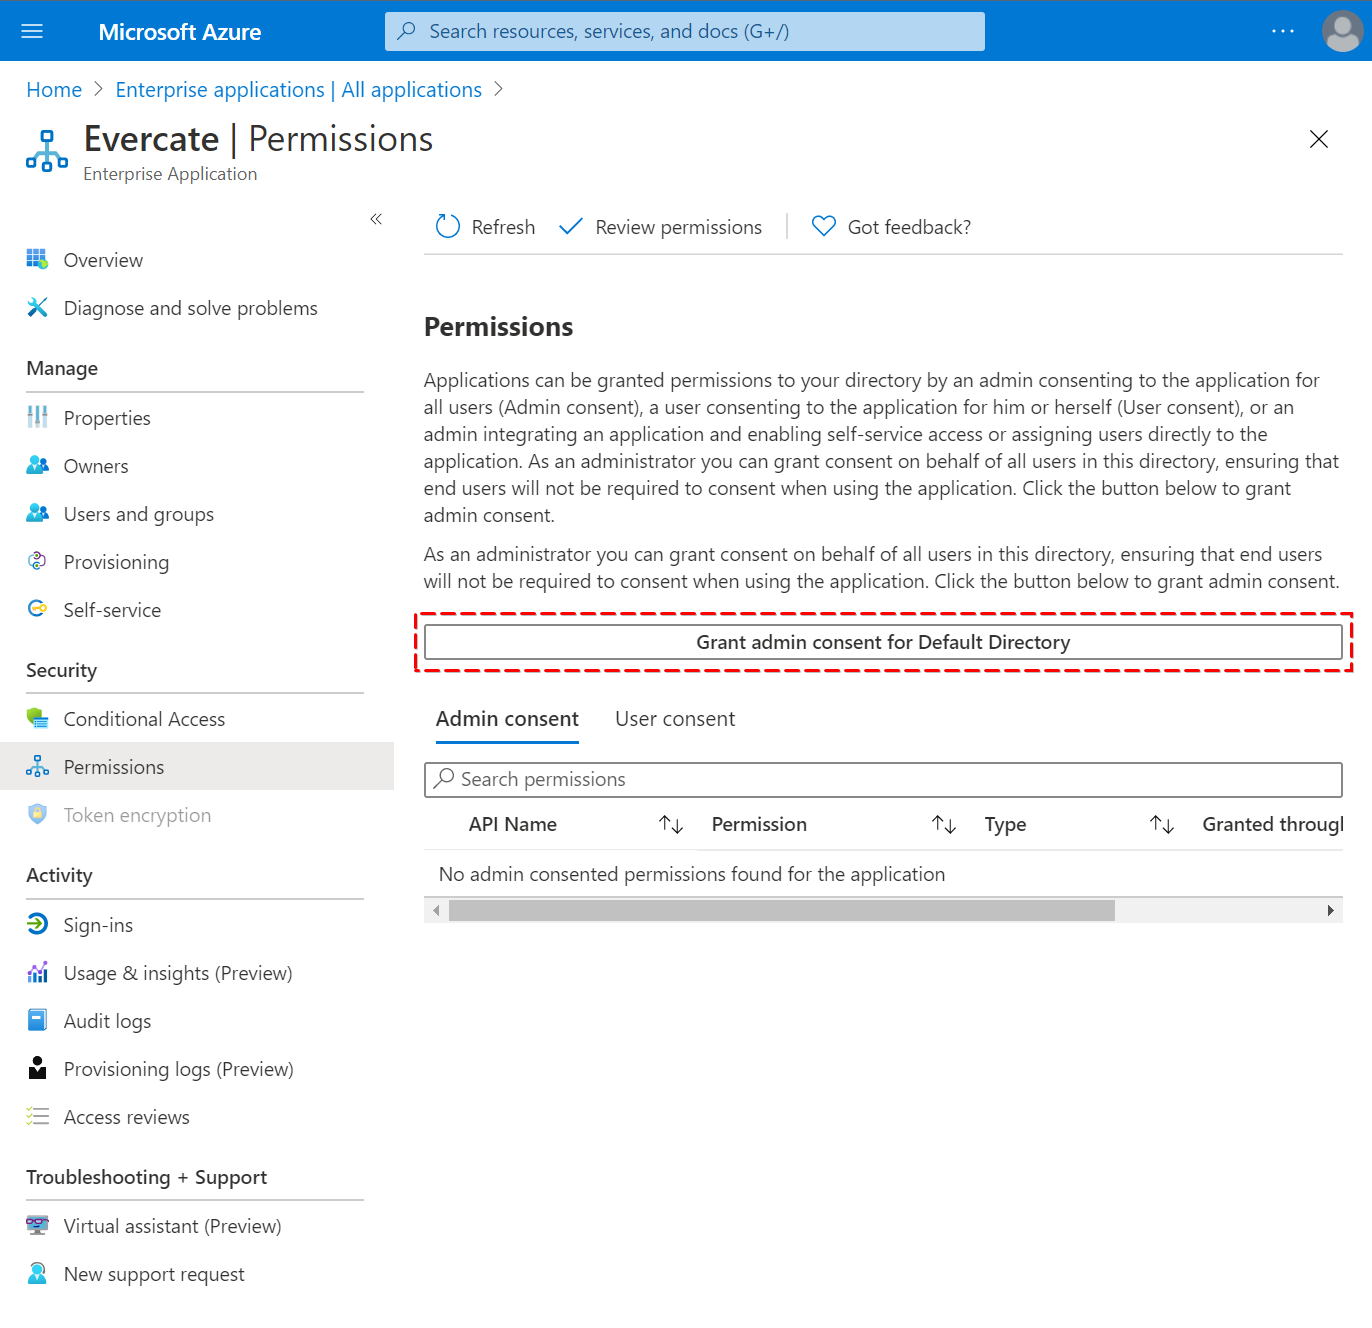
If you failed to check the "Consent on behalf of organization" box when configuring the connection, you can fix this from Azure Portal. Go to Enterprise Applications, click Evercate, then go to Permissions and click "Grant admin consent for Default Directory".
Check who has access to Evercate
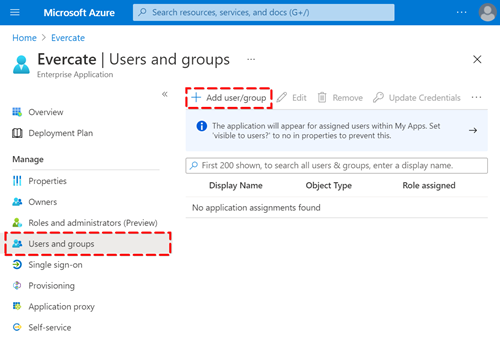
We also recommend that you require user assignment under properties. This way you can easily control who in your organization can log into Evercate.
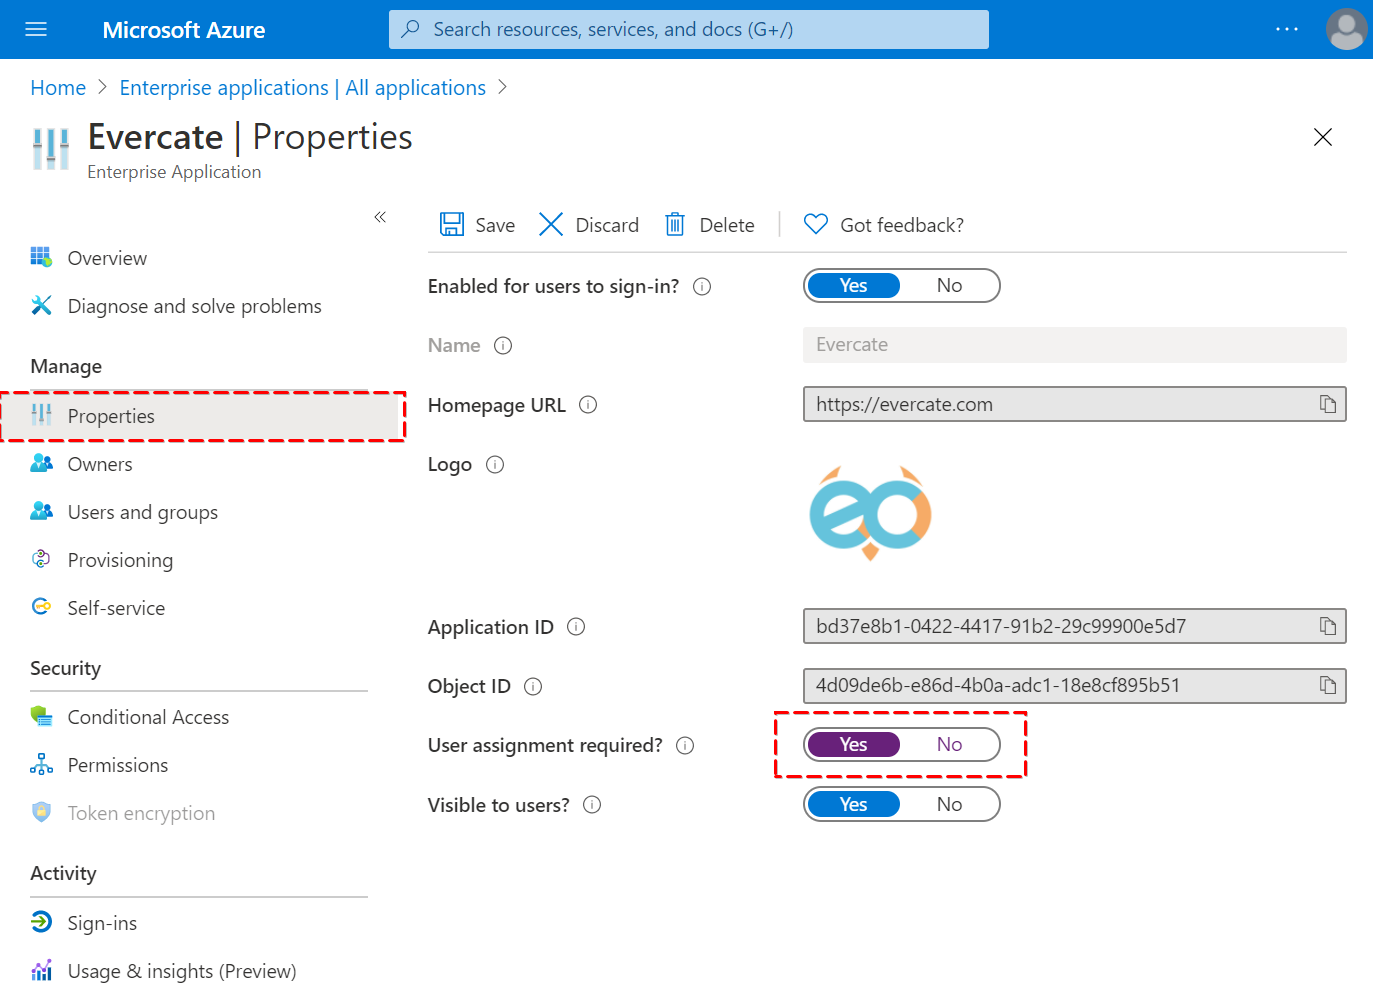
You can now go to Users and groups and add all the users and groups you want to give access to the application.
If you have enabled provisioning in Evercate, only those users who have been granted access will be established to Evercate.
Provided that you have selected "User assignment required" on the properties page, only users added to the application can use single sign on (SSO).
Configuring the application in Azure for provisioning
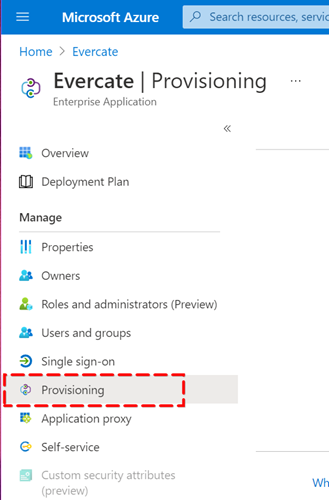
Go to Enterprise Applications, click on Evercate, and then go to Provisioning.
Set the Provisioning Mode to Automatic, set the Tenant URL to https://adscimprovisioning.evercate.com/scim and the Secret Token is the token from your settings page in Evercate (see earlier in this guide).
You can now press Test Connection and see that you get a successful response.
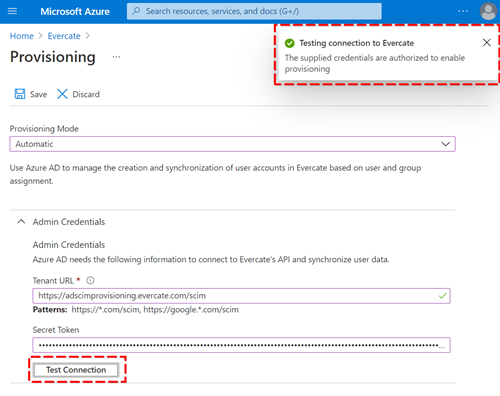
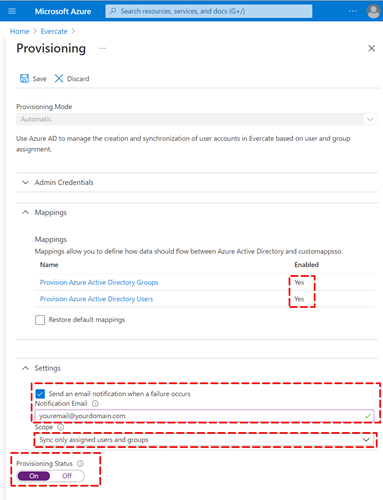
Click Save to proceed to configuring the settings
- Make sure both Groups and Users are enabled (avoid clicking them to configure fields, leave default).
- It is a good idea to set up an email to your IT department to notify them in case provisioning fails.
- Set Scope to synchronize only users and group assigned to the application. If Scope is not visible, go back to Enterprise Applications, click Evercate > Provisioning > Edit.
- Set Provisioning Status to On
- Click Save to save the settings
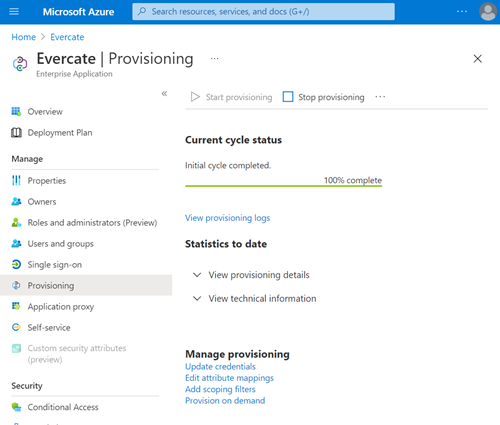
After a few minutes, the first cycle should have been run and it should look like the following picture. If it doesn't, you can click on Start provisioning.
You have now set everything. The last step is to add the users you want in Evercate.
Go to Users and Groups and click on Add user/group to add the users and groups you want to add to Evercate. Azure AD will then establish these users on the next sync, which usually happens within an hour.
Note. Group names are added as tags for users in Evercate. To get all groups you are interested in using as tags synchronized with Evercate, you need to add each such group separately. Even if all its users have already been added by previous actions. This depends on how Azure AD has chosen to make user information available via SCIM.
Example: Adam and Claire are both in the "Headquarters" and "HR" groups. You want to have both of these groups set as tags for Adam and Claire in Evercate. You first add the group "Headquarters" - which adds both users to Evercate along with the tag "Headquarters". Then you add the group "HR" - which updates both users in Evercate to also have the tag "HR".
Obs: If you add a group, only direct users in the group will be added, not users belonging to subgroups.