Adding and managing users in Evercate
There are different ways to manage your users. In this guide, we'll go through how to create users one by one and how to create users in bulk.
Adding a single user in Evercate
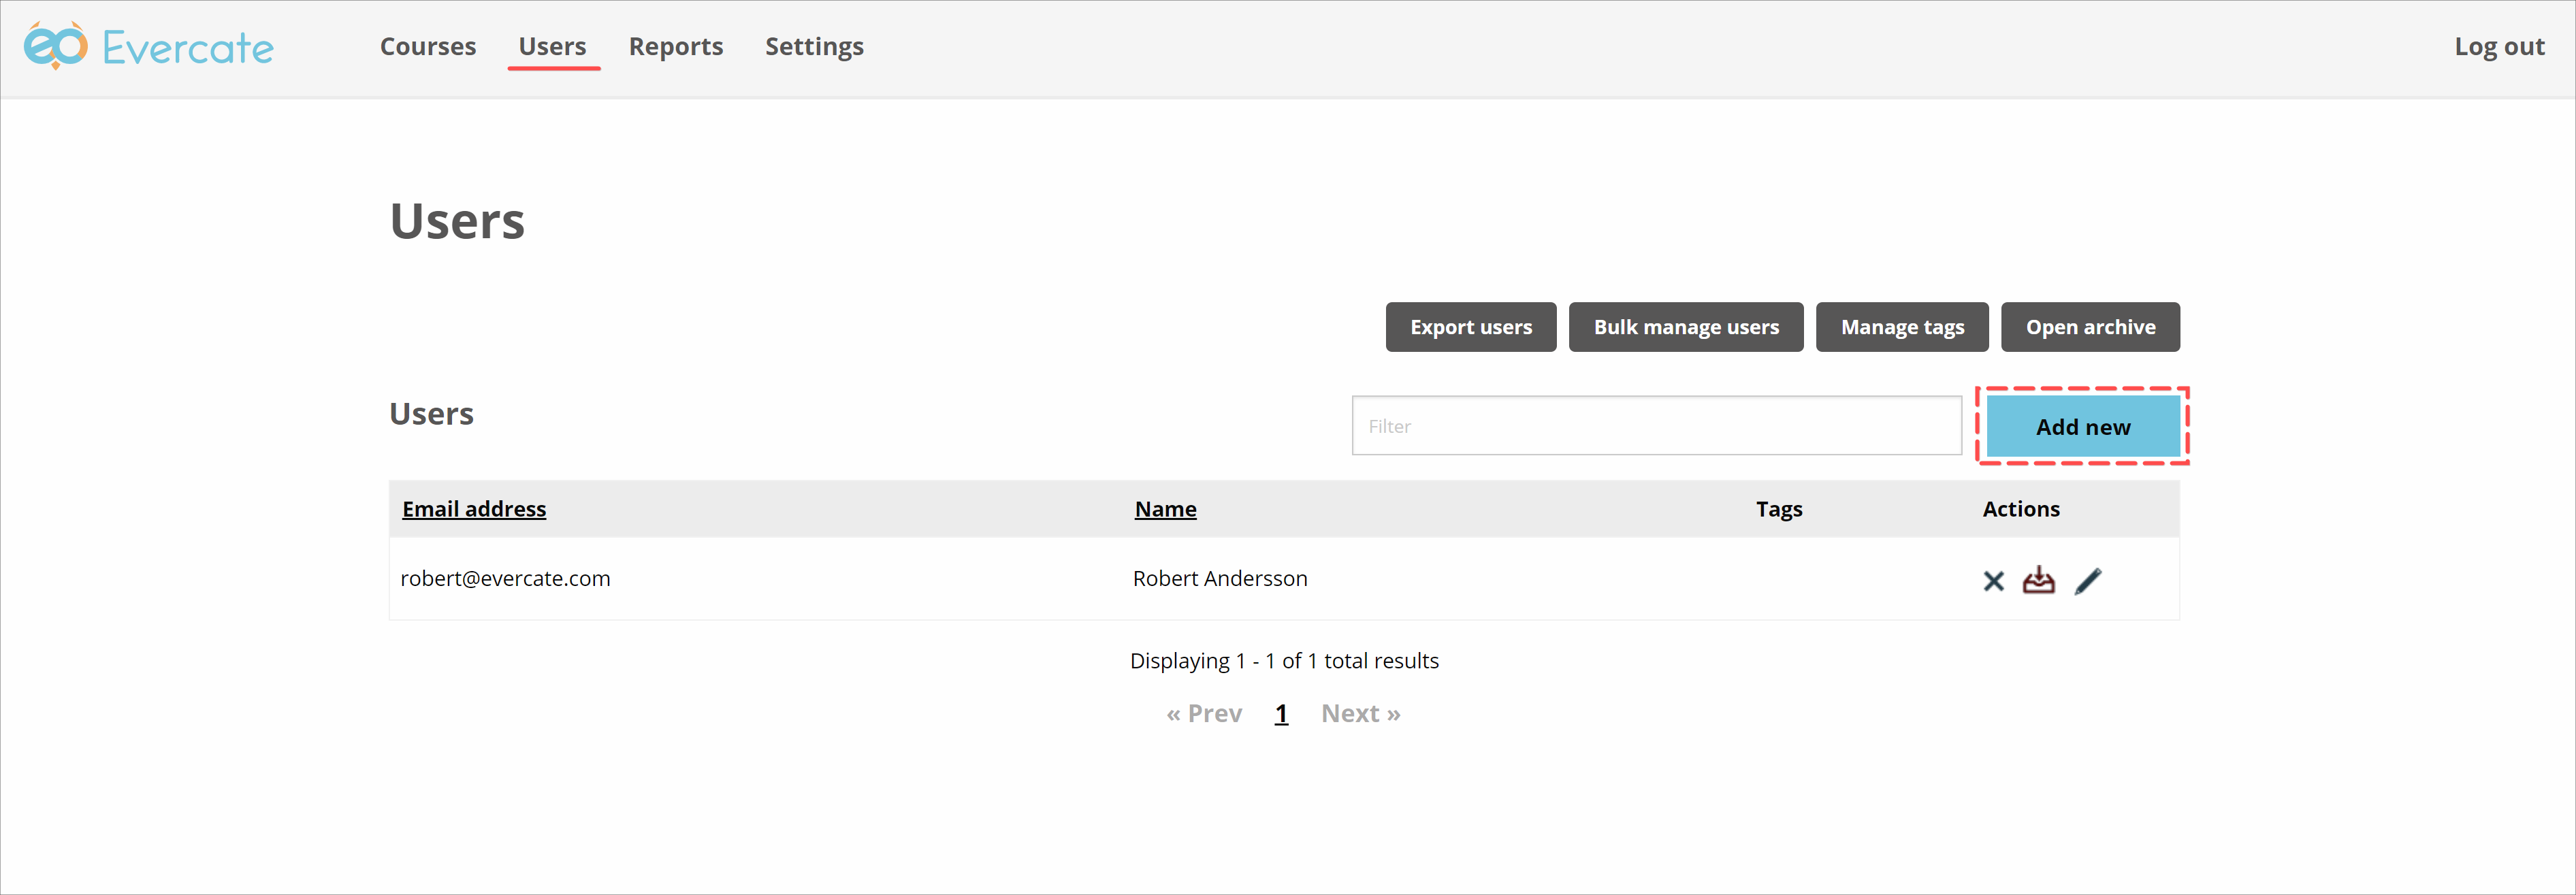
Before we can add users to a course or program, we need to create them. They must be made available in the system. To create a new user, we must first go to "Users" in the main menu. Once there, we have a list of our current users in the system, and just above the list on the right is a button that says "Add". We click on it.
Now we have a modal where we can enter the user's email address, first name and last name which are the mandatory fields for a user in Evercate.
If you have set up tags, you can also go to the "Tags" tab to assign tags to this user. You can learn more about this in the guide to managing tags in Evercate.
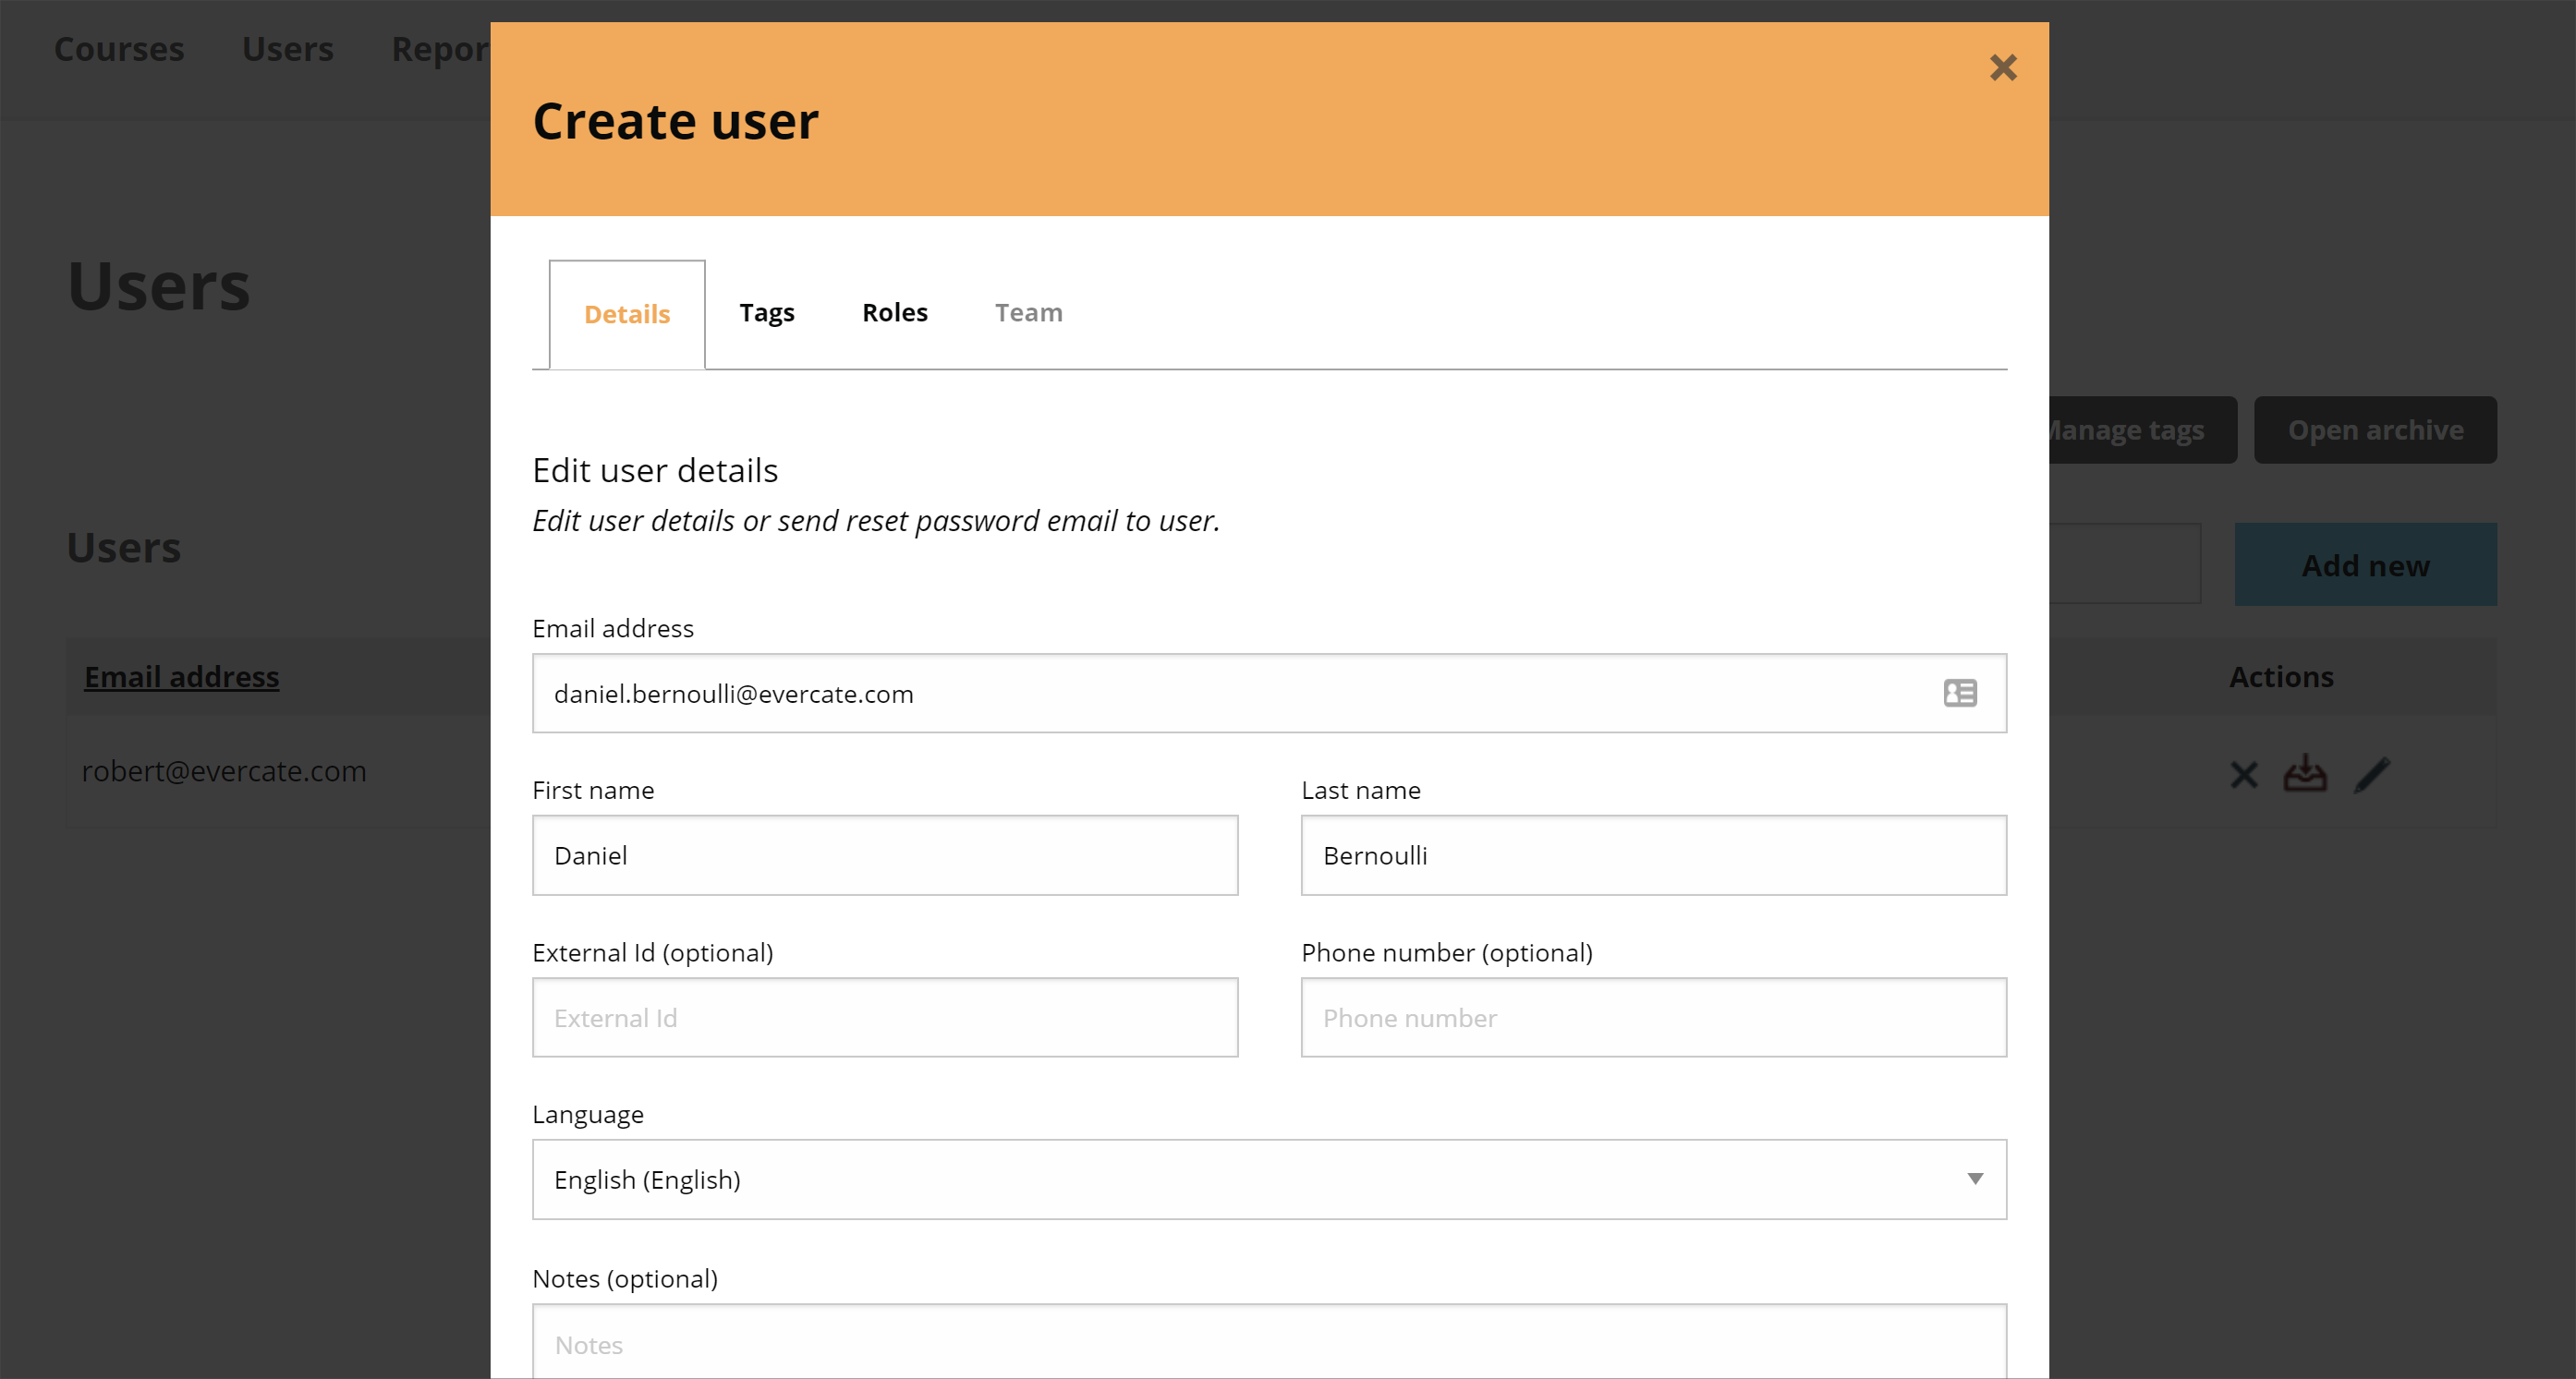
When you are finished, click on "Create user".
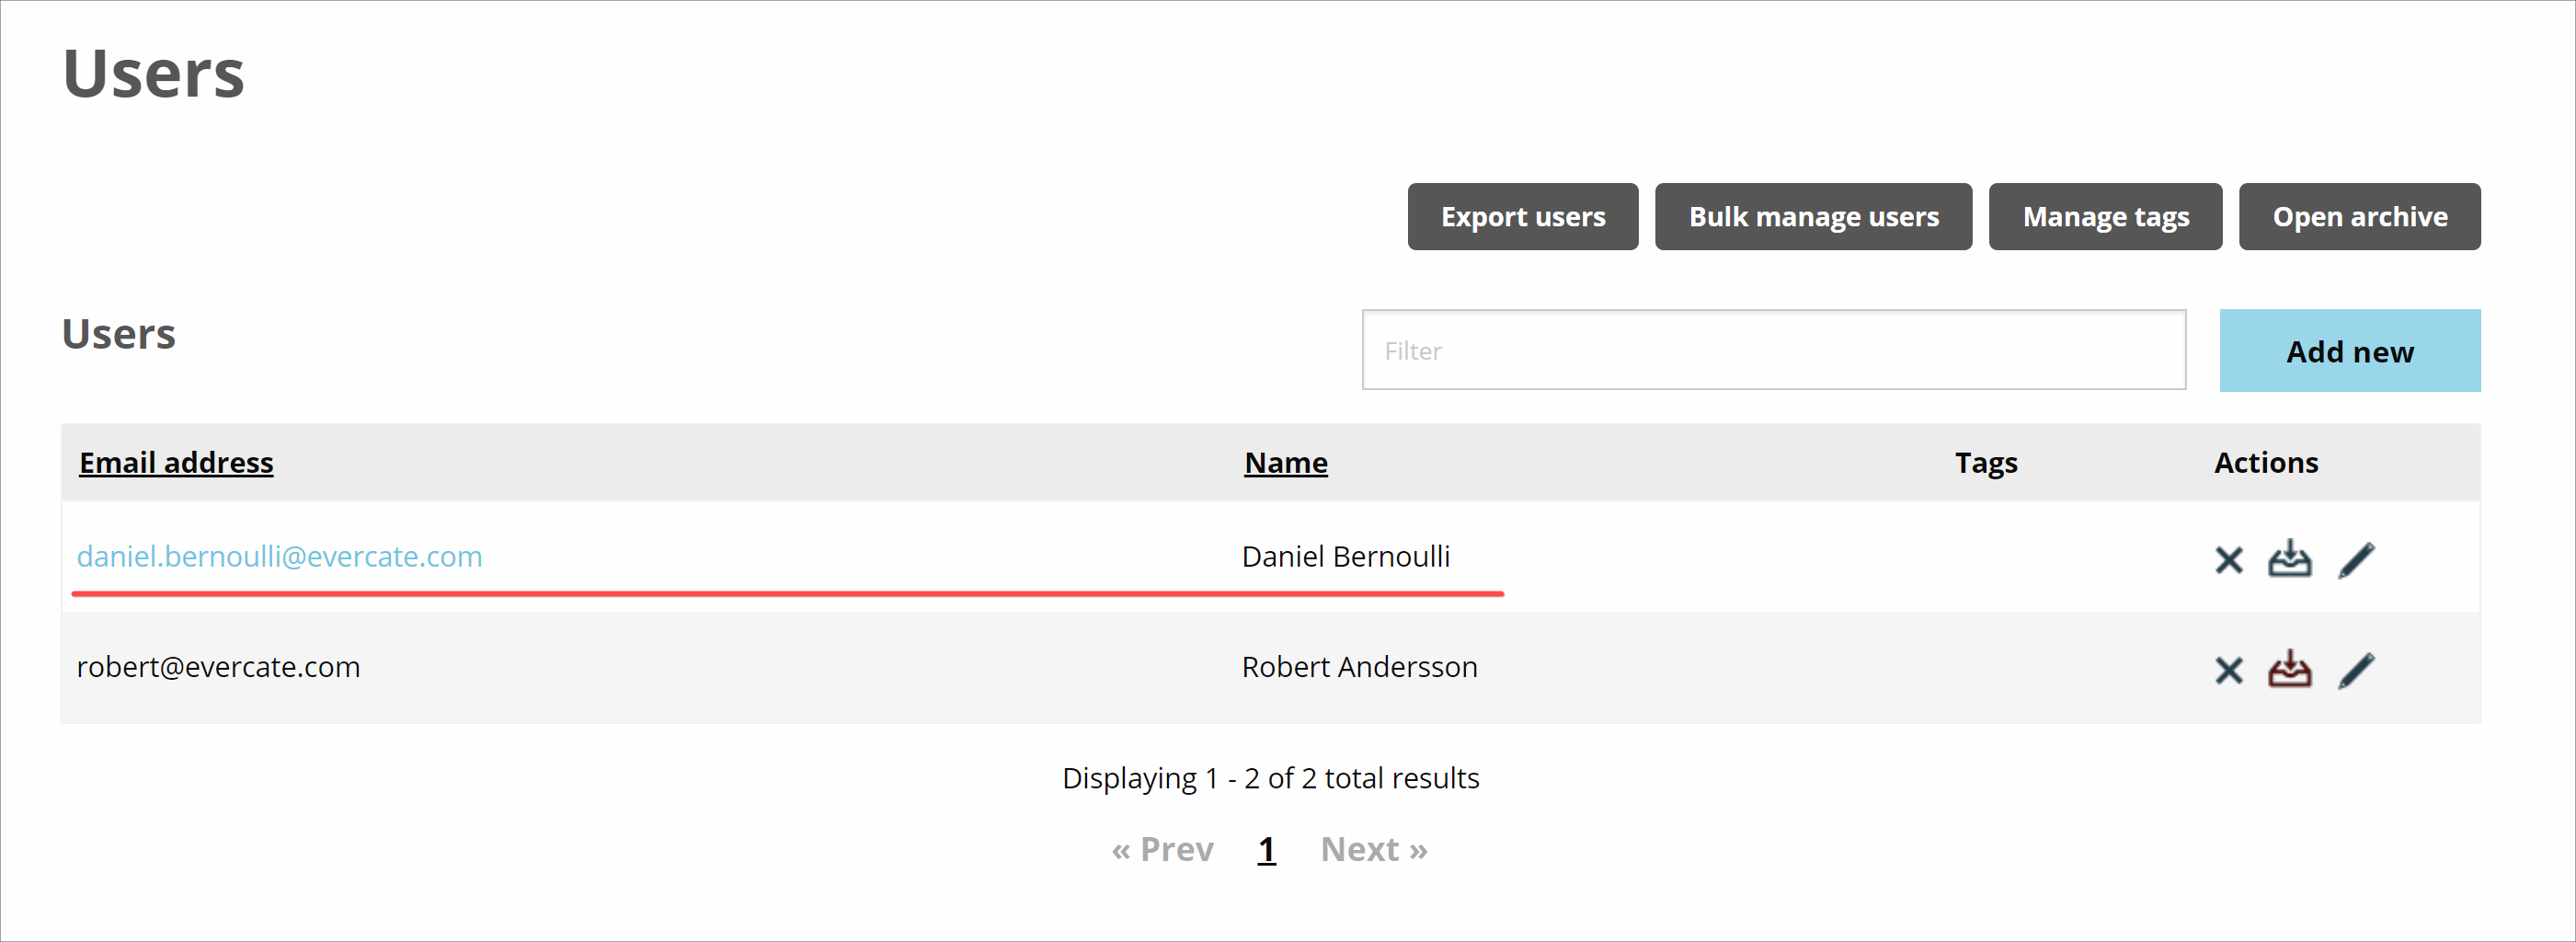
Now you will return to the user list on the Users page and there you will see the user you just created.
Now that the user is in your registry, you can assign courses either manually or through user rules.
Import or update multiple users simultaneously in Evercate
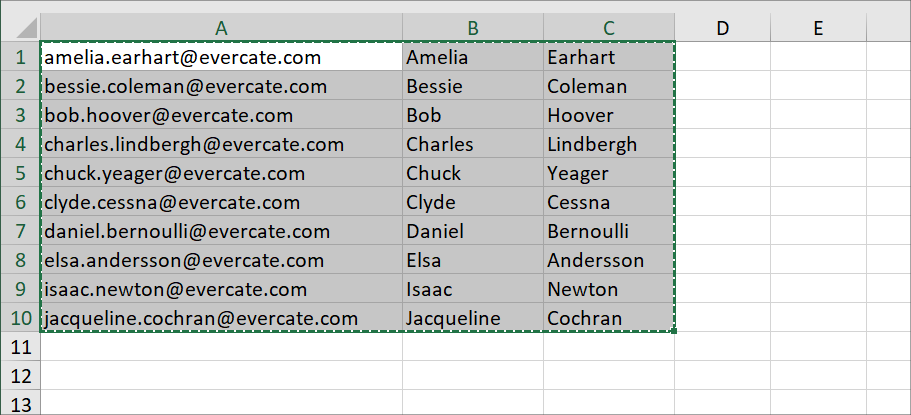
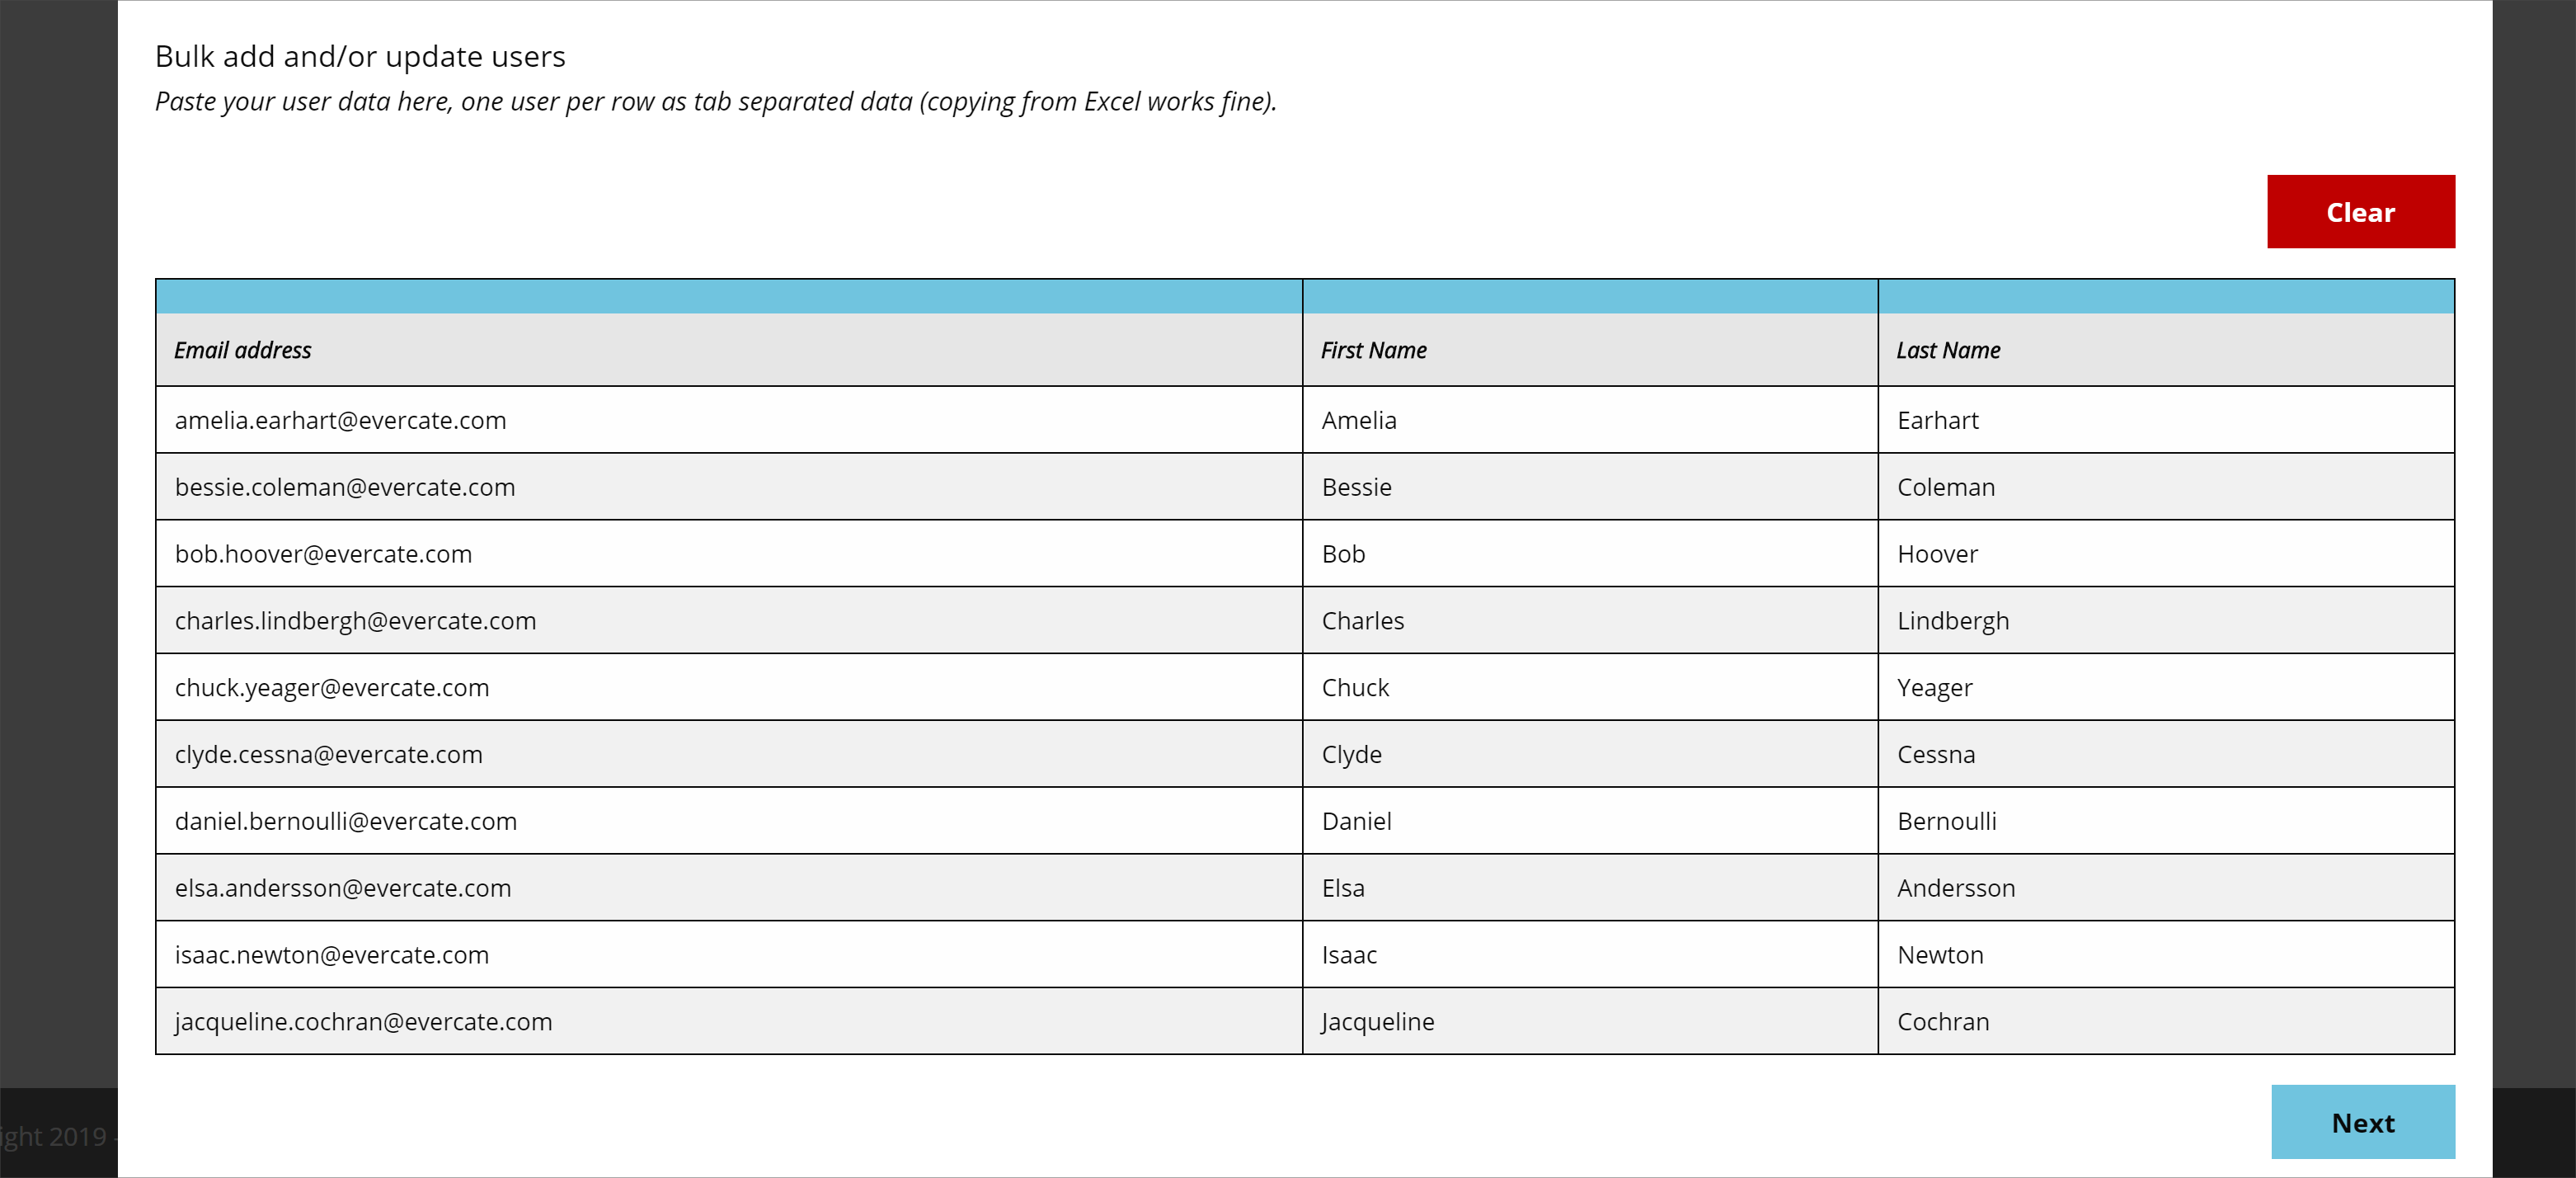
The other way to create users in Evercate's advertising interface is to add users under "Mass User Management". To do that, we first need to get our hands on user data in an excel file (or google spreadsheet or similar). Here I have an excel file, with the users' email, first name and last name in three columns, one user per row. I select the users I want to create in Evercate and copy this data to my clipboard.
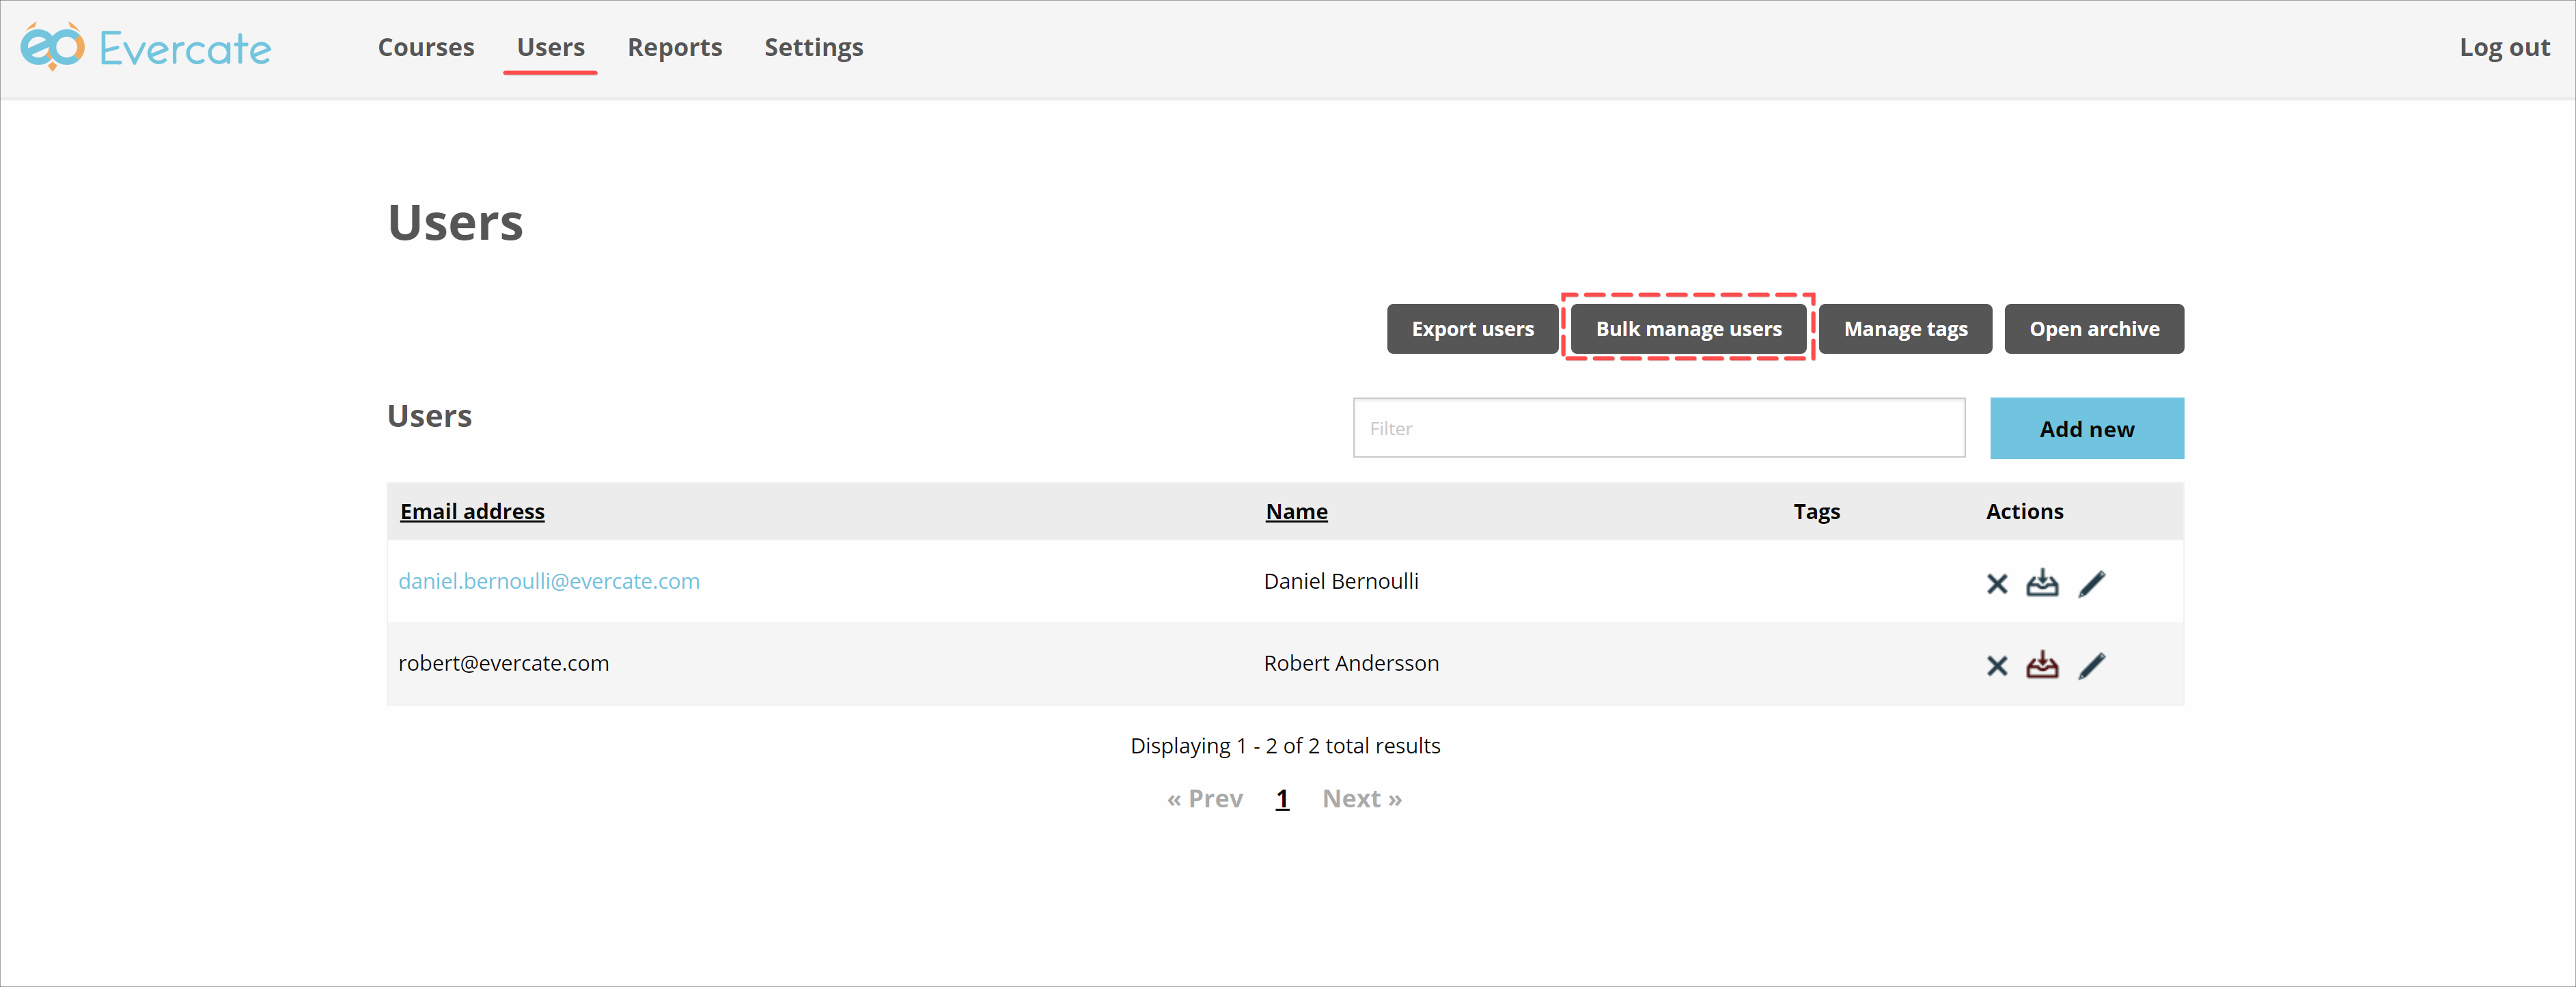
Then we go back to Evercate's administering interface and make sure we are on the "Users" page in the main menu. This time, instead of clicking on add new for the list of users, we click on the button "Mass management of users".
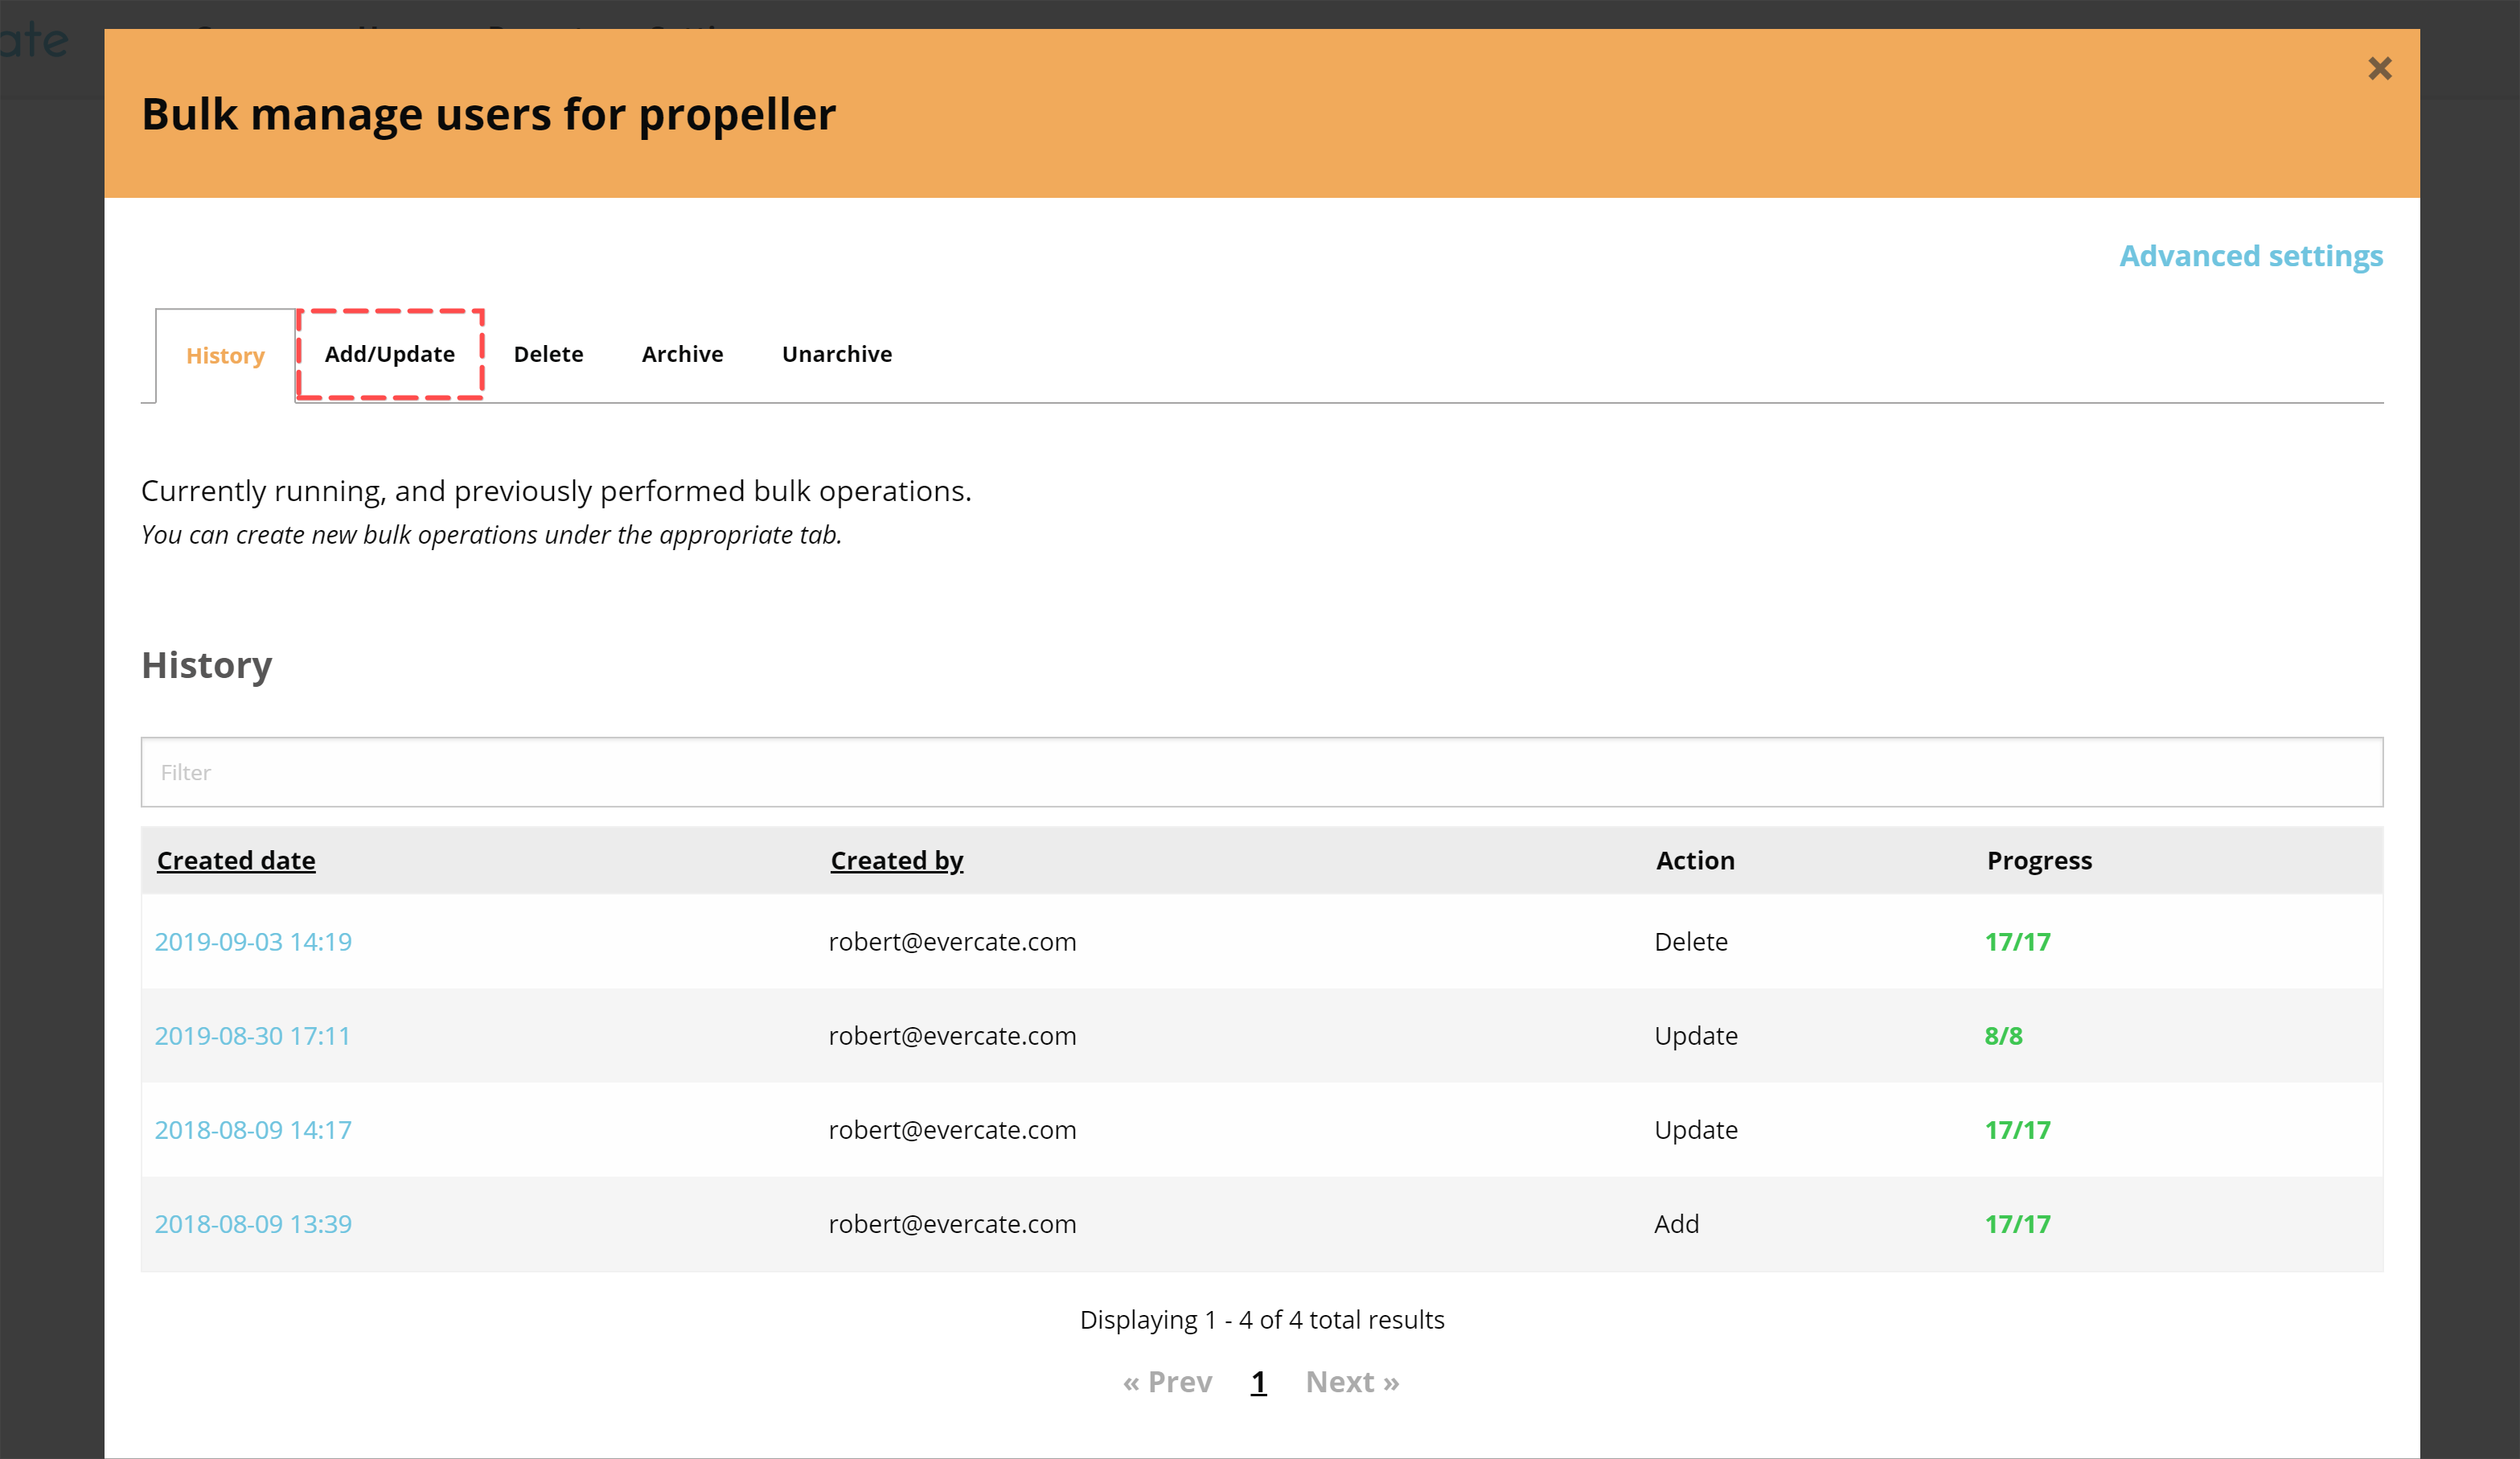
We get a modal and on the first tab we see our history of bulk actions that we have taken for our users. Since I want to add new users, I click on the "Add / Update" tab.
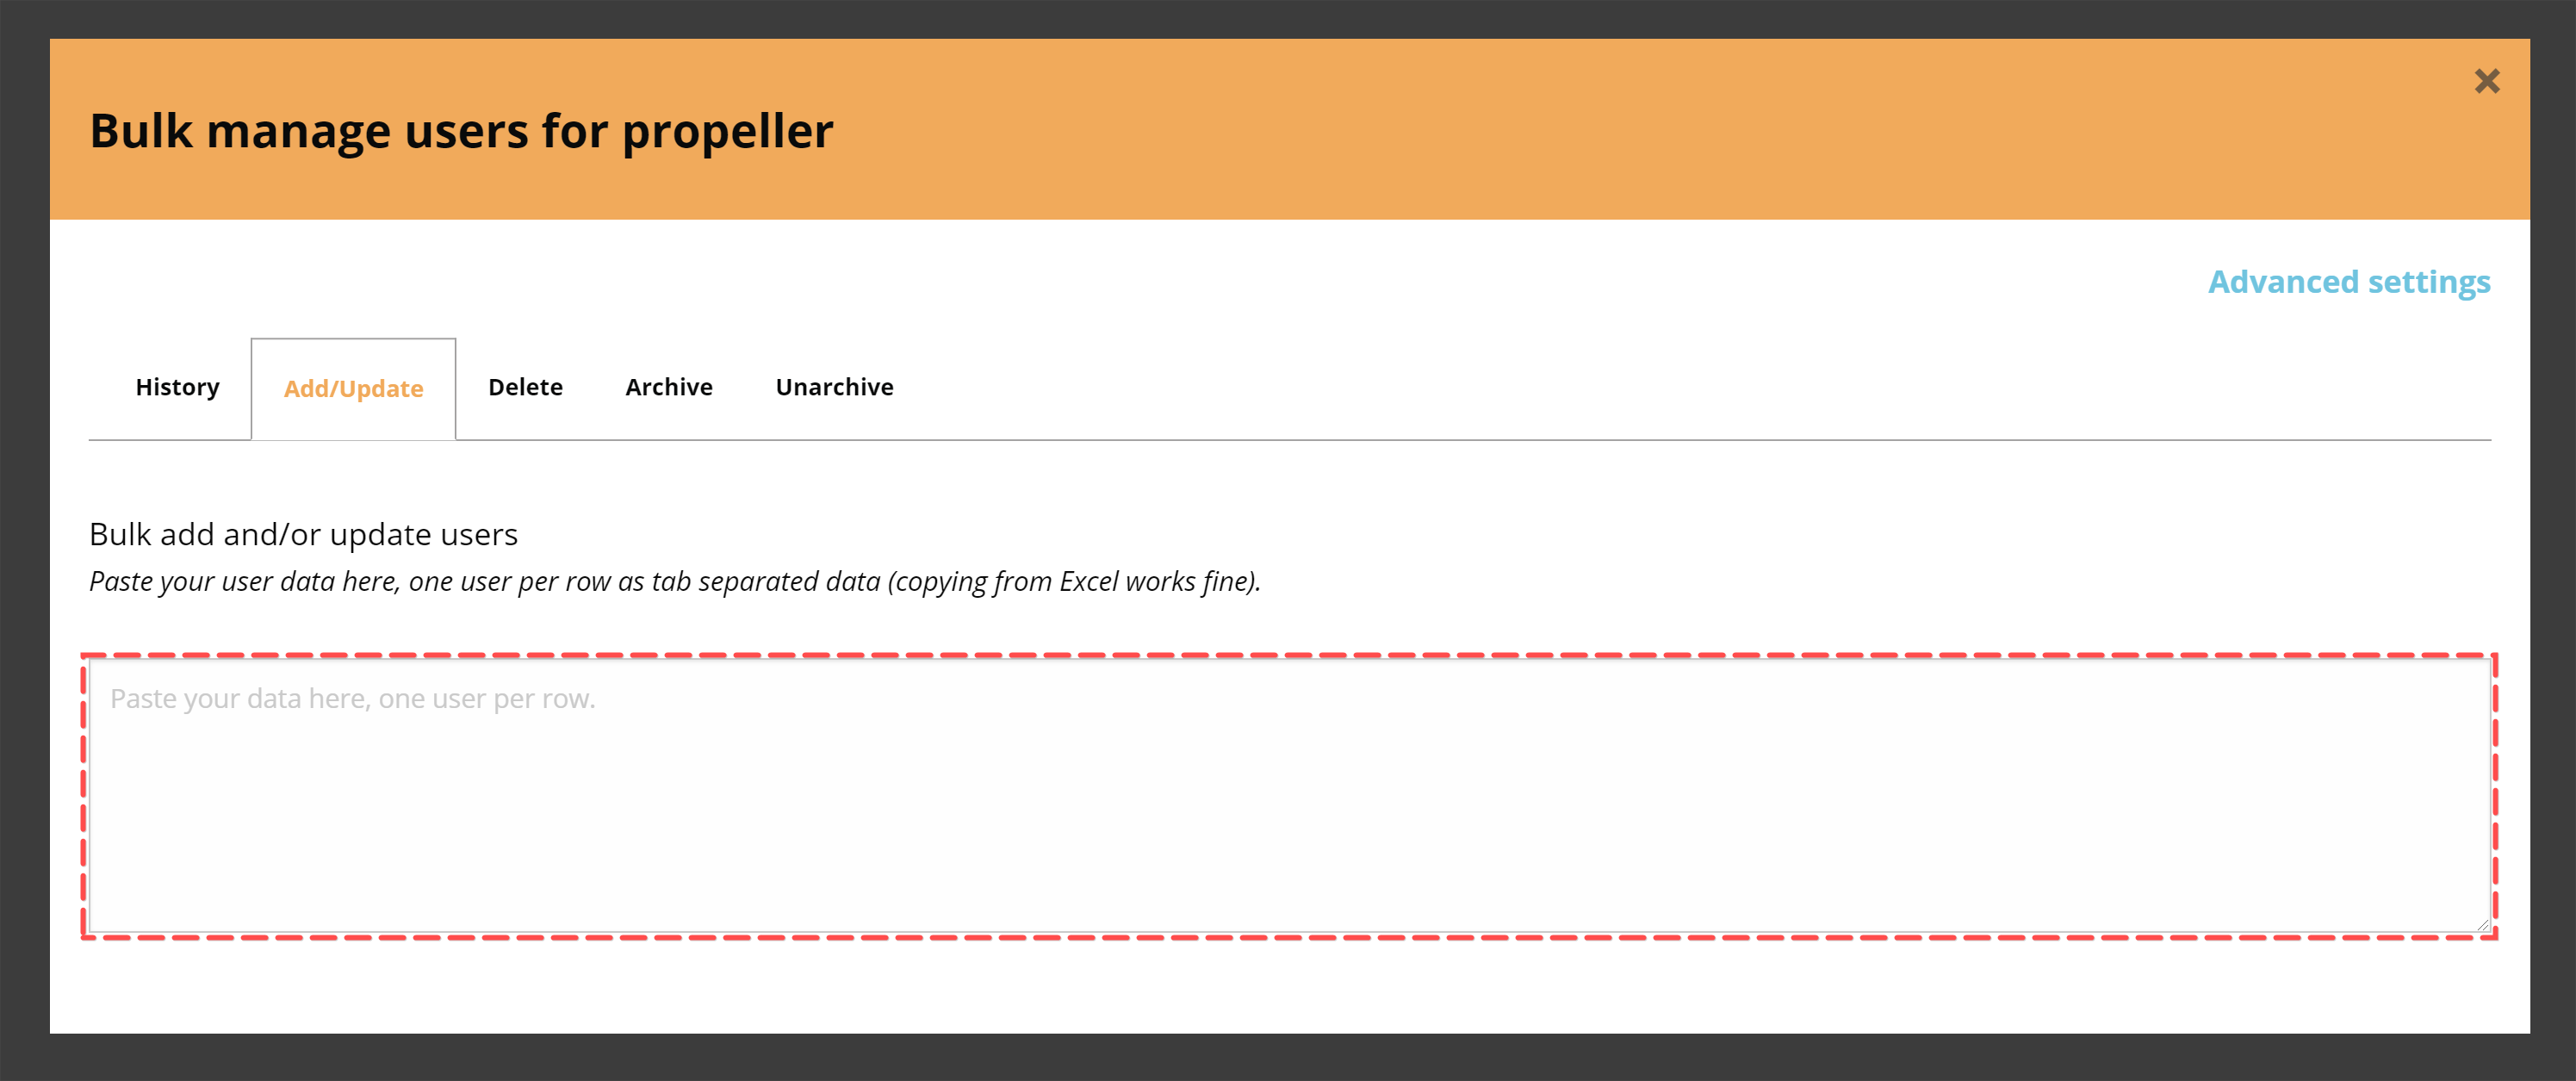
Here we present a large text area where we can paste our data from Excel. So I click there and paste my data.
As soon as I paste my data, we can see that it is automatically structured just like in Excel. One user per row, with the corresponding number of columns. I make sure that the column headings match the data in each column before I click "Next". If the column heading doesn't match the data below it, you can simply click and drag to change the order of the column headings so that it does.
In the final step of massaging users, we just need to confirm that the changes will happen and choose what actions to take. One thing that stands out to me is that it says it will create 8 users and update 1 user. If we look back at the data in our Excel file we have Daniel Bernoulli present there. Daniel is also the user we created in the first part of this guide if you recall, so this is exactly how it should be for us right now.
Since our data consists of both new and existing users, we get to choose which actions to take. We can choose to "Only update users" to only update the information for Daniel, we can choose to "Only add new users" to only create the users that are not already created, Daniel in our case, or we can choose to " Add and update users" to create our new users and update Daniel at the same time. I click on "Add and update users".

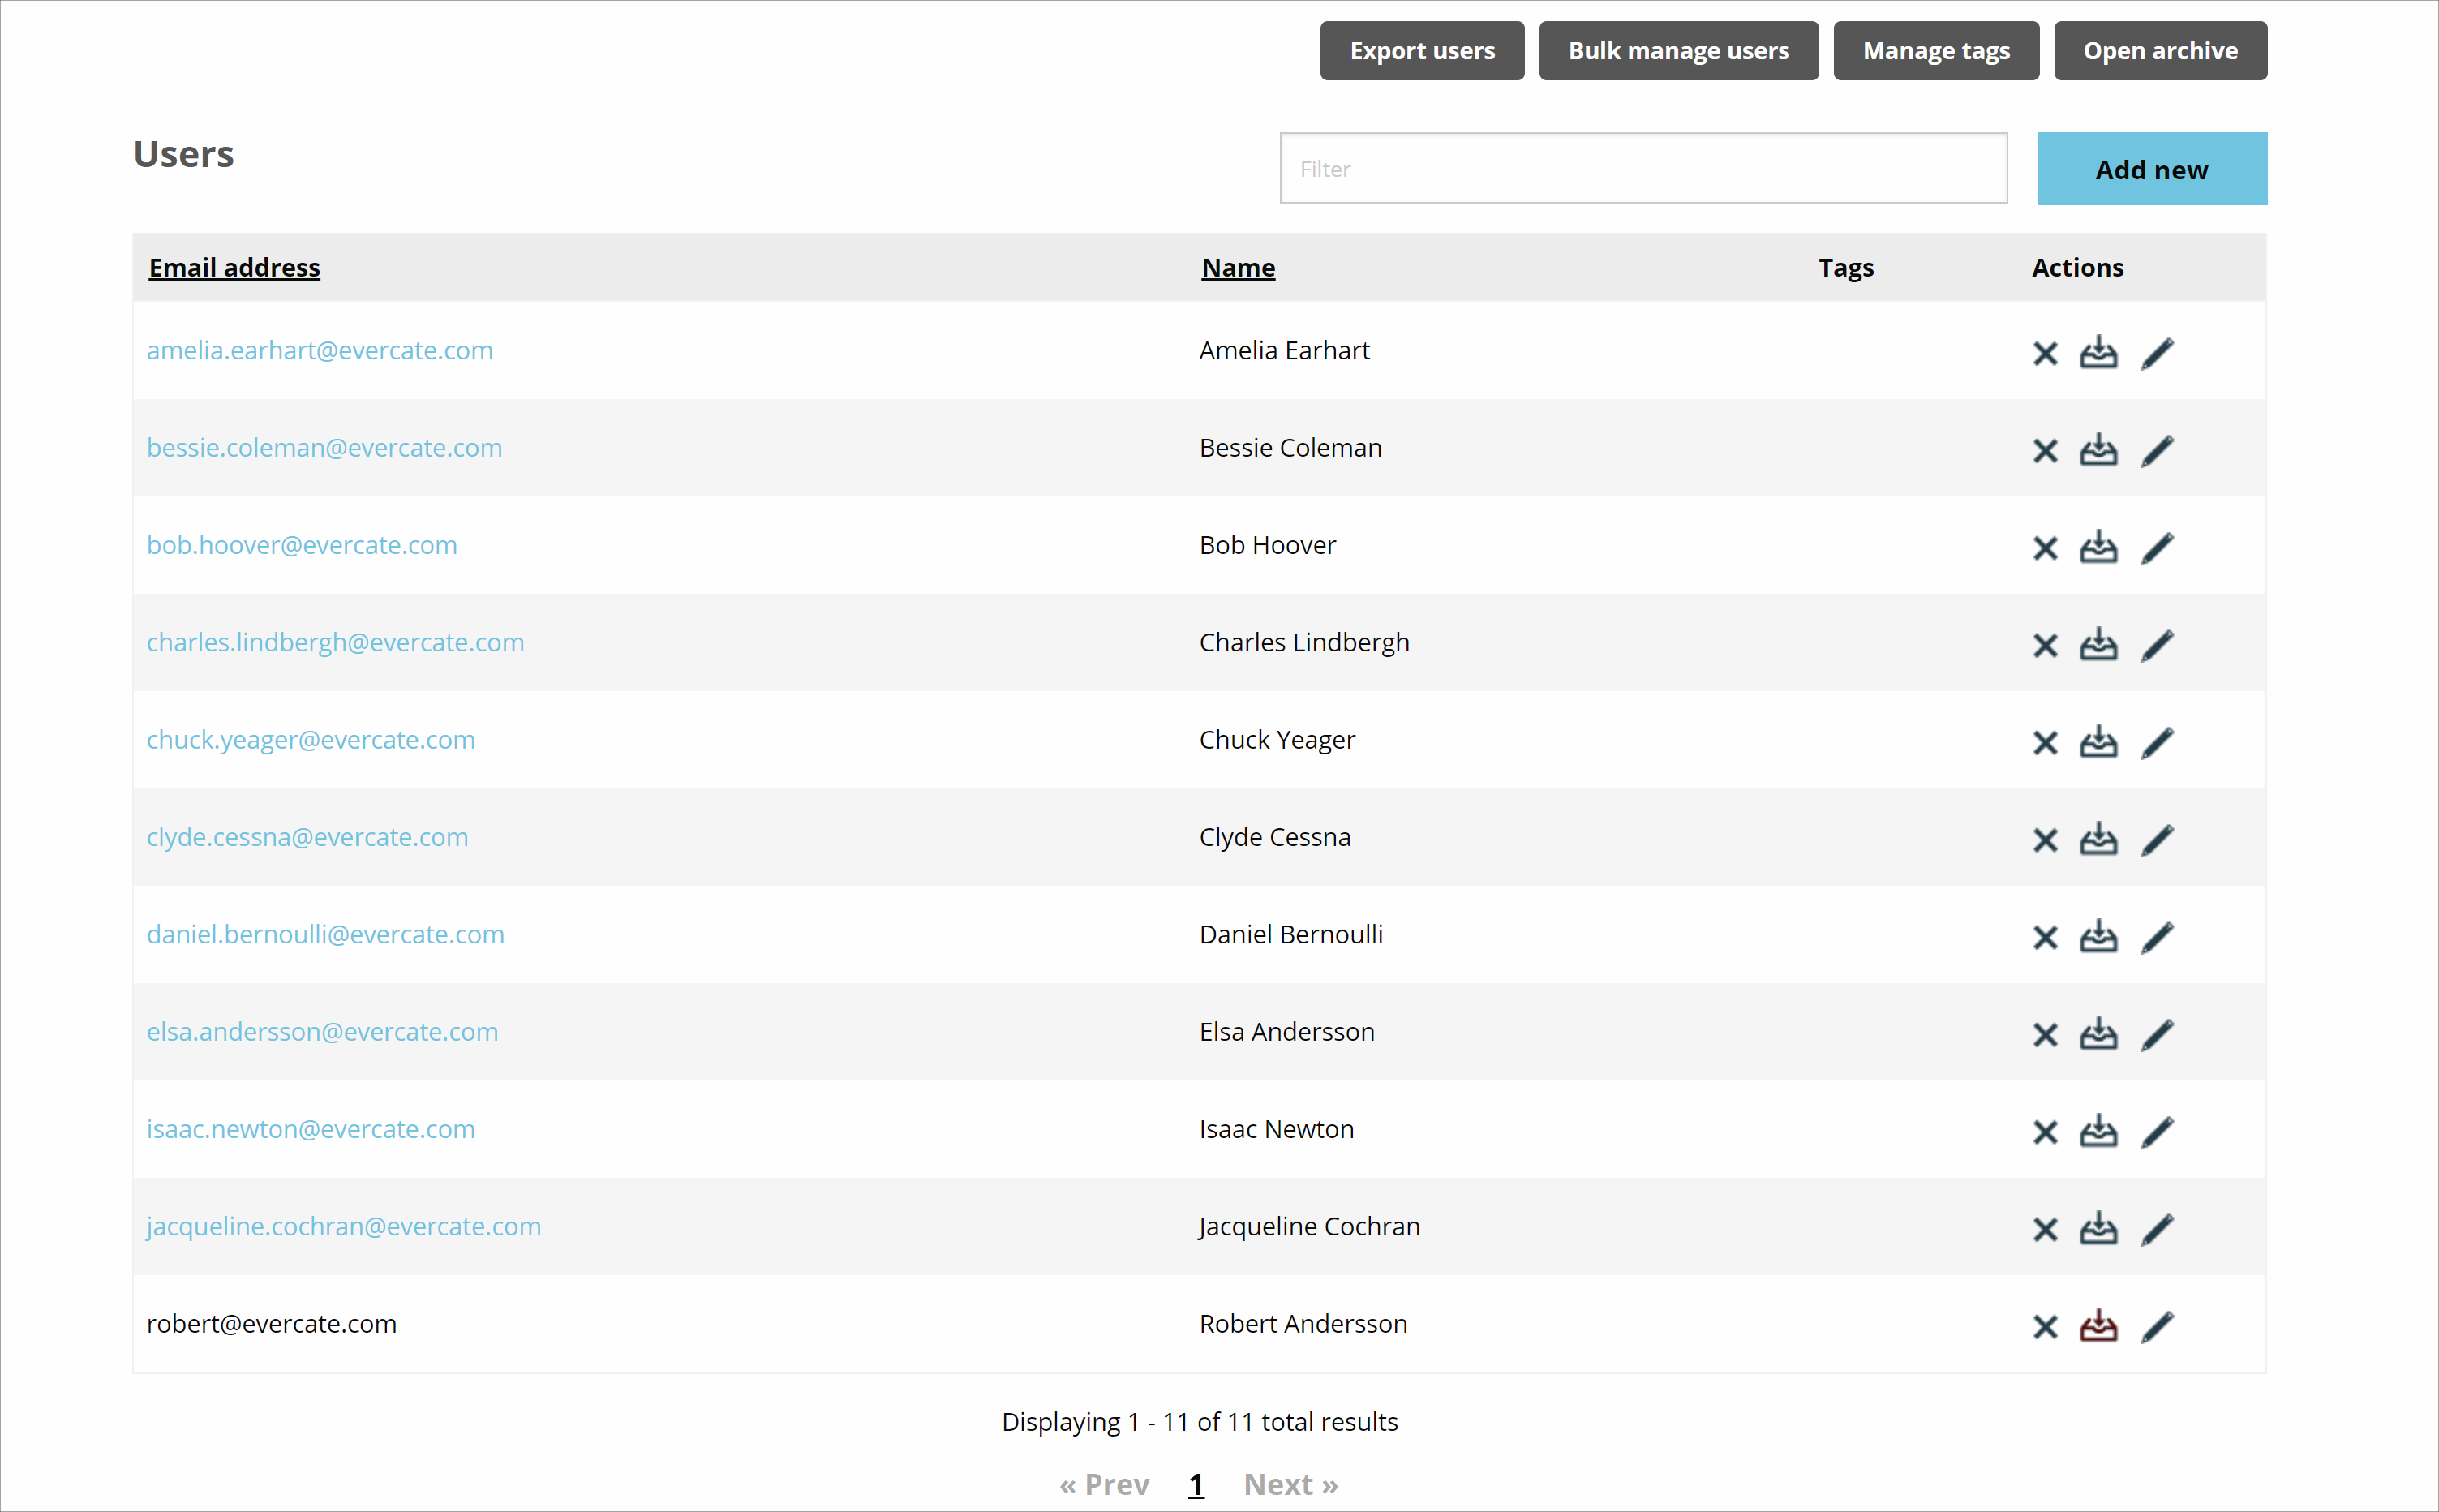
The mass job will now run and show us its progress under the history tab, and when it's done we'll see that we now have all our created users in our user list.
Update individual user in Evercate
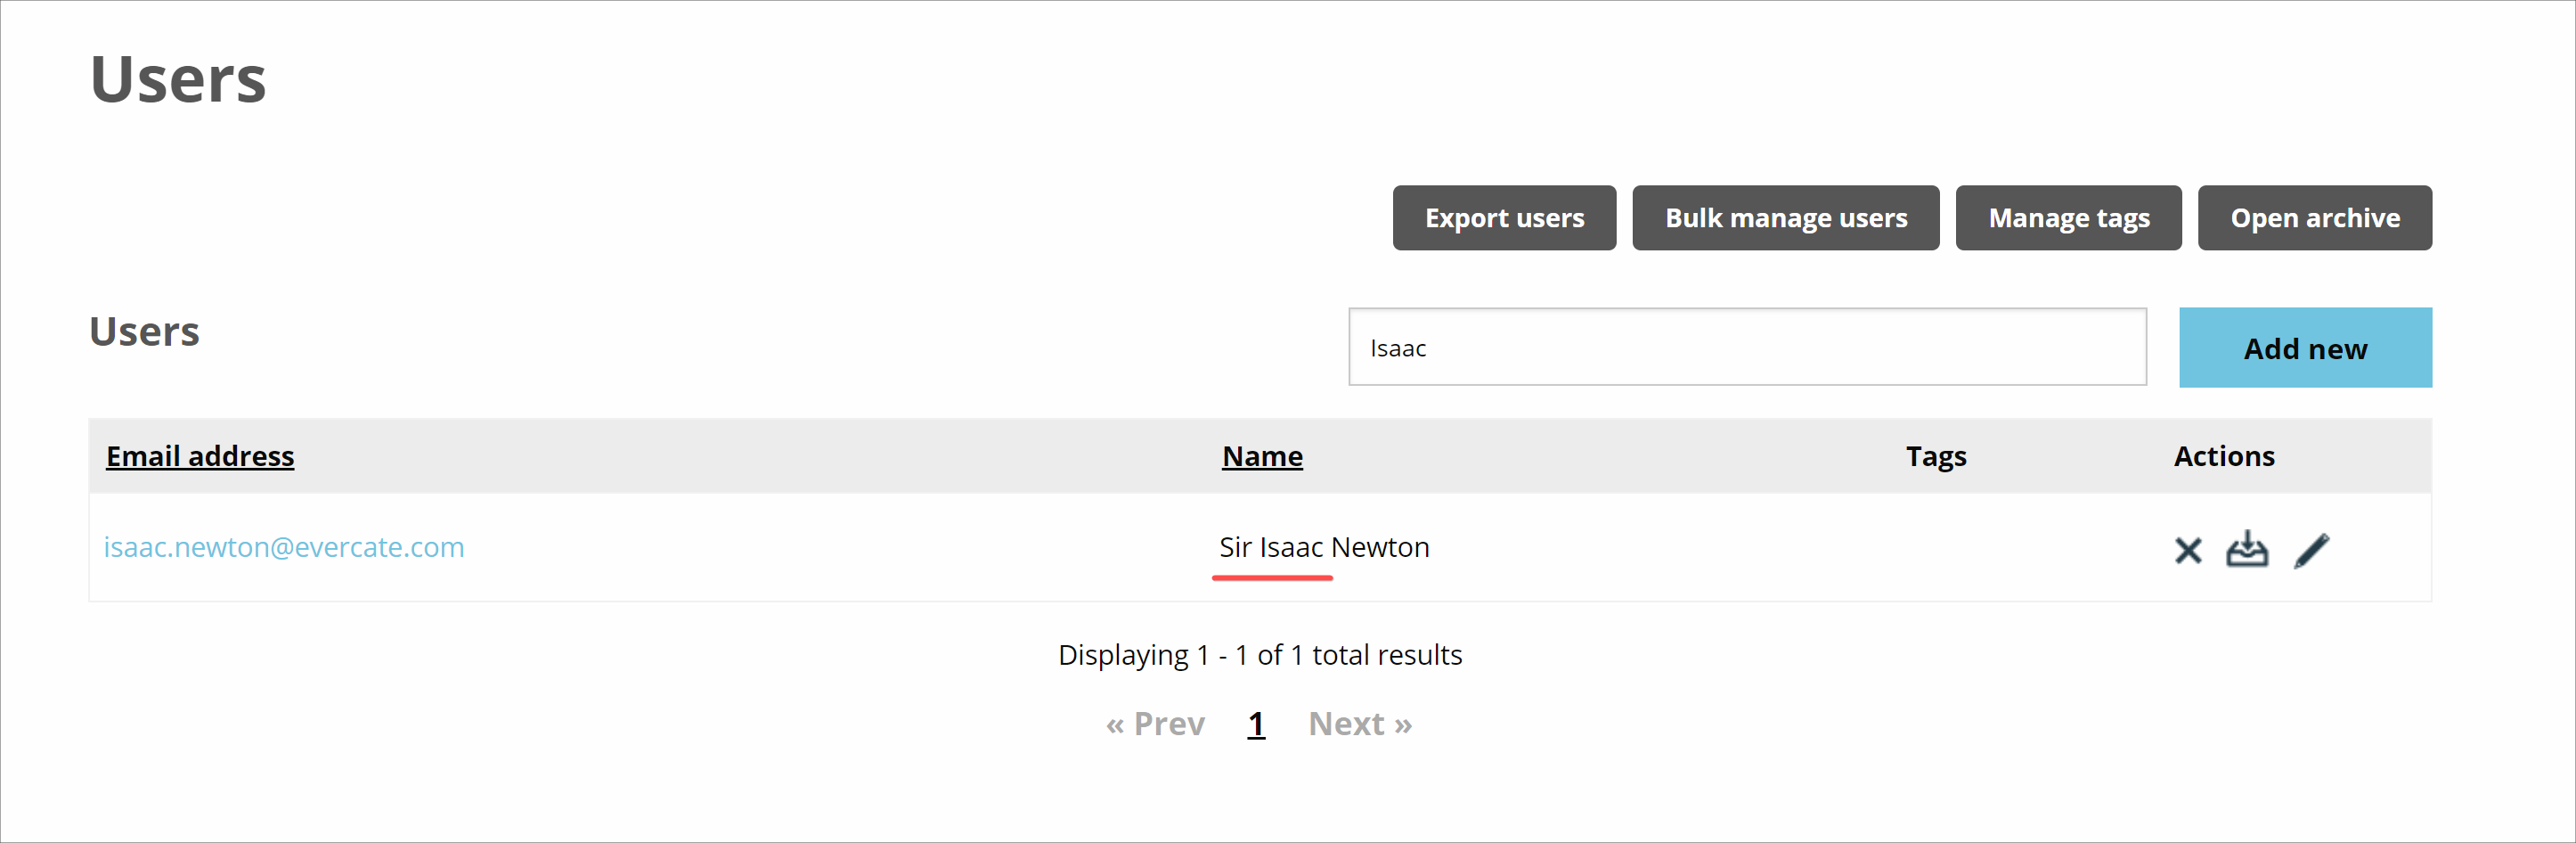
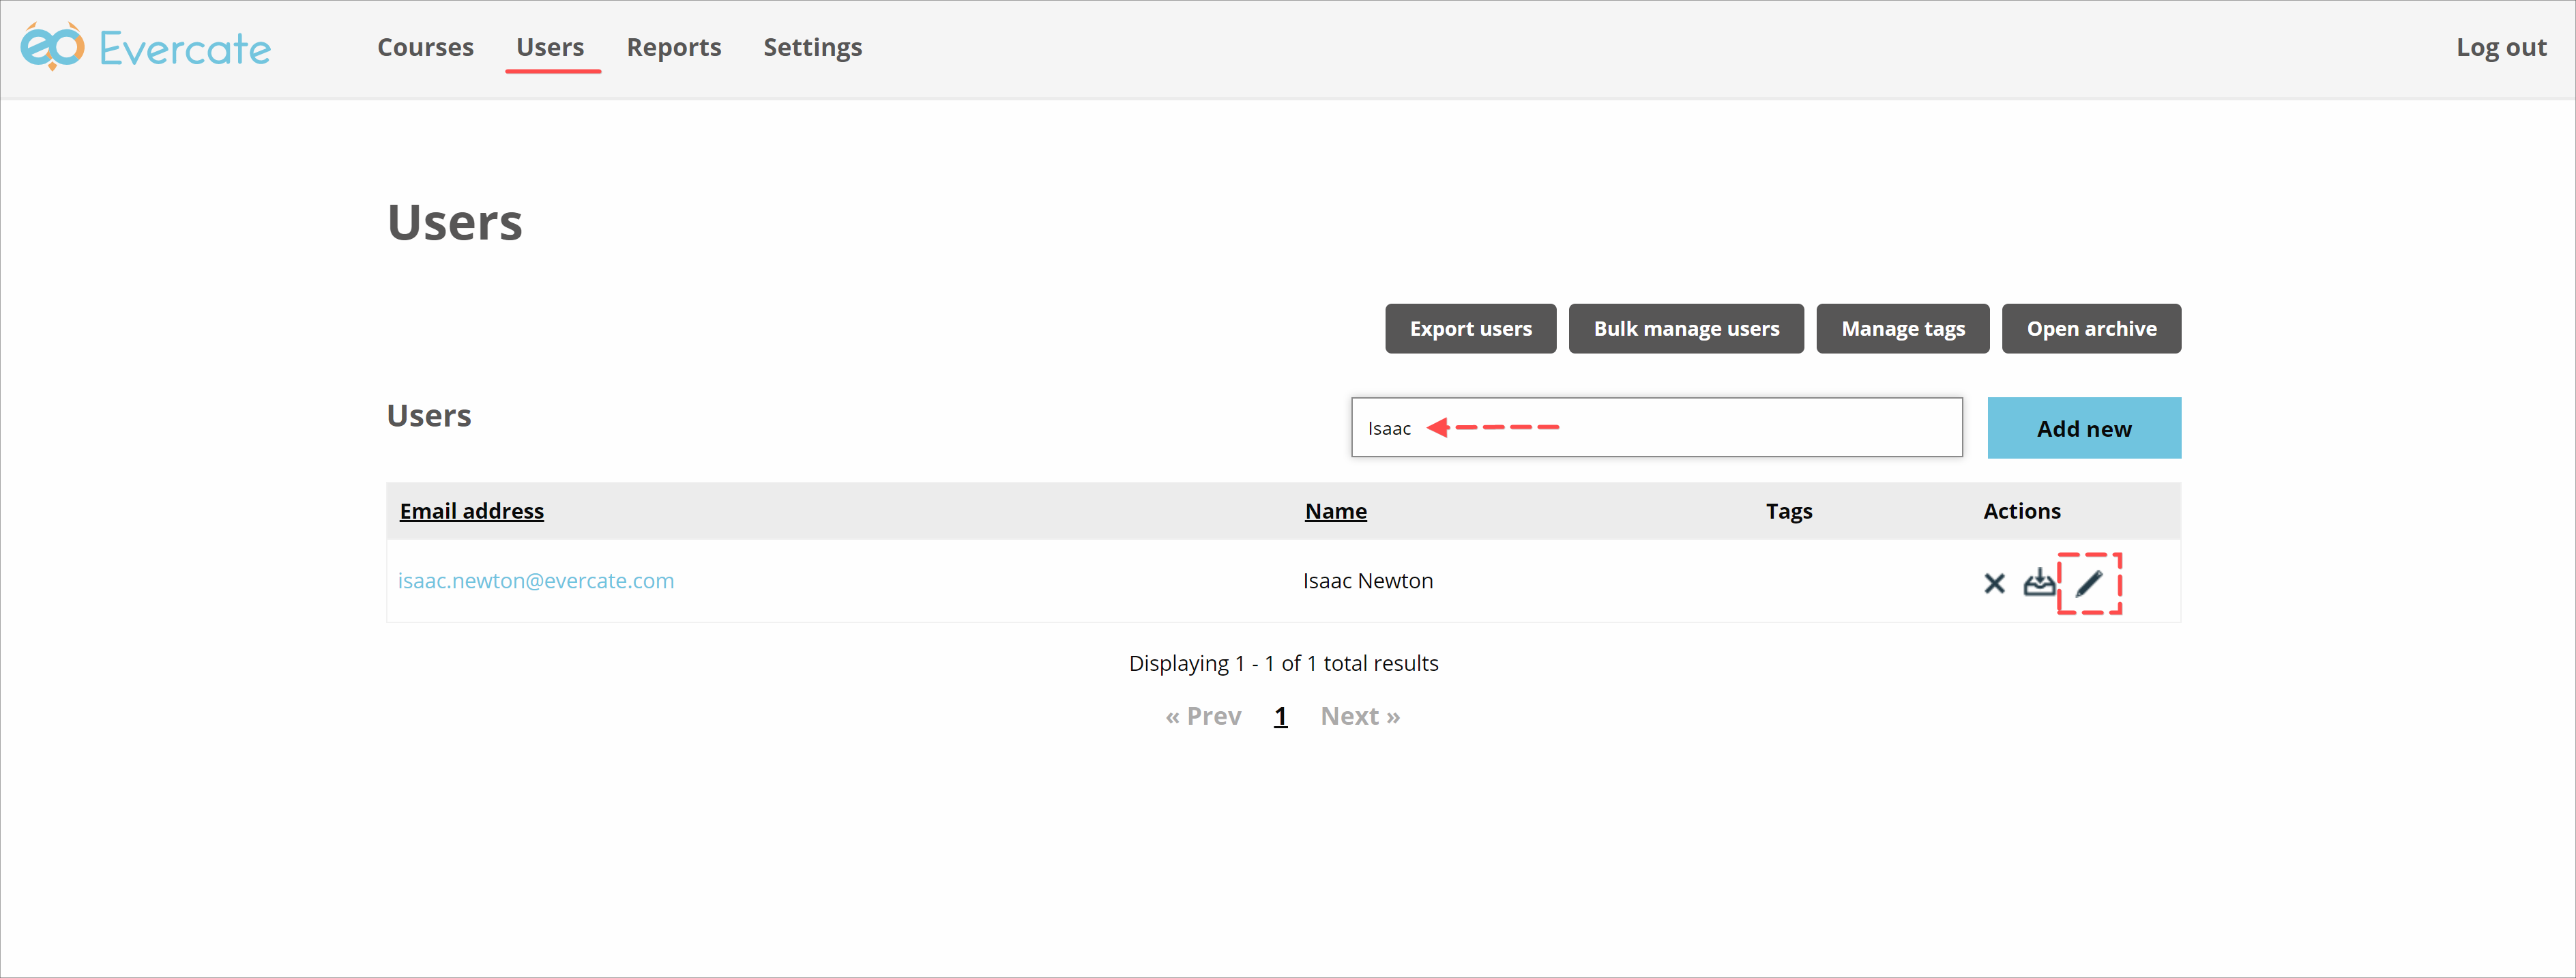
If you need to update the information for an individual user. The first thing you need to do is go to the "Users" page and find the user in question. I type "Isaac" in the filter box when I look for Isaac Newton. I realized that I need to add Sir before his first name because it's only right to add a little gravitas to your name if you discovered gravity.
Once we have found the user in question, we click on the pencil icon to edit the user.
Here we get the same modal as when we created the user in the first place, the difference is that it is already filled in with the data we have for the user. So I add Sir before his first name and click Save.
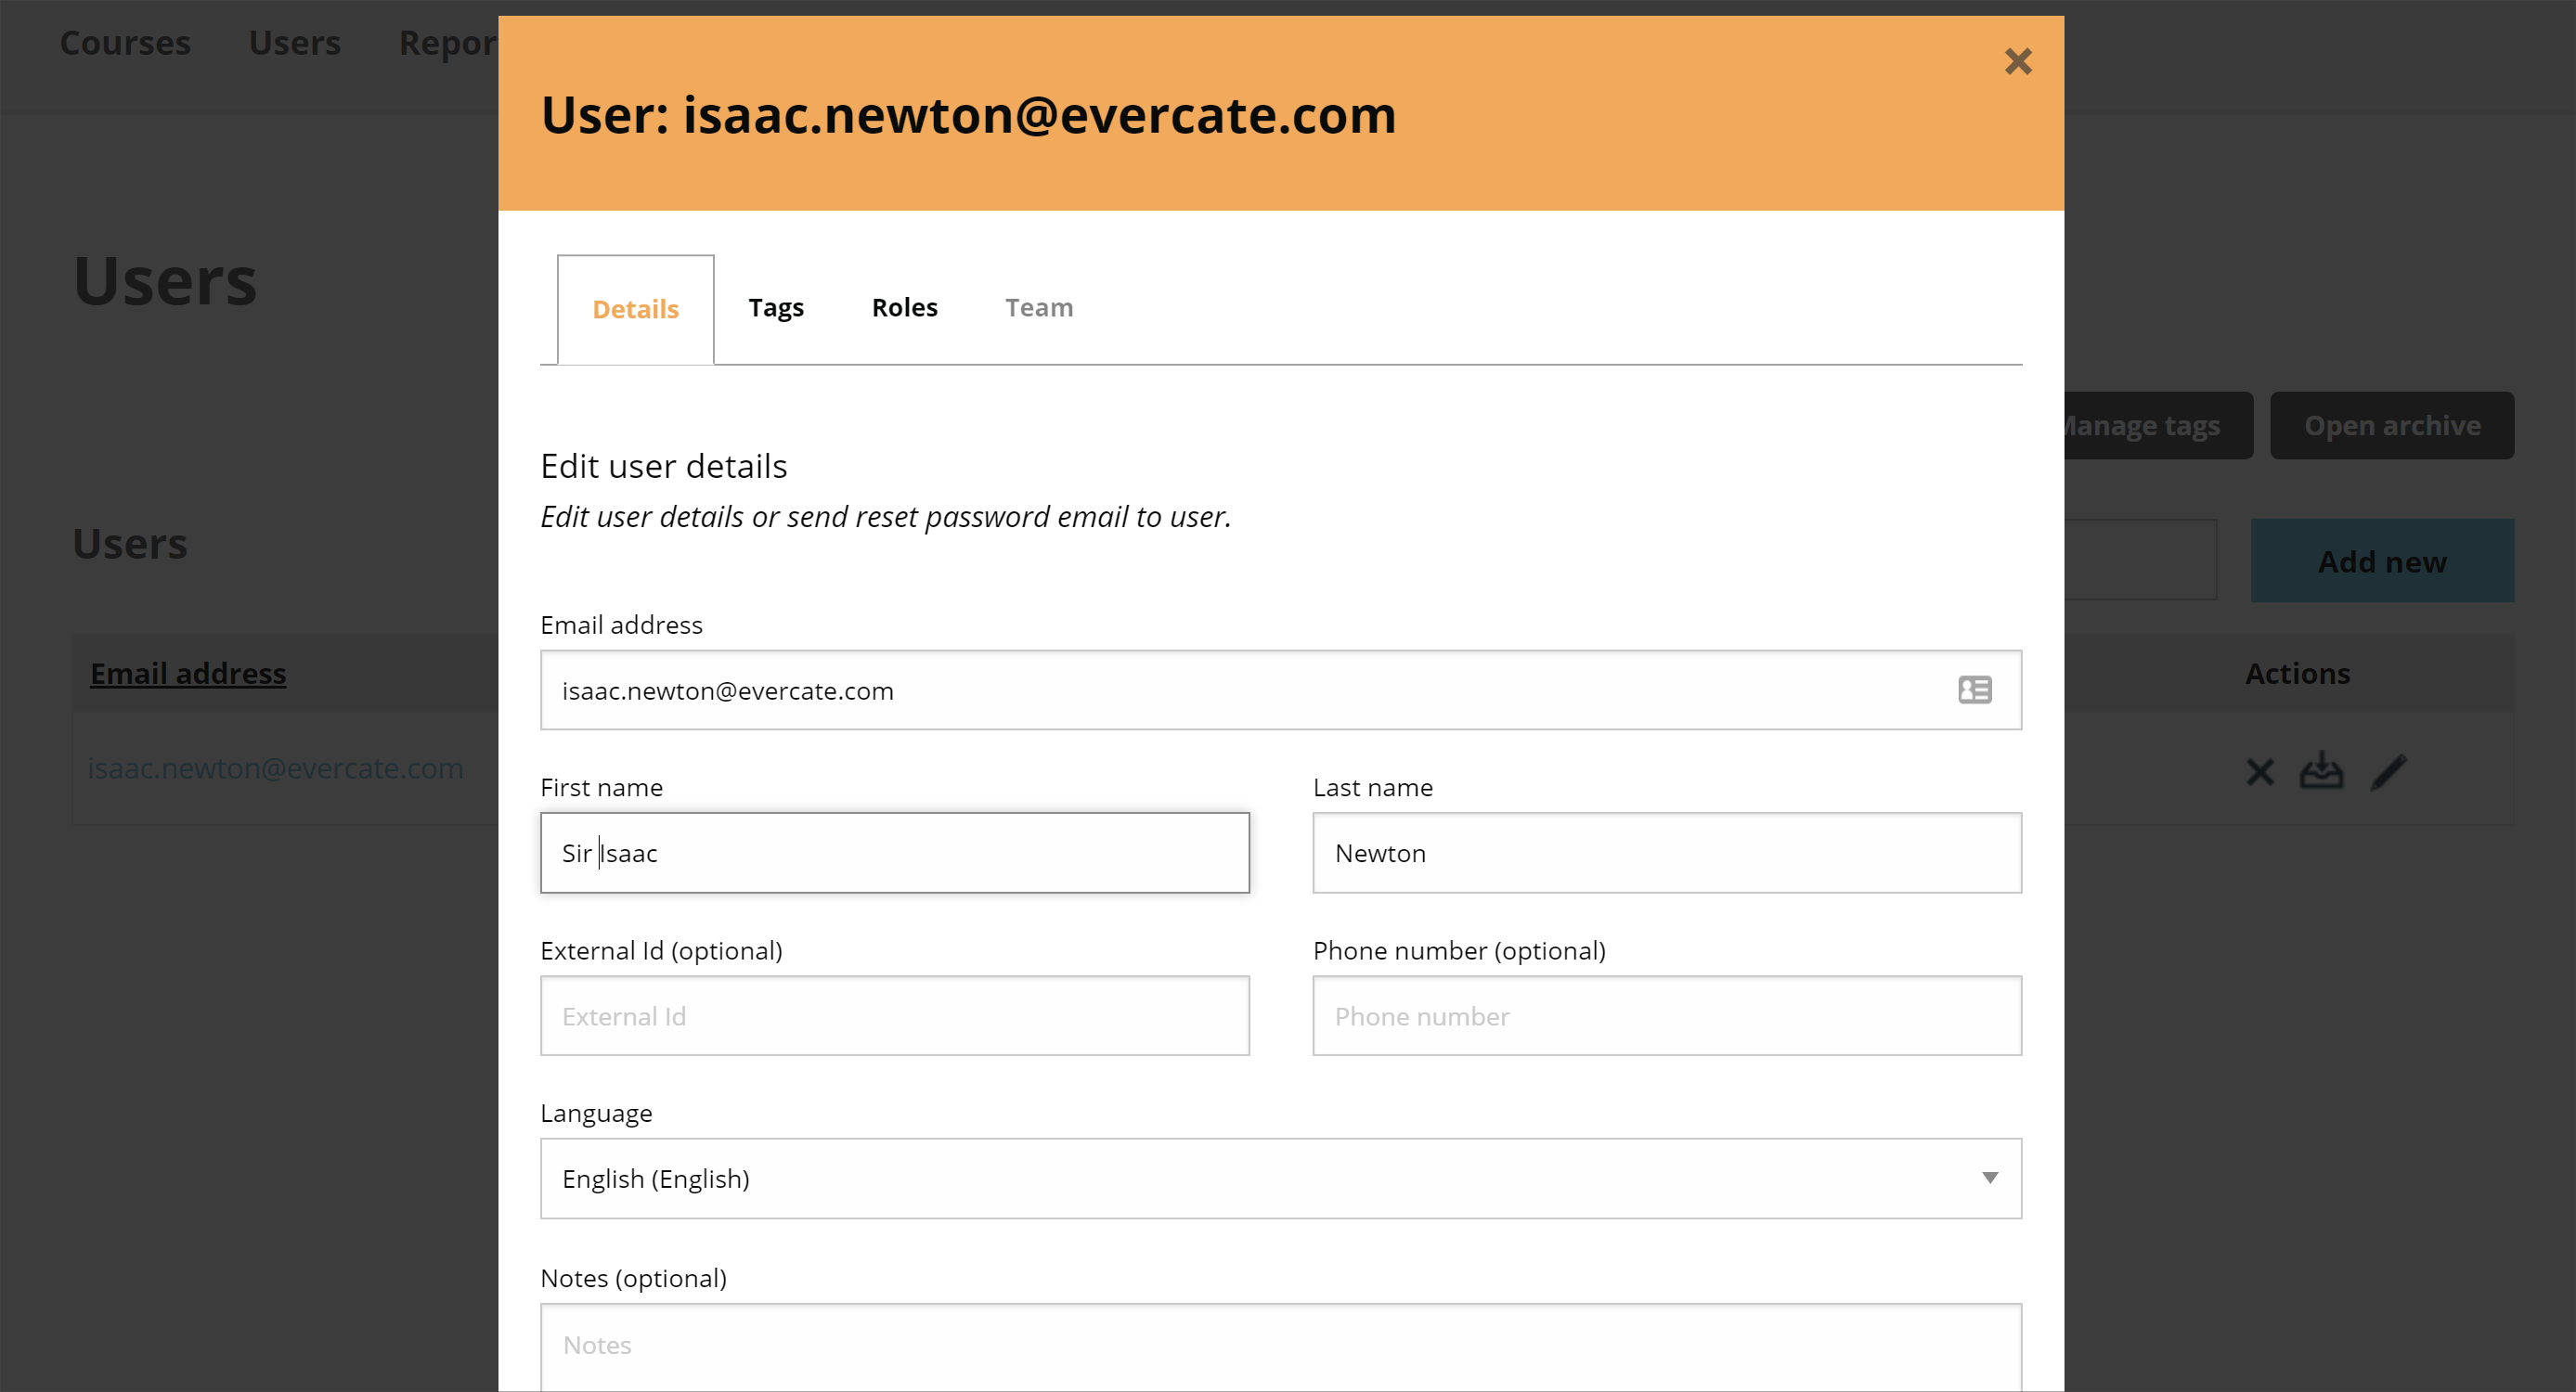
Since for each action there is an equal (and opposite) reaction, we can now see that the name has changed from Isaac Newton to Sir Isaac Newton.